
How to Quilt-As-You-Go + FREE Zipper Pouch Pattern
The quilt-as-you-go piecing technique used in this tutorial is beginner-friendly and a great introduction to quilting. You’ll quilt as you piece, meaning the layers are secured as you go — no large quilt sandwich to wrestle with and no complicated finishing. It’s a stress-free way to experiment with decorative stitches, quilting lines, and texture while building confidence.
In quilt-as-you-go piecing, each fabric piece is stitched and quilted directly onto the batting as you build the design. This means your quilting is done in manageable sections rather than all at once, keeping everything flat, tidy, and easy to control on a domestic machine.
It also creates beautiful texture and visual interest that you simply can’t achieve by quilting straight lines across a finished panel. Each seam adds subtle dimension, giving your pouch depth and character. The process itself is calm and repetitive — a little bit of scrappy quilting therapy as you build the design piece by piece.
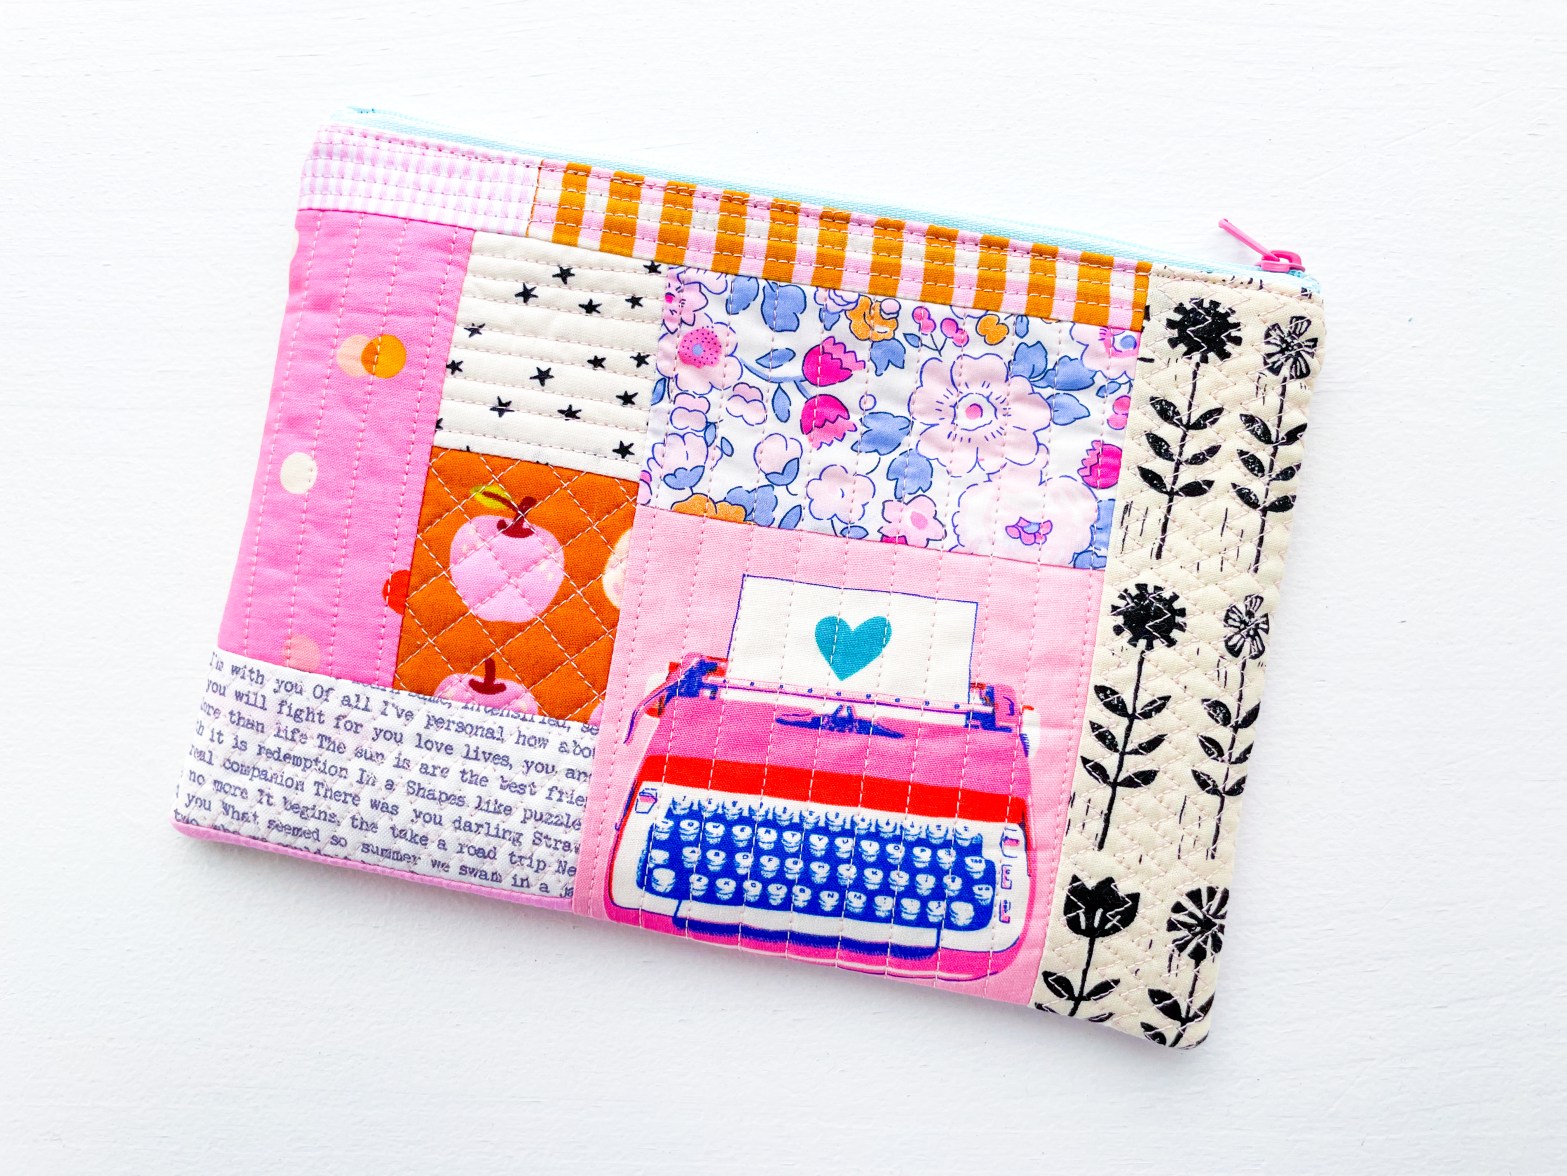
This Quilt-As-You-Go (QAYG) zipper pouch is a fun, practical way to use up fabric scraps while creating something you’ll actually reach for again and again. Zipper pouches are endlessly useful — perfect for storing sewing notions, makeup, stationery, or gifting — and this project lets you turn small pieces of fabric into a polished, functional finish.
Not only is this a practical project, it’s also a fantastic scrap-busting idea — ideal for leftover strips, small cuts, or even an orphan quilt block. Best of all, you’ll walk away with a finished zipper pouch and a solid understanding of the quilt-as-you-go technique that you can apply to future bags and pouches.
Let’s dive into our scrap baskets shall we?!

NOTE: Please read through the entire tutorial first. For best results, use 100% cotton fabric, batting, and thread, as this project involves frequent pressing with a hot iron. Synthetic materials may melt or distort.
If you have a walking foot, now is a great time to use it — it helps keep the layers feeding evenly while quilting. Don’t worry if you don’t have one; a regular presser foot works just fine.
Finished Size: 8.5” (wide) x 6″ (heigh)
Supplies:
- Assortment of fabric scraps.
- cotton batting larger than the finished panel you’ll need for your project. For the zipper pouch we are going to make you’ll need: two (2) pieces of cotton batting 9.5″ x7″
- cotton thread
- Iron + pressing mat
- walking foot
- Basic sewing supplies
- Sewing machine
Quilt As You Go Instructions
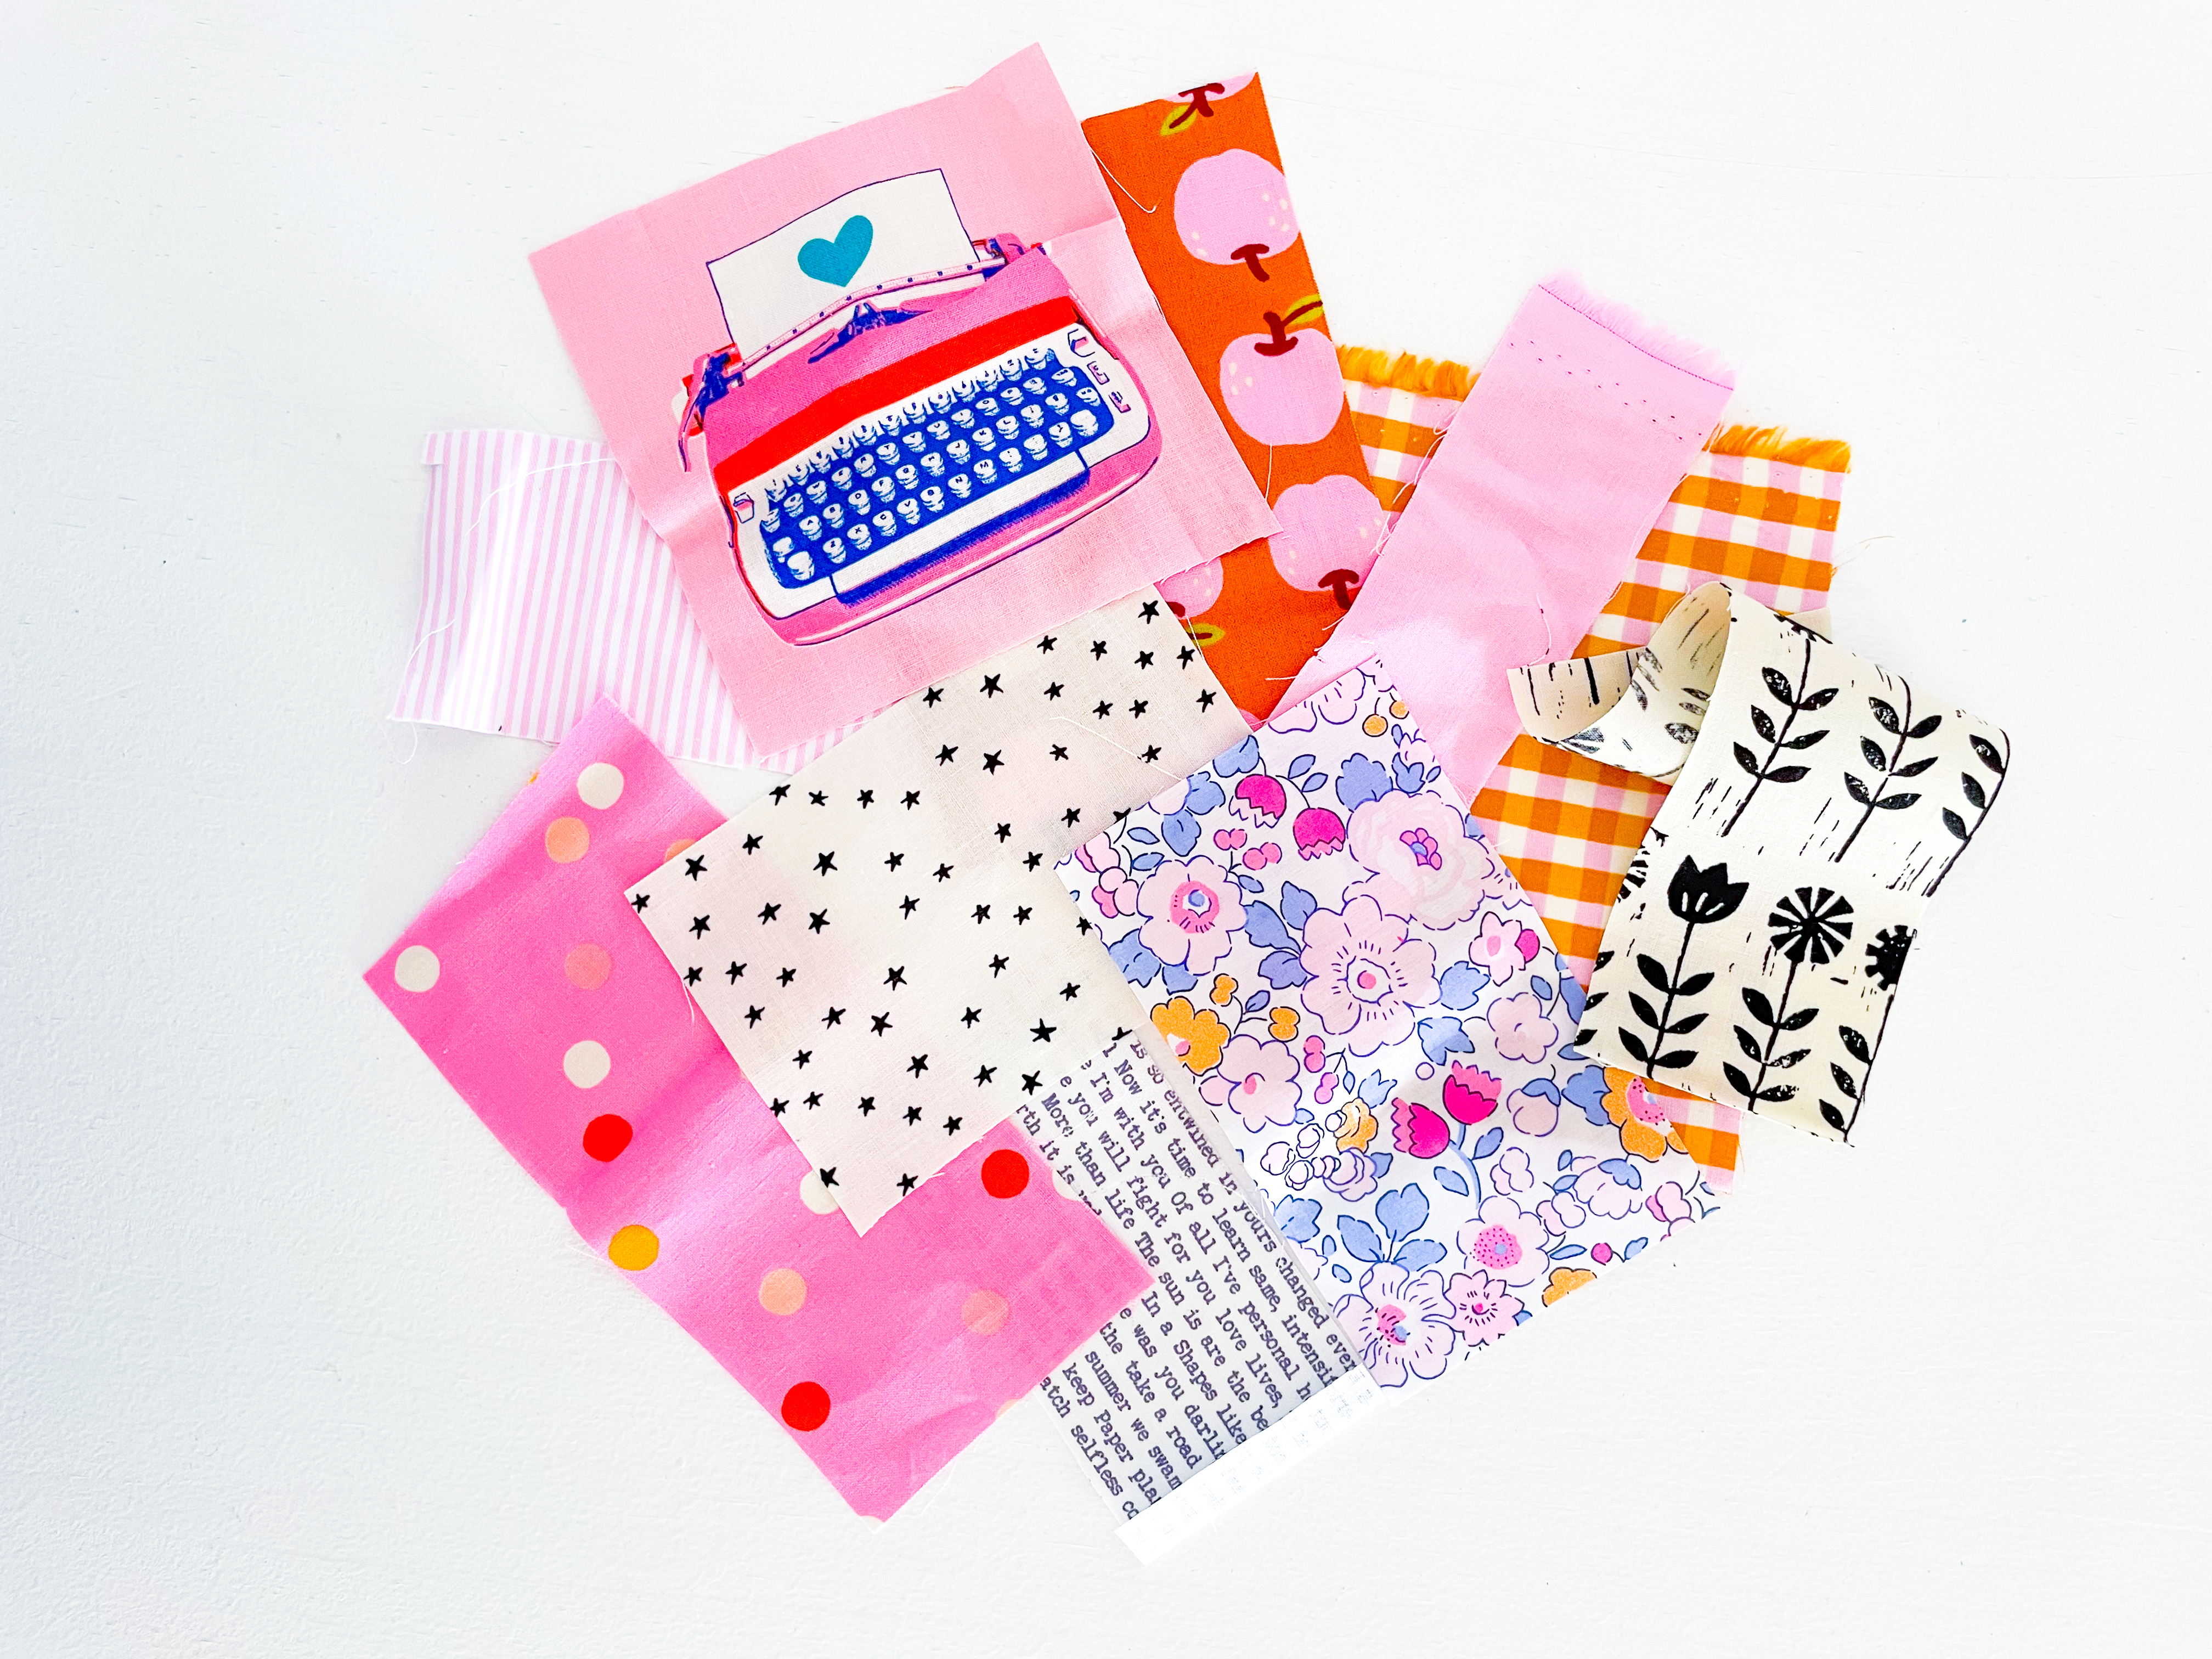
Step 1: Choose Your Fabrics.
Select the fabric scraps you’d like to use for your quilt-as-you-go panel. They can be different sizes and even slightly odd shapes — just square them up with a quilting ruler as you go. Give everything a good press with a hot iron before you begin.
A Note on Fabric Selection
This technique works beautifully with almost any fabric combination, but it helps to choose a focal point first. Start with a central piece — this might be a bold floral, a novelty print, or even an orphan quilt block.
If using a quilt block, keep it small and simple — around 2–2½″ blocks work well. Think of something like a tiny economy block or sawtooth star. This will form the centre of your quilt-as-you-go panel. Plus, if you’re looking for some FREE economy block templates, i’ve got you covered in my Economy Blocks Made Easy Guide.
From there, you can mix and match by adding contrasting fabrics for a scrappy look, or stay within a tighter colour palette for a more cohesive finish.
Don’t overlook solids — they look incredible with this technique and really allow the quilting texture to shine.
Gather more than you think you’ll need — you can always swap pieces in and out as you build your panel. Part of the fun is adjusting, mixing, and refining as you sew.
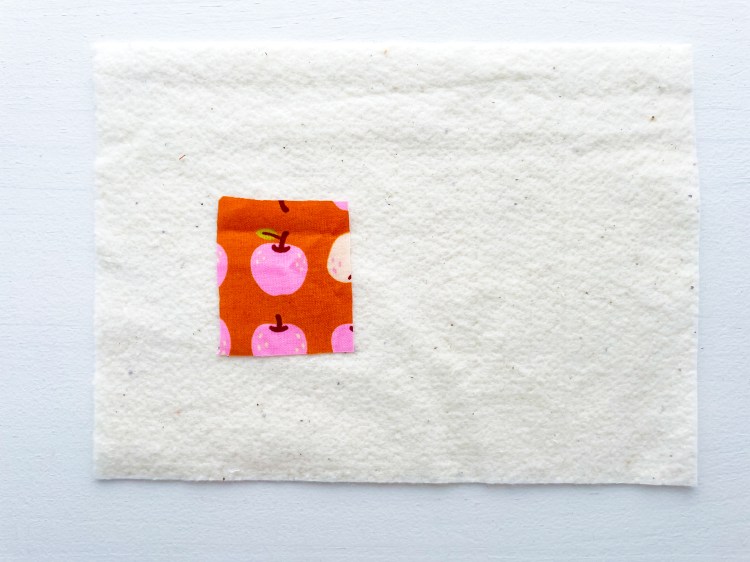
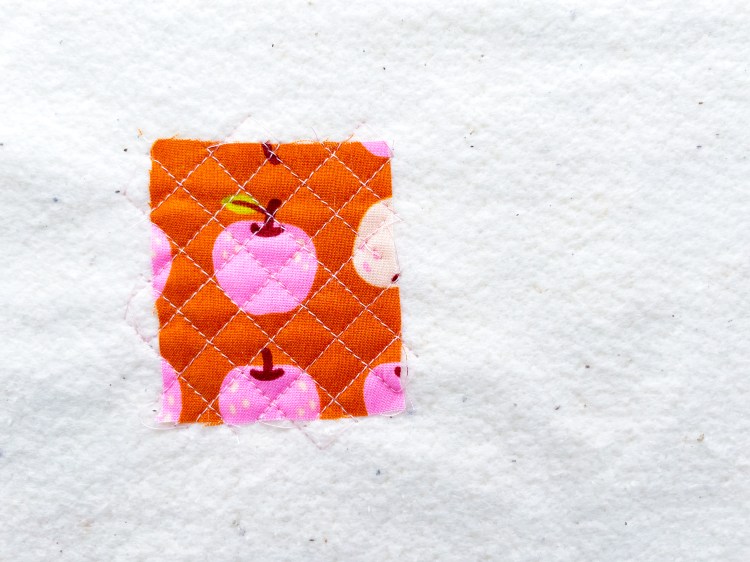
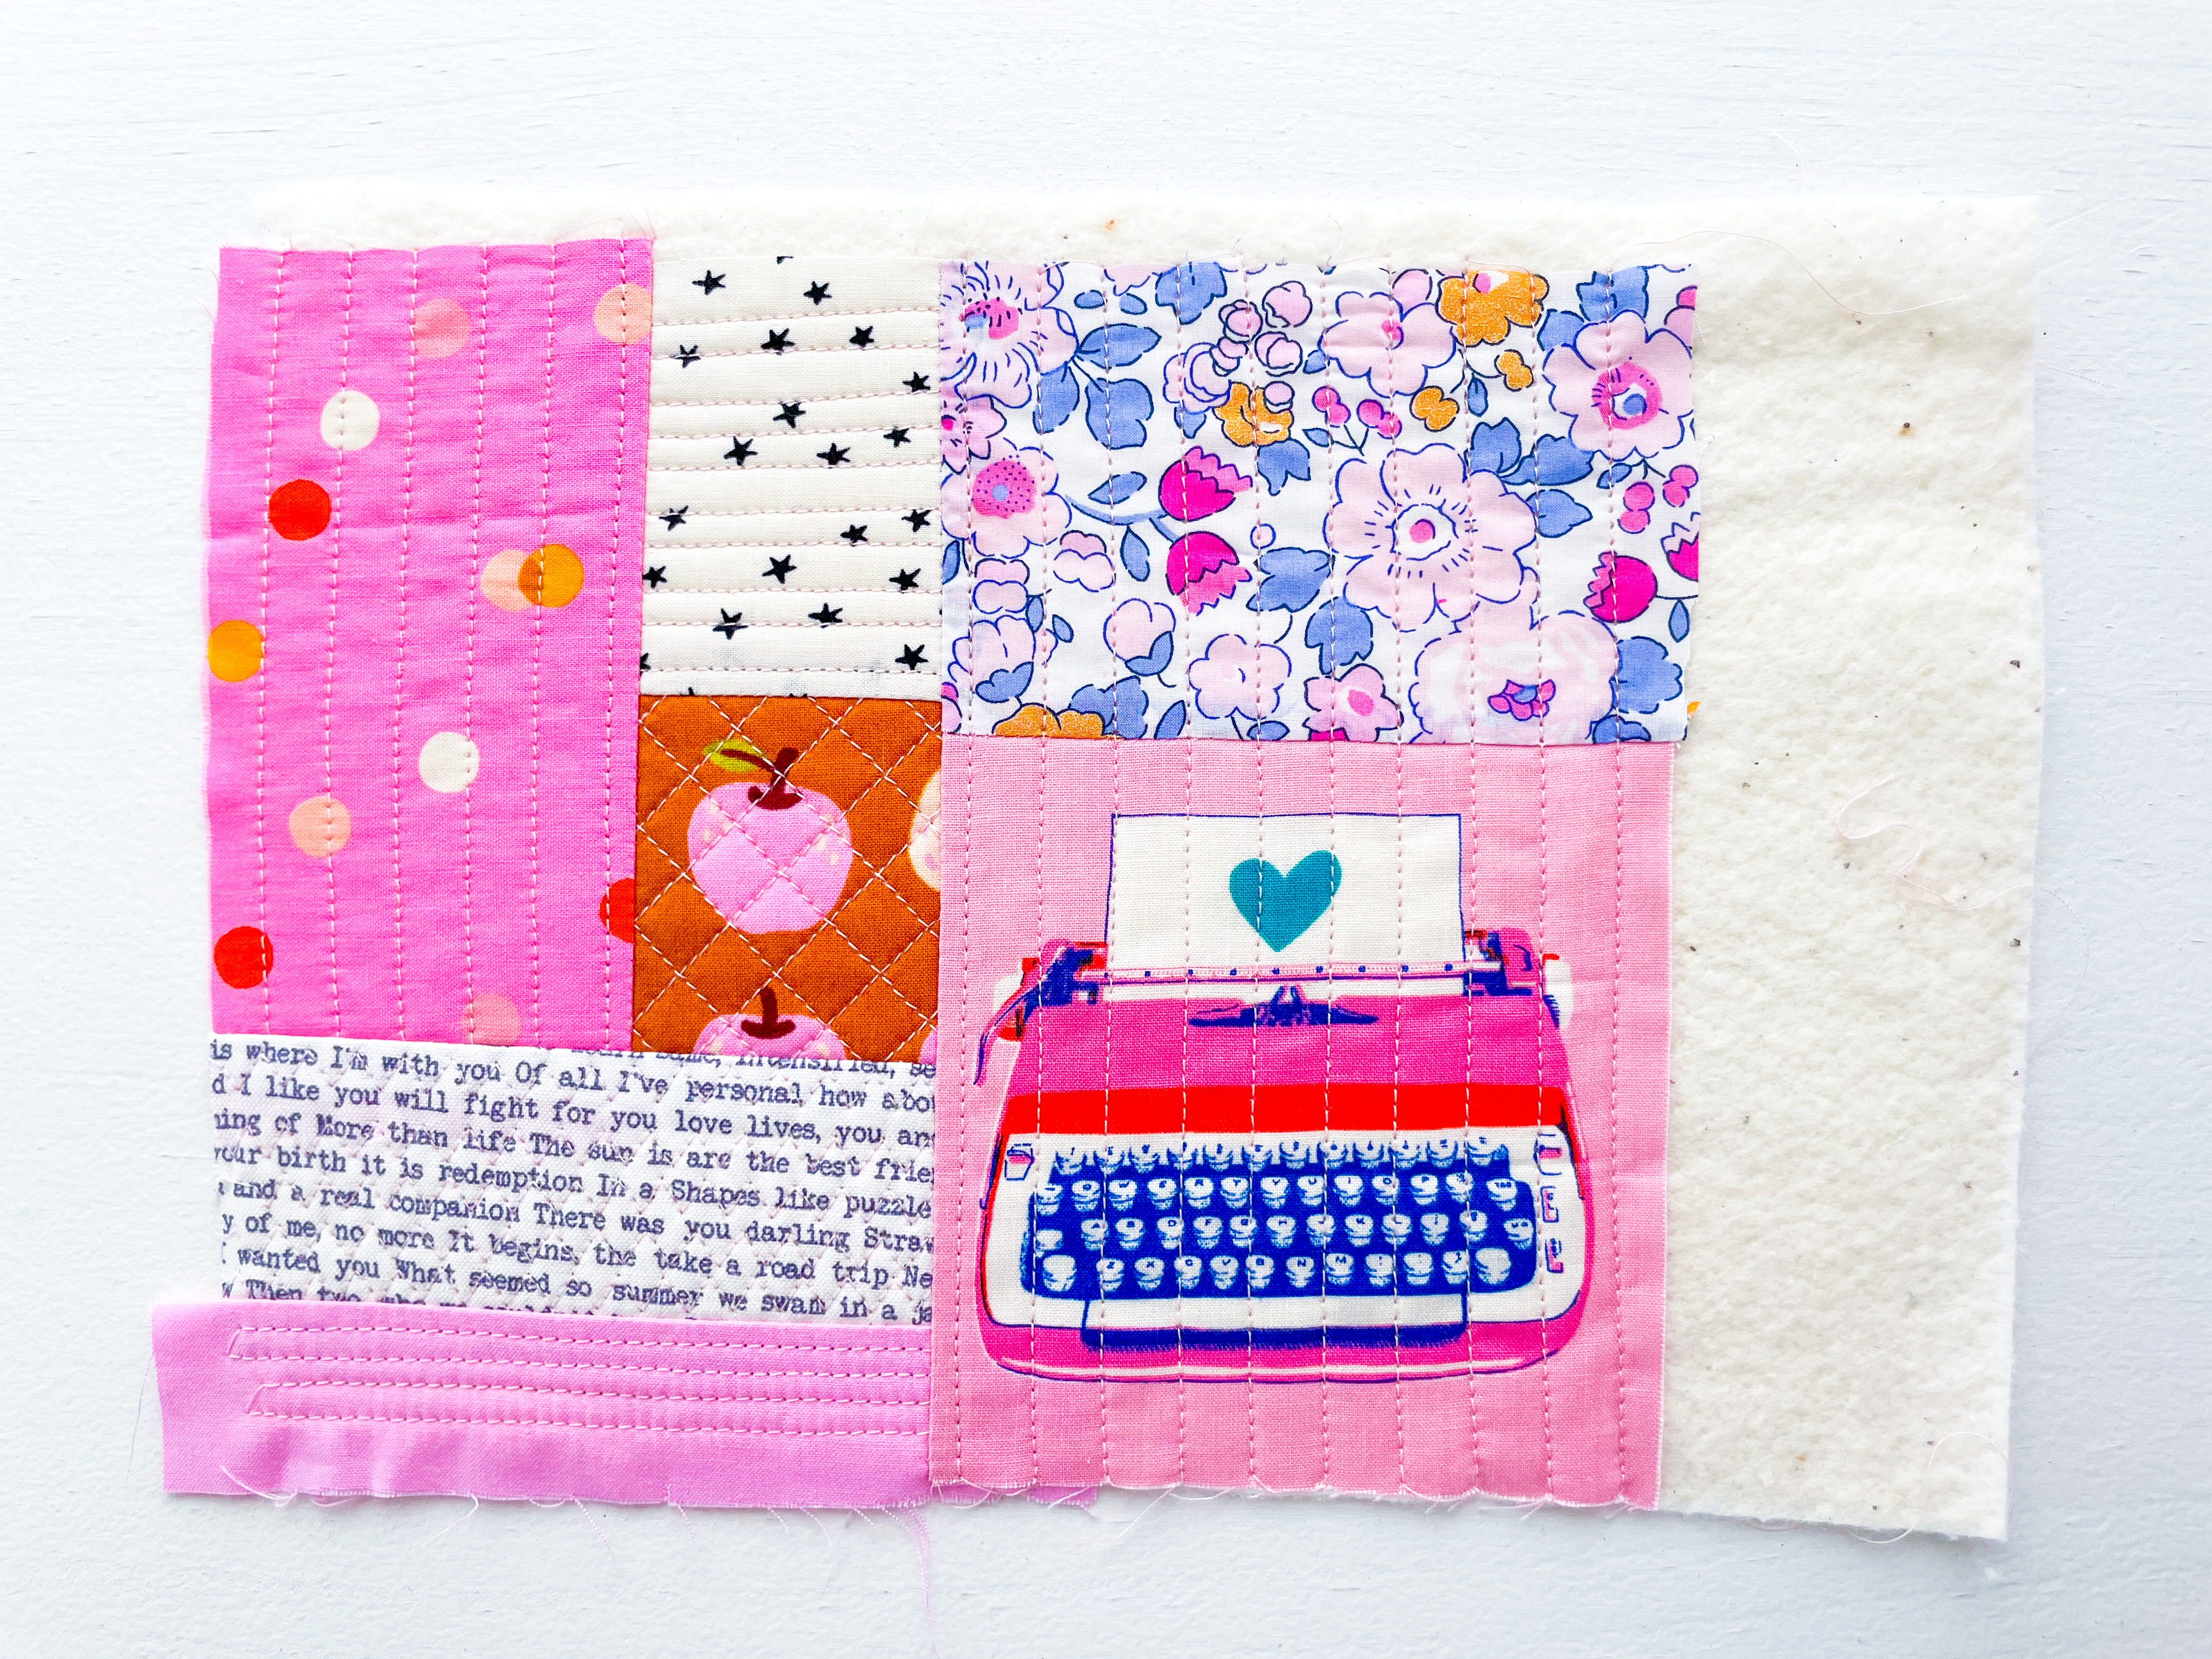
Step 2: Quilt Your First Scrap
Place your first scrap in the center of the batting and quilt it down. You can keep it simple with straight lines, try free-motion quilting, or experiment with decorative stitches on your machine.
For example, I use a Janome DC2050, and my favorite decorative stitches for this project are 20, 34, and 41. If you’re quilting basic lines, I recommend a stitch length of 3.0 — it gives a nice, even visible stitch length that will feed evenly through the machine.
Take your time with this first piece — it sets the foundation for your quilt-as-you-go panel, so don’t worry about perfection. Part of the charm is the texture and dimension that develops as you add more scraps.
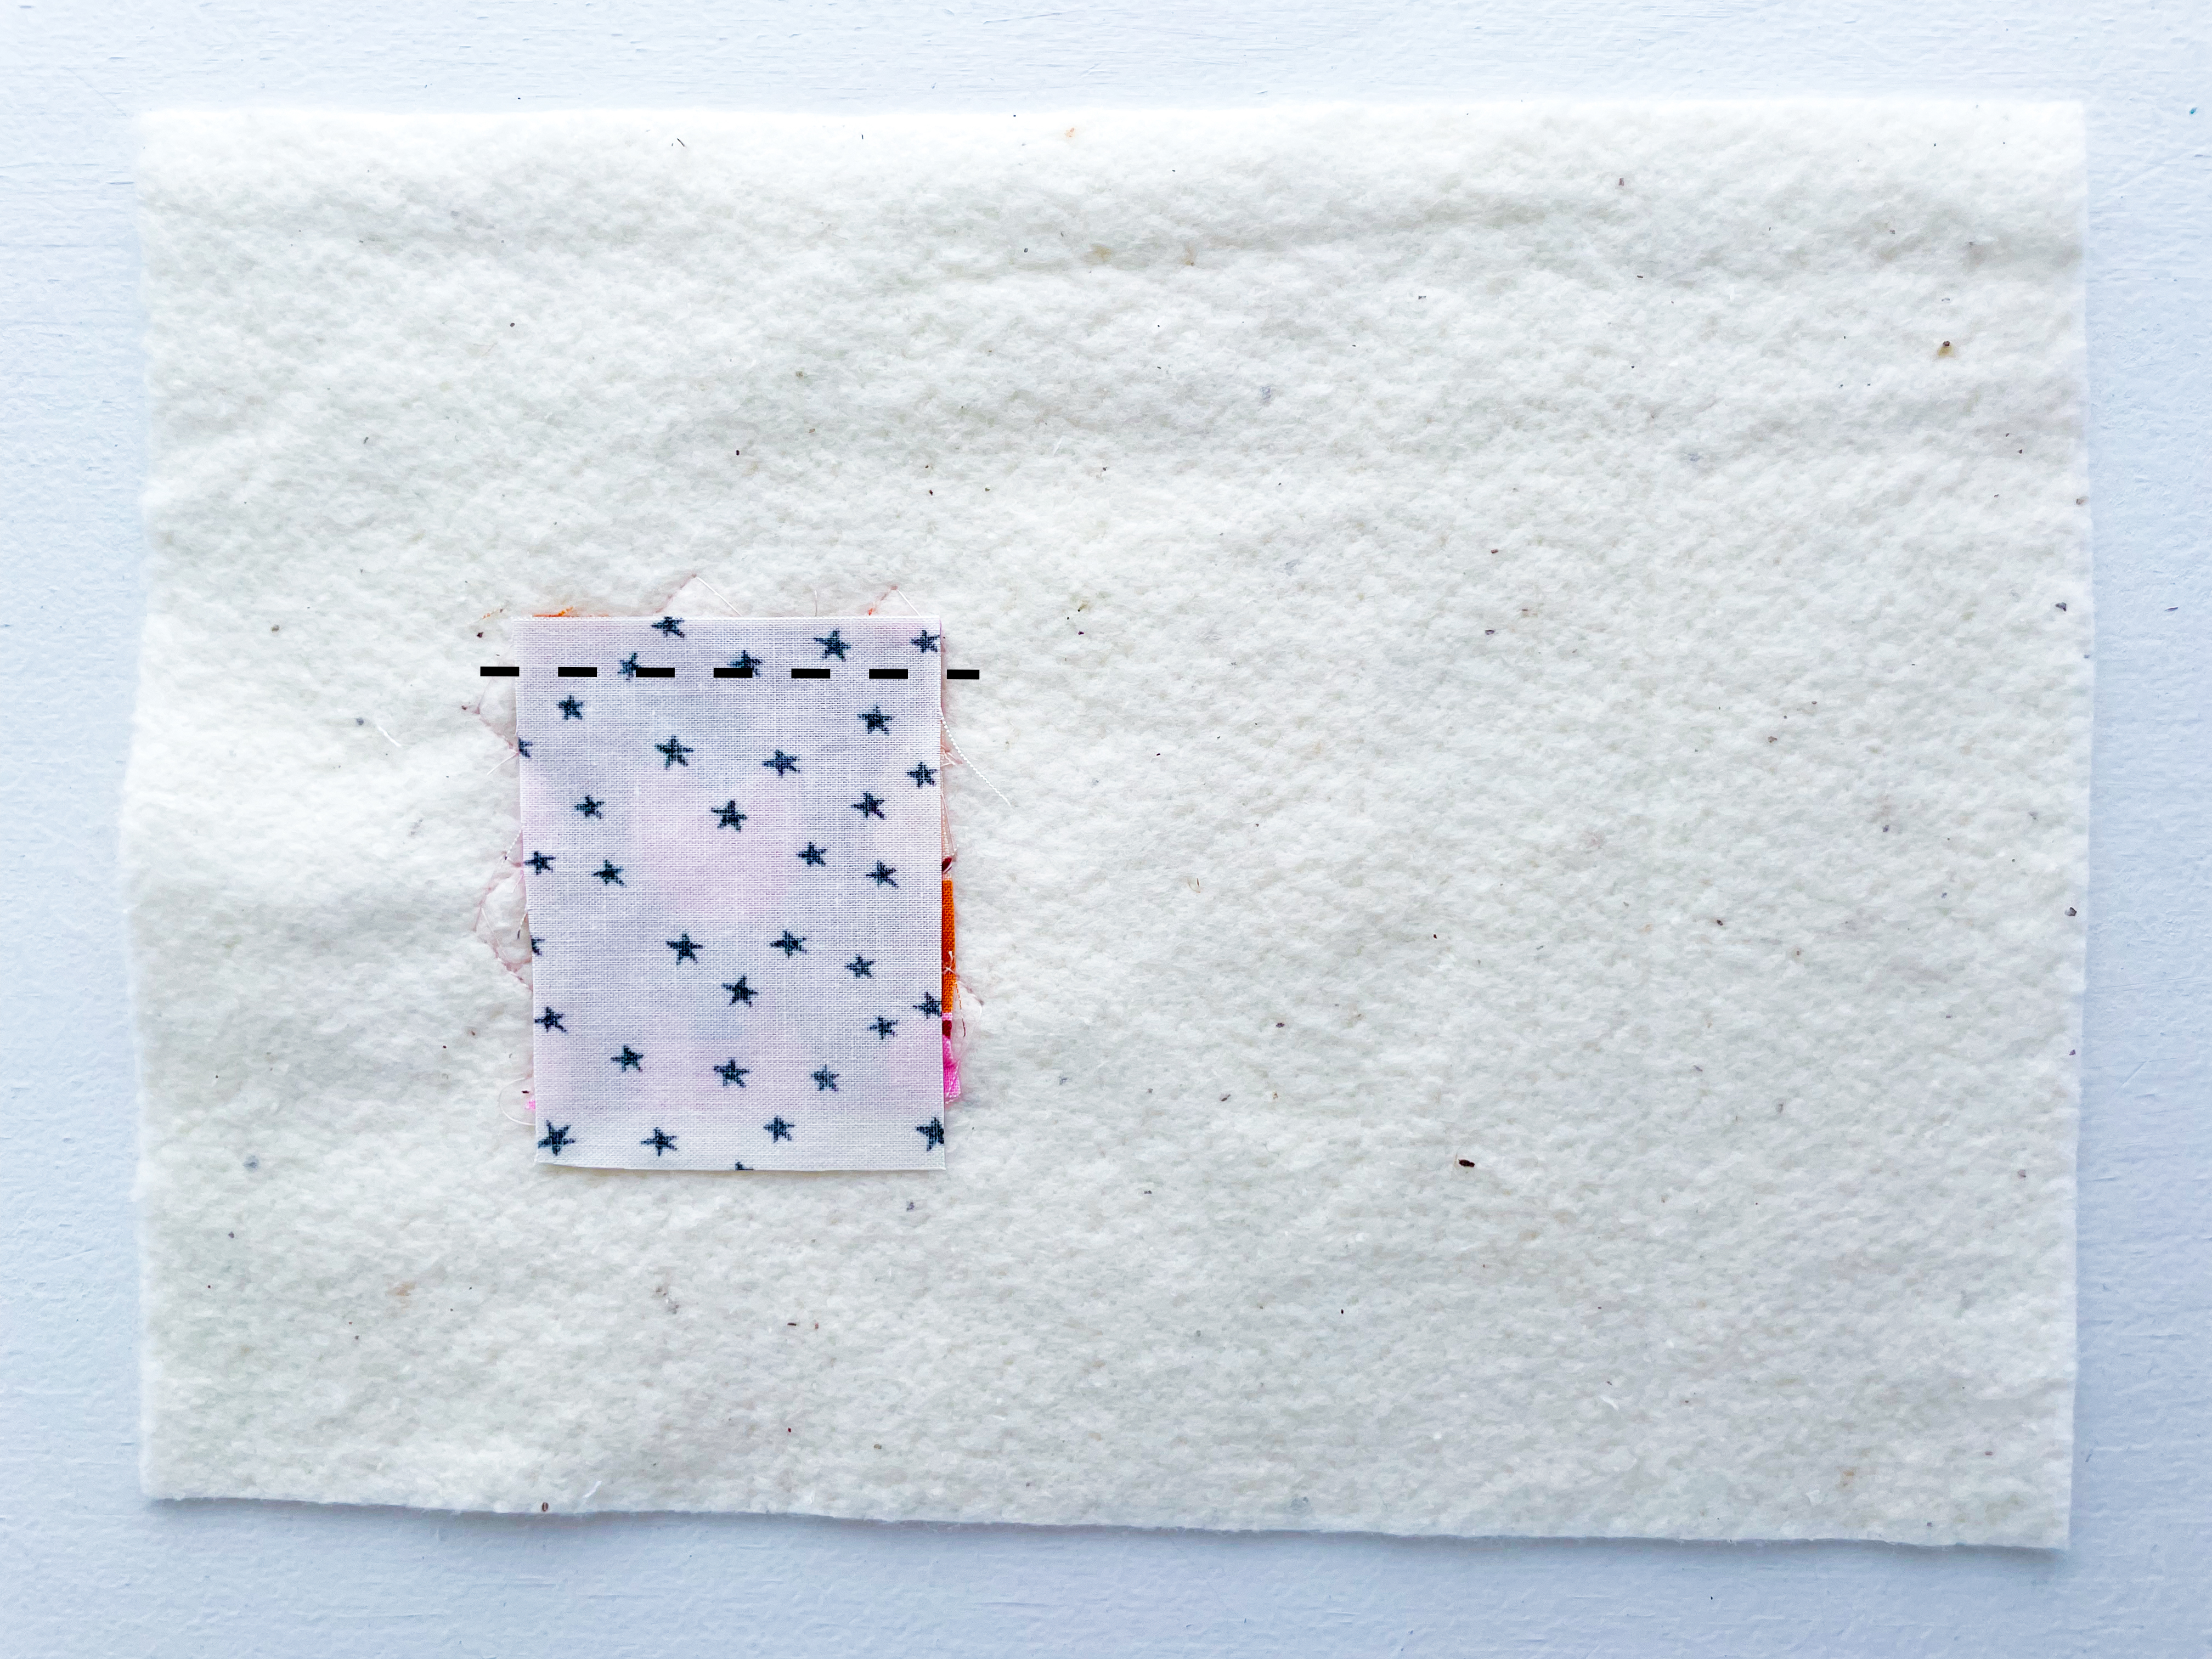
Step 3: Add the Next Scrap
Choose your second fabric and place it along one side of your first piece, with right sides together. It can be whichever side you like, but try to make the edges roughly the same length.
Stitch the pieces together using a ¼” seam allowance. Take your time — accuracy here will make the next steps easier and help your quilt-as-you-go panel stay neat.
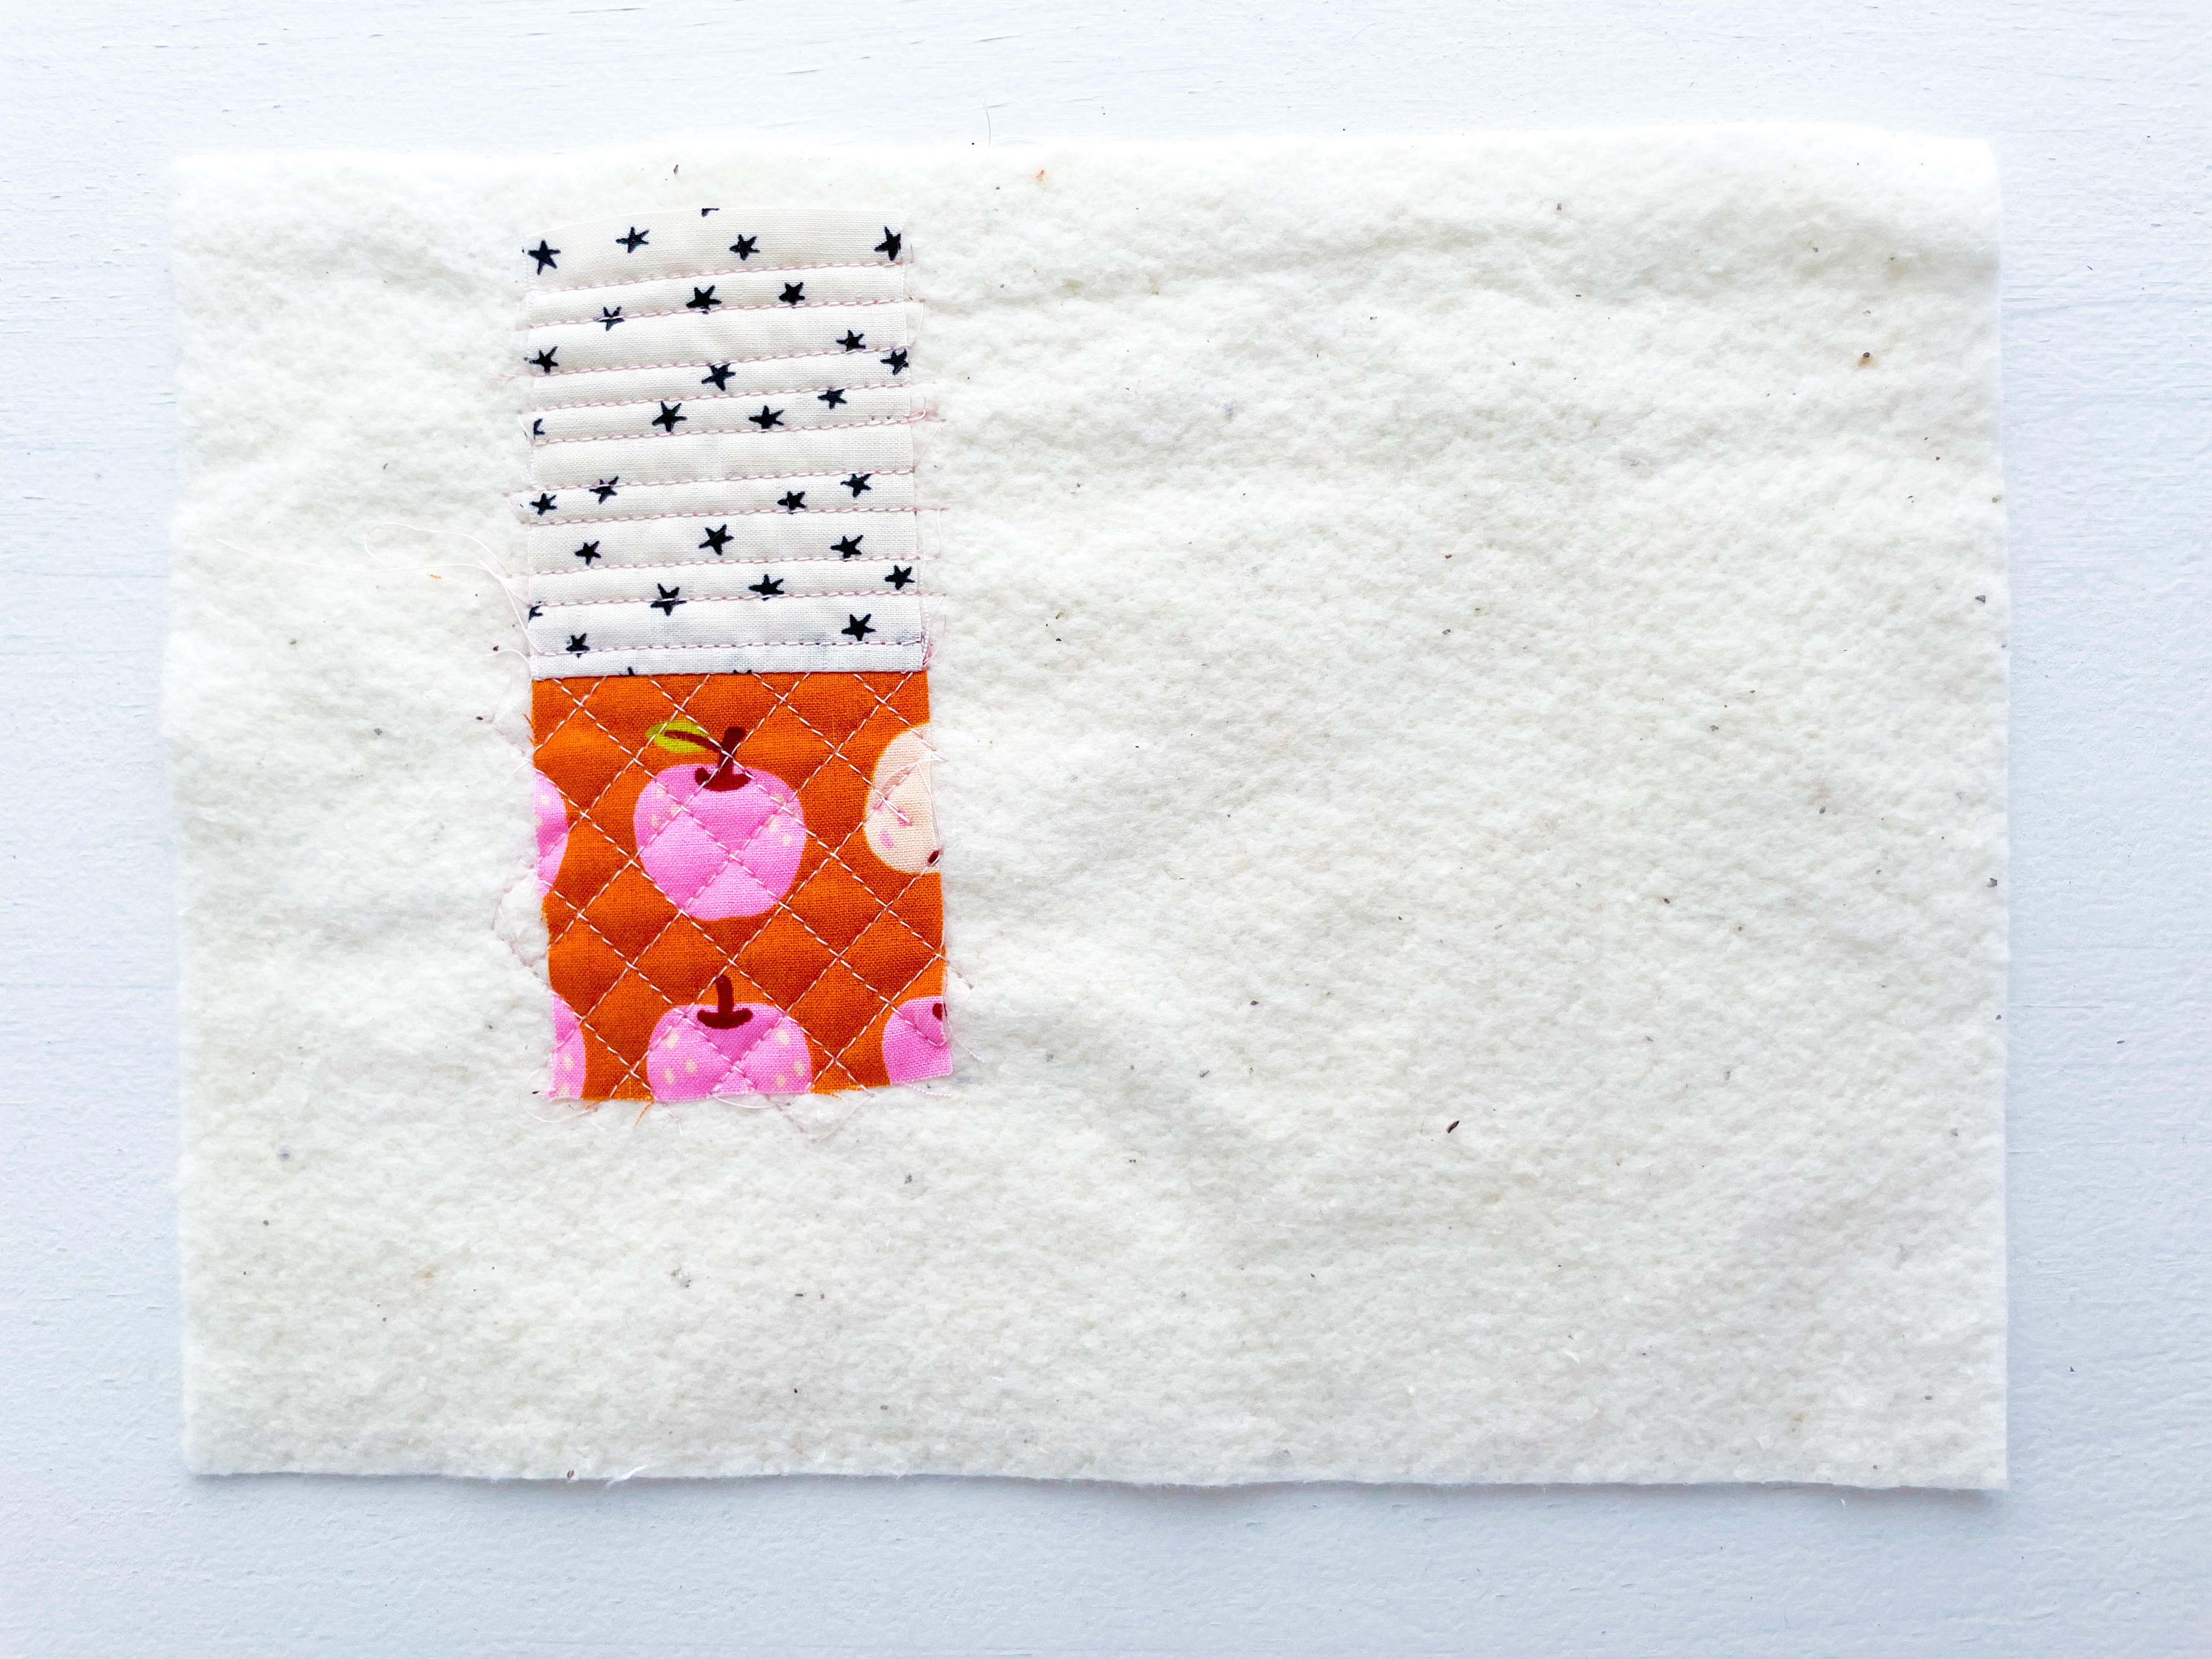
Step 4: Press and Quilt
Open up your fabric and give it a good press. Then quilt the second piece of fabric down using your preferred quilting style — straight lines, decorative stitches, or free-motion quilting.
As you go, make sure to trim any thread tails from both the front and back of your work. This simple habit will prevent tangles and keep your quilt-as-you-go panel neat and tidy.
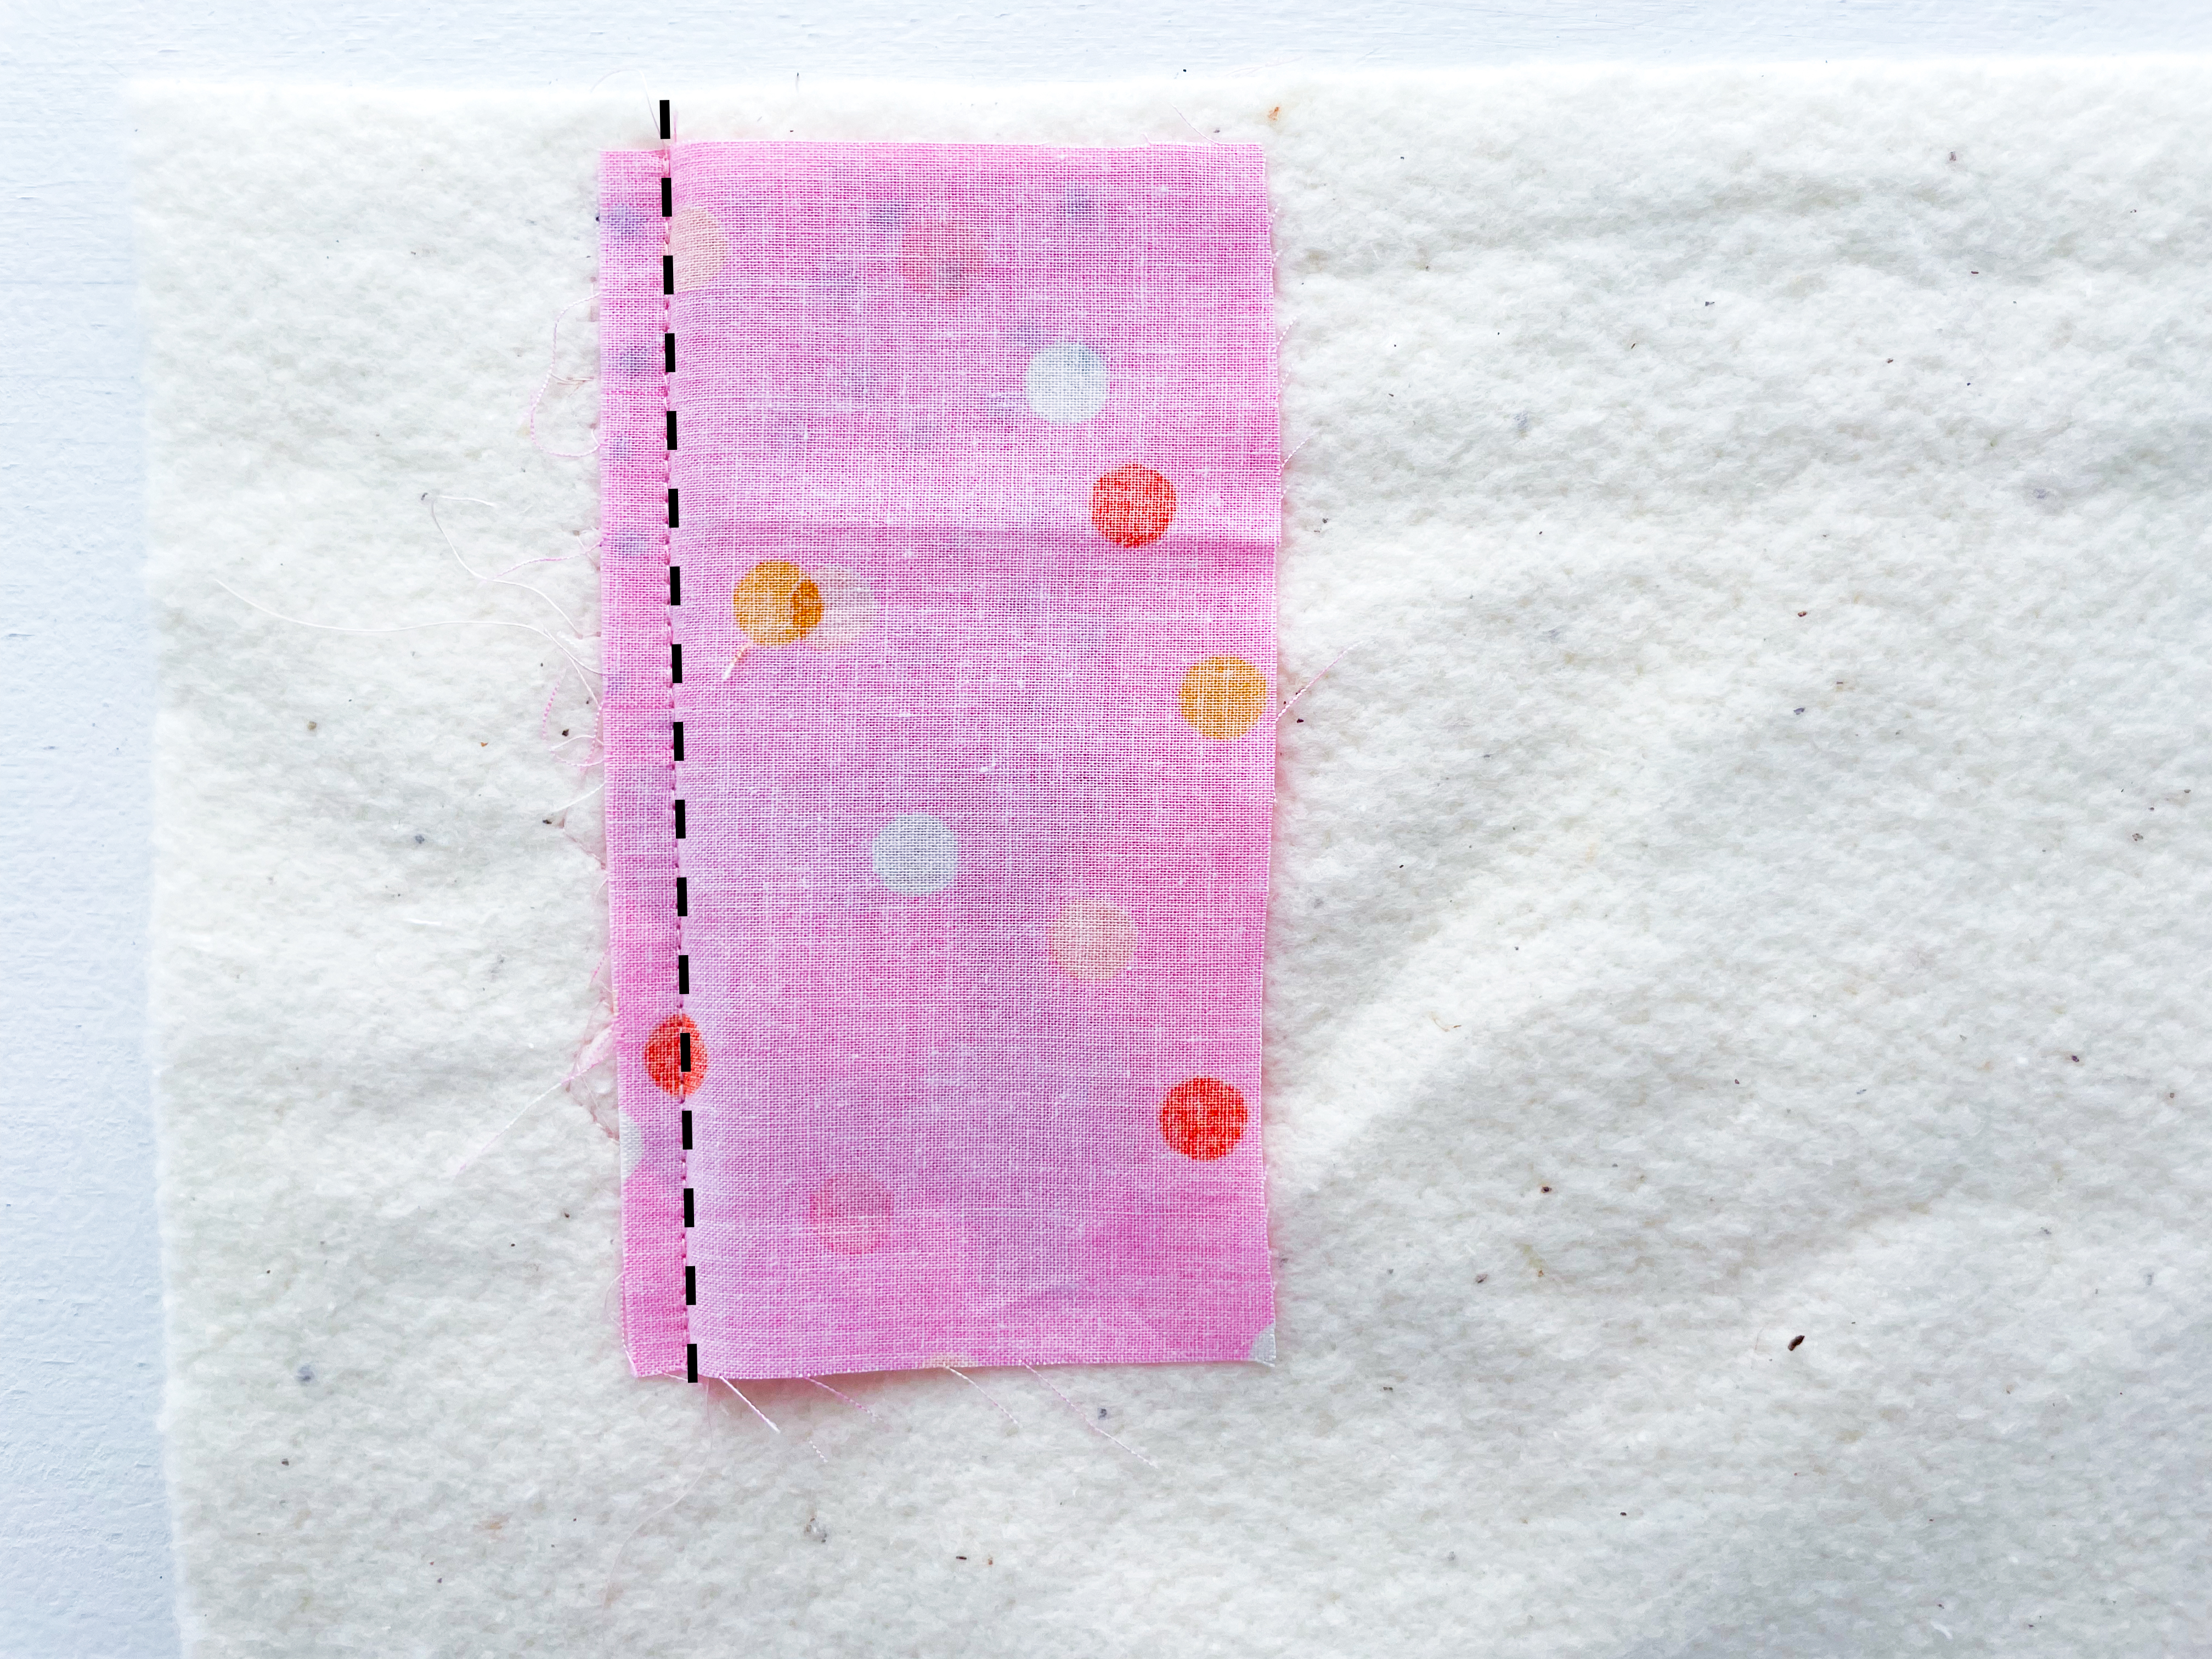
Step 5: Add the Third Scrap
Choose your third piece of fabric and place it along one side of your existing pieces, with right sides together. Stitch it down using a ¼” seam allowance. You can add it to any side you like — quilt-as-you-go is flexible!
If your fabric scrap is a little too long or an unusual shape, trim it with a quilting ruler as you go so it fits neatly. The most important thing is that the edge you’re sewing is straight and roughly the same length as the side you’re attaching it to — this will prevent gaps in your finished panel.
There are no strict rules with quilt-as-you-go, so feel free to experiment. The fun is in mixing shapes, colors, and textures while building your panel piece by piece.
STEP 6: Press and Quilt
Open the third piece of fabric up, Press with a hot iron and quilt as desired.
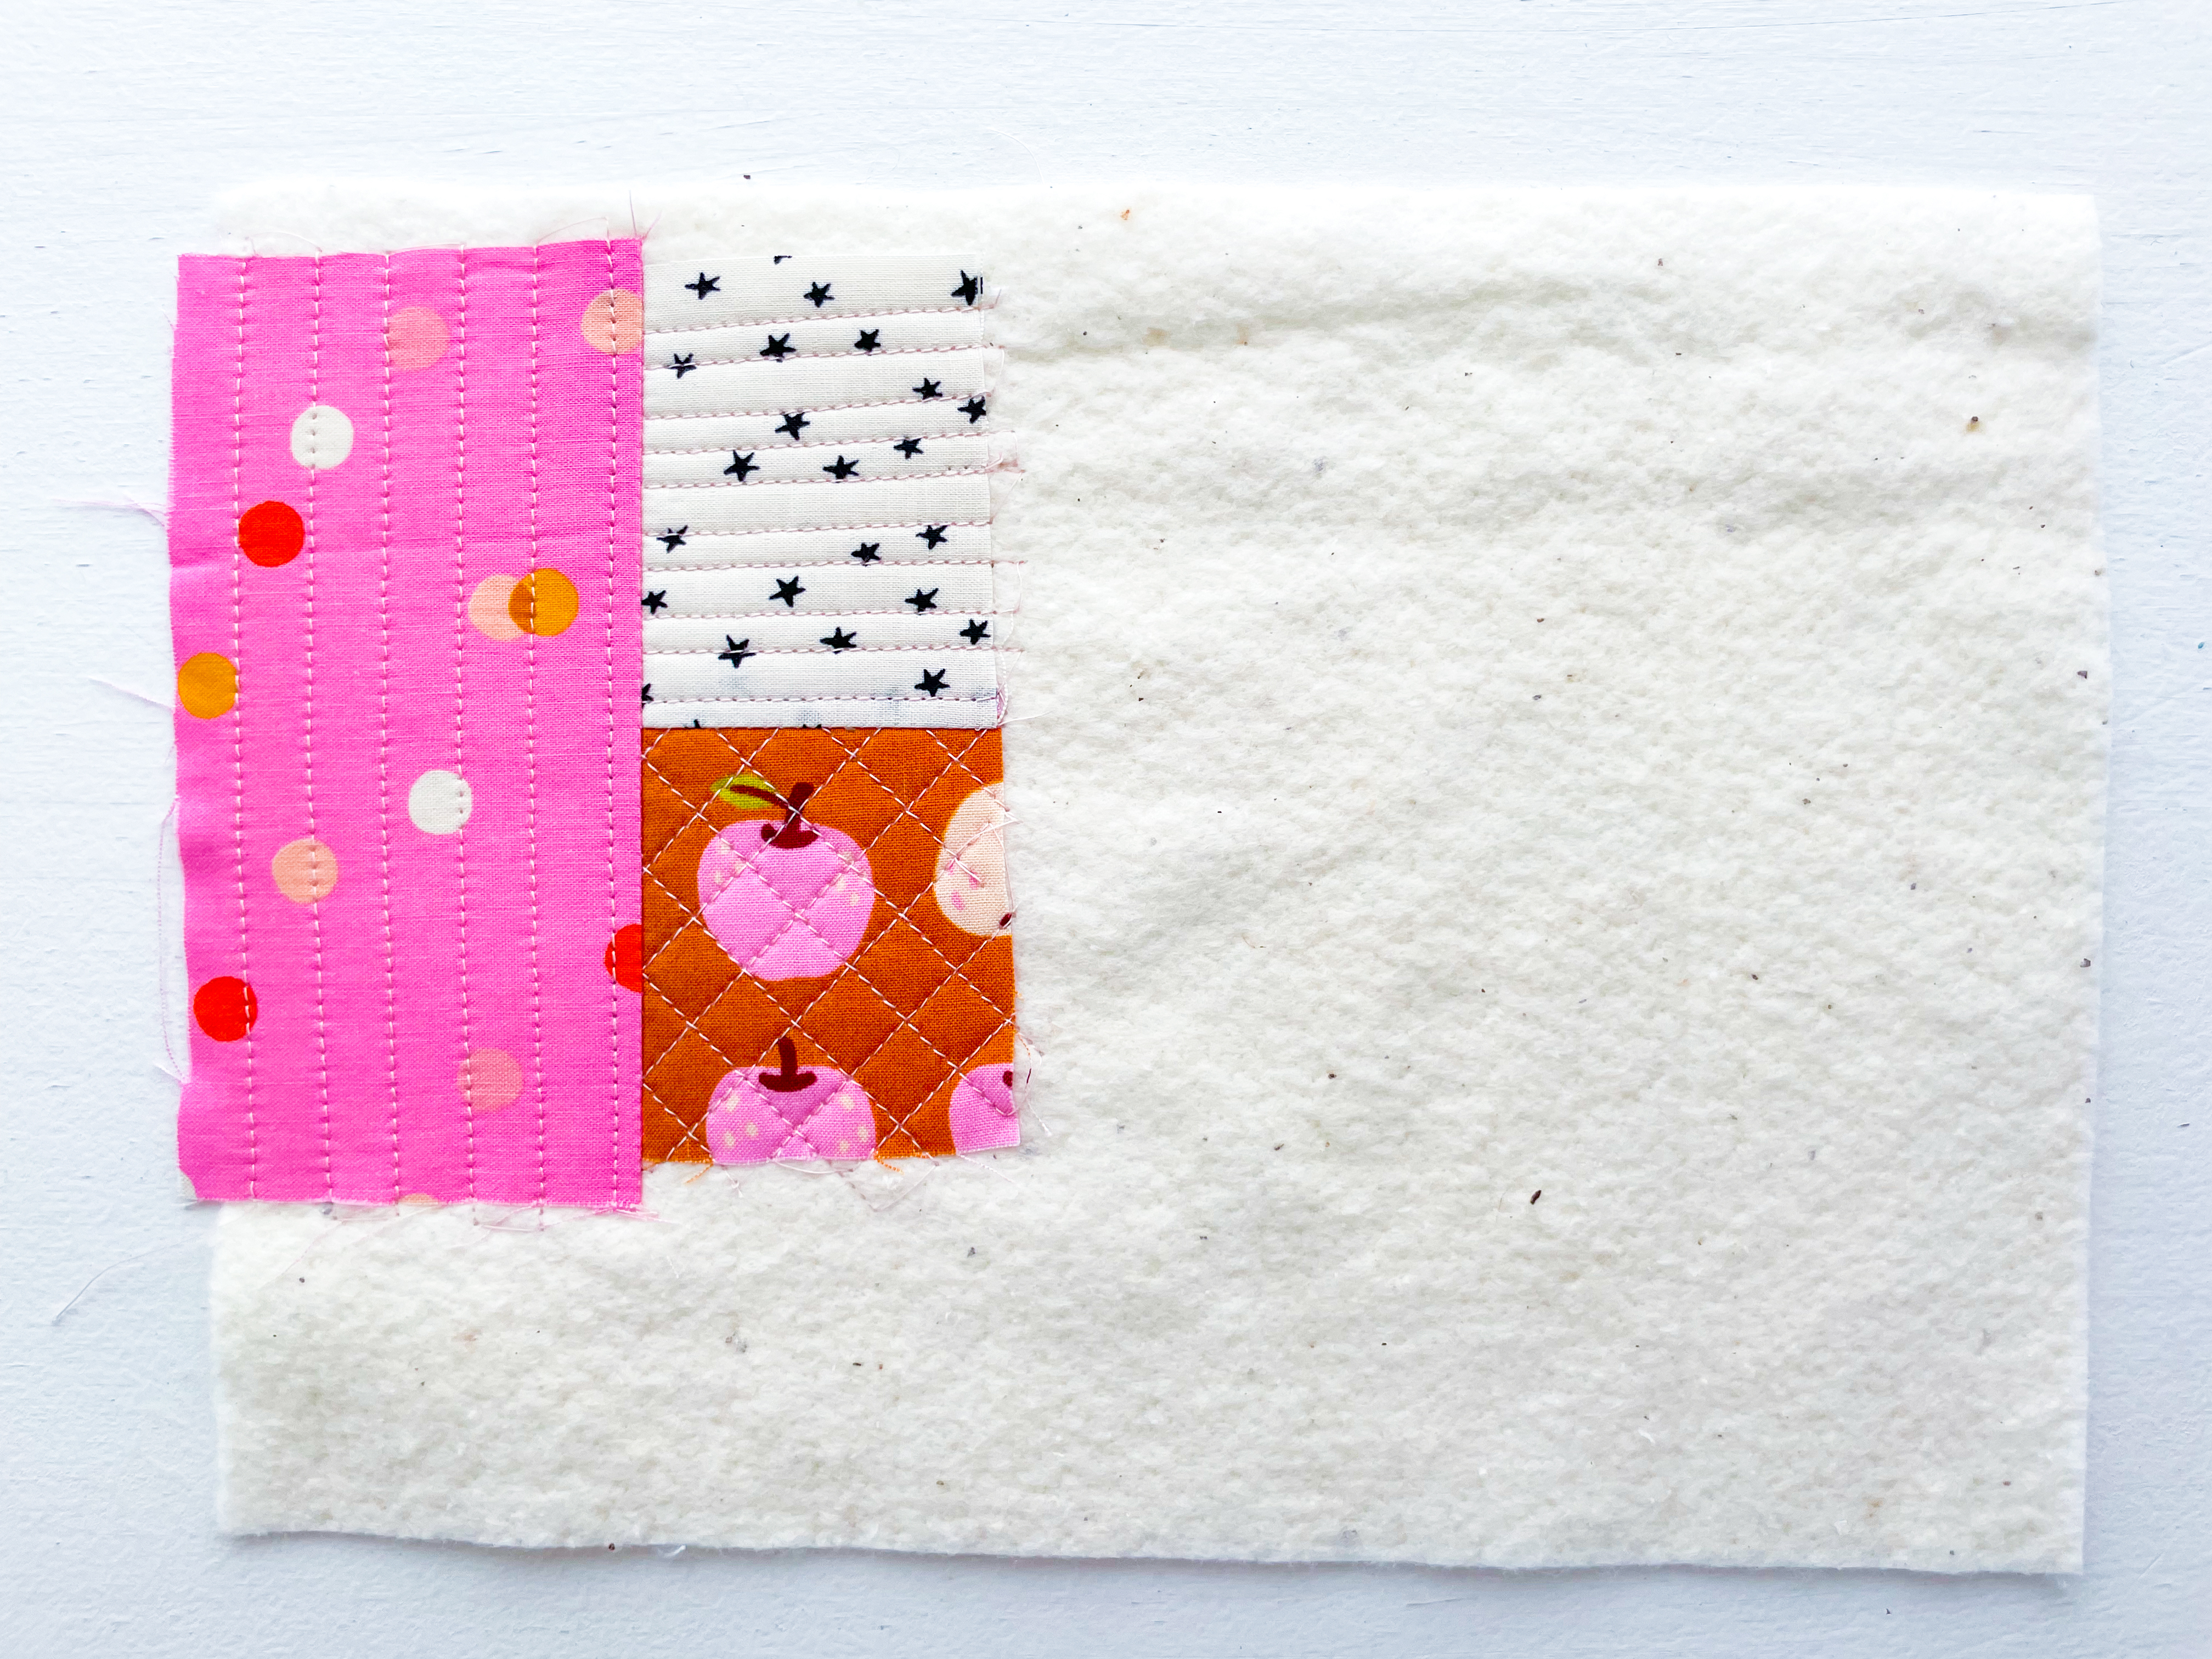
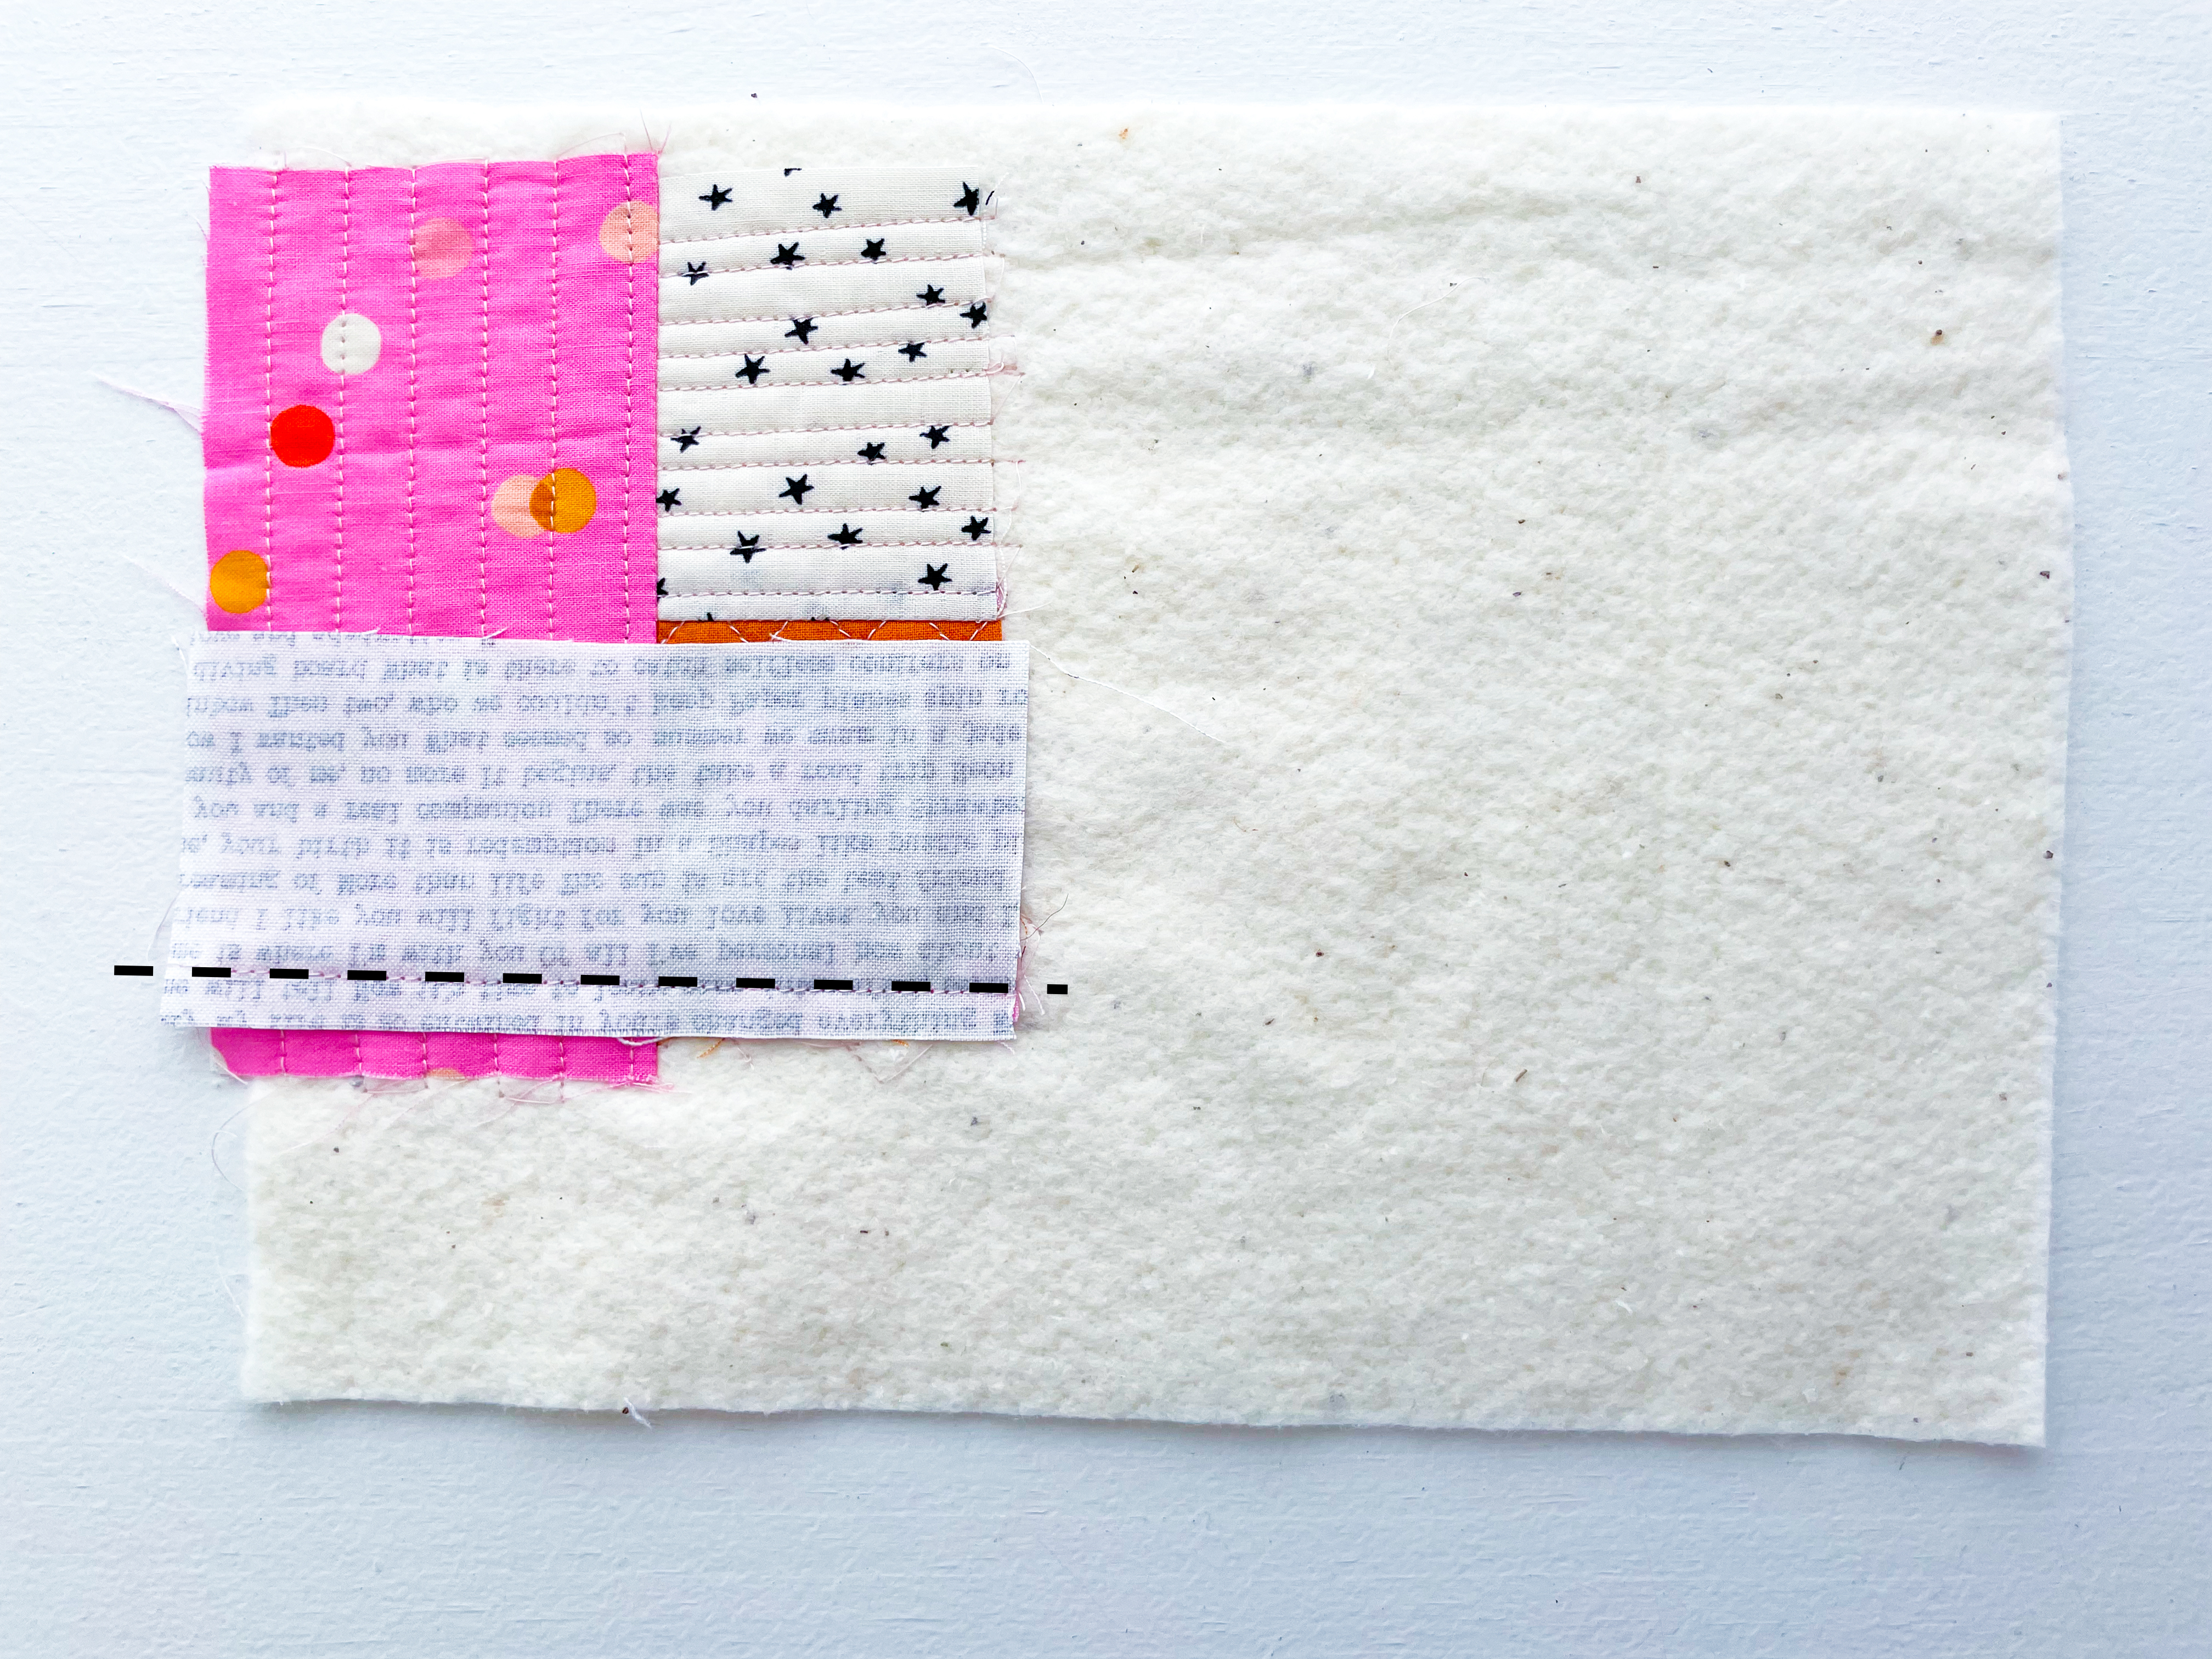
Step 7: Add the Fourth Scrap
Place your fourth piece of fabric along one of the sides, right side down. Stitch along the edge using a ¼” seam allowance.
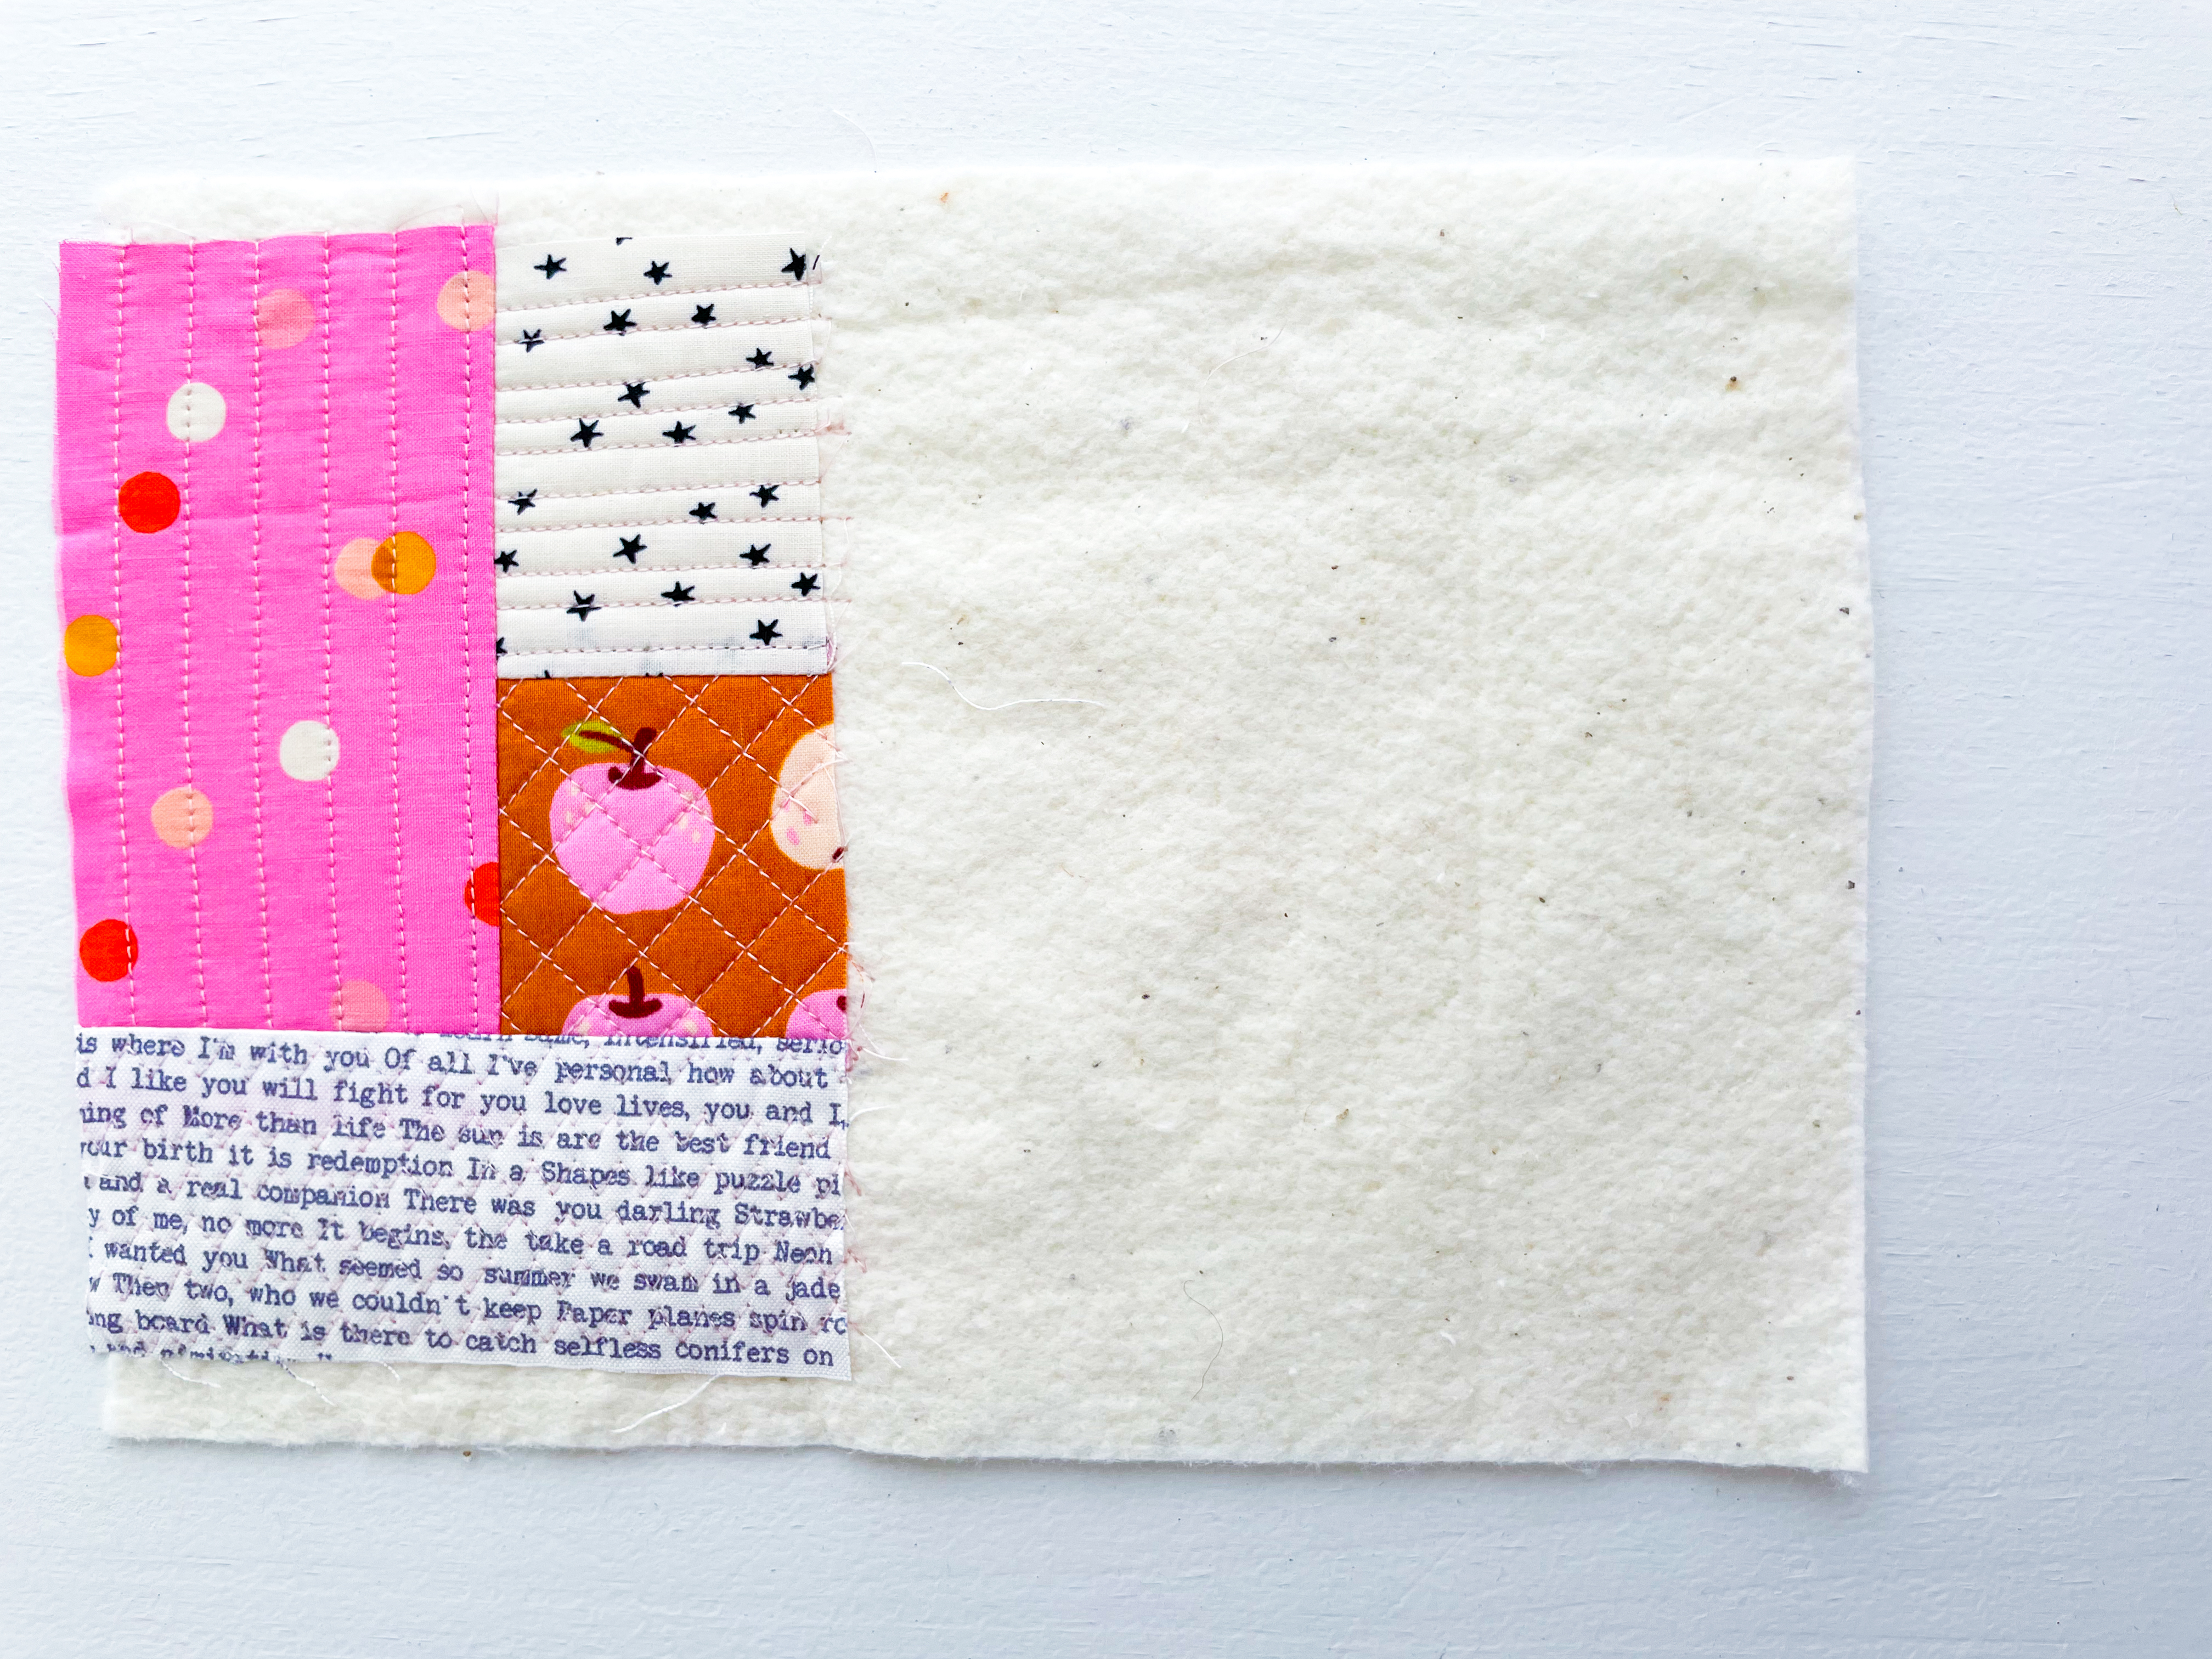
Step 8: Press and Quilt
Open up the fourth piece of fabric and press flat with a hot iron. Quilt as desired.
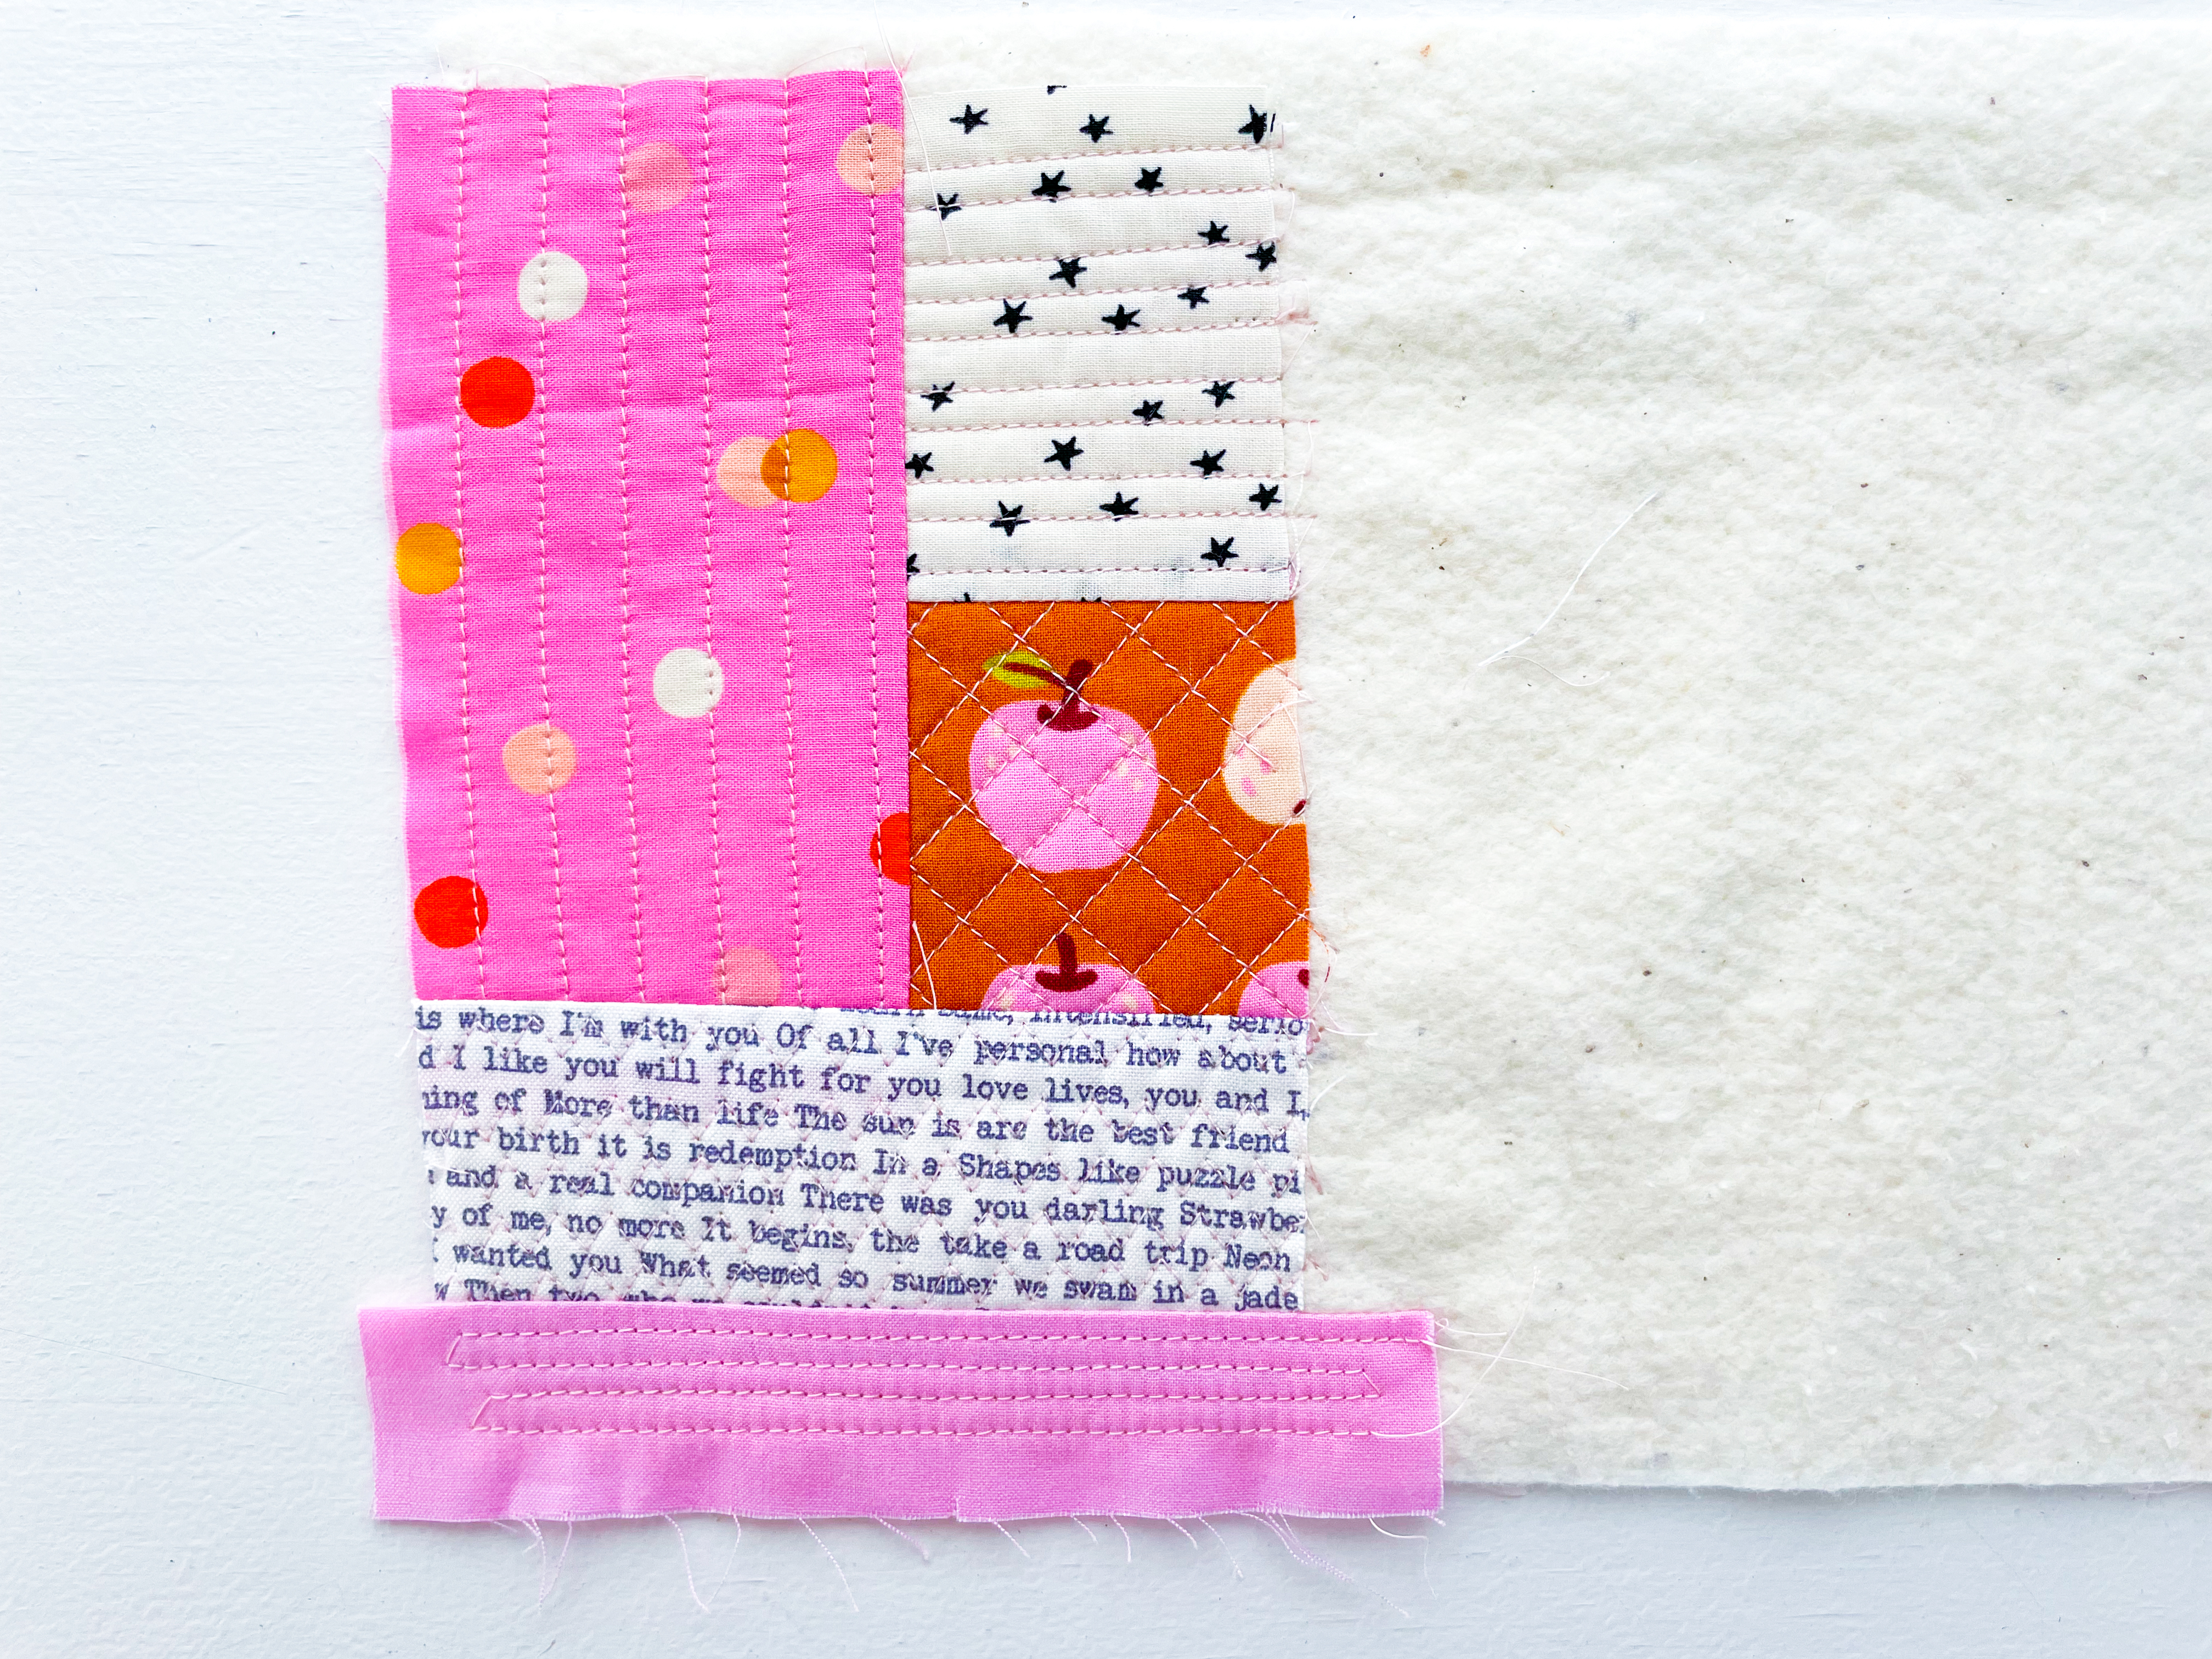
Step 9: Add the Fifth Scrap
Add the fifth piece of fabric just like all the others. Place it on top right side down, stitch it in place using a ¼” seam allowance. Open up, and press with a hot iron. Quilt as desired.
STEP 10: Joining Small Prints (The Fun Part!)
Here’s the fun part — if you want to use a print in your design but it’s a little too small, you can join it to another piece of fabric to make it the right length.
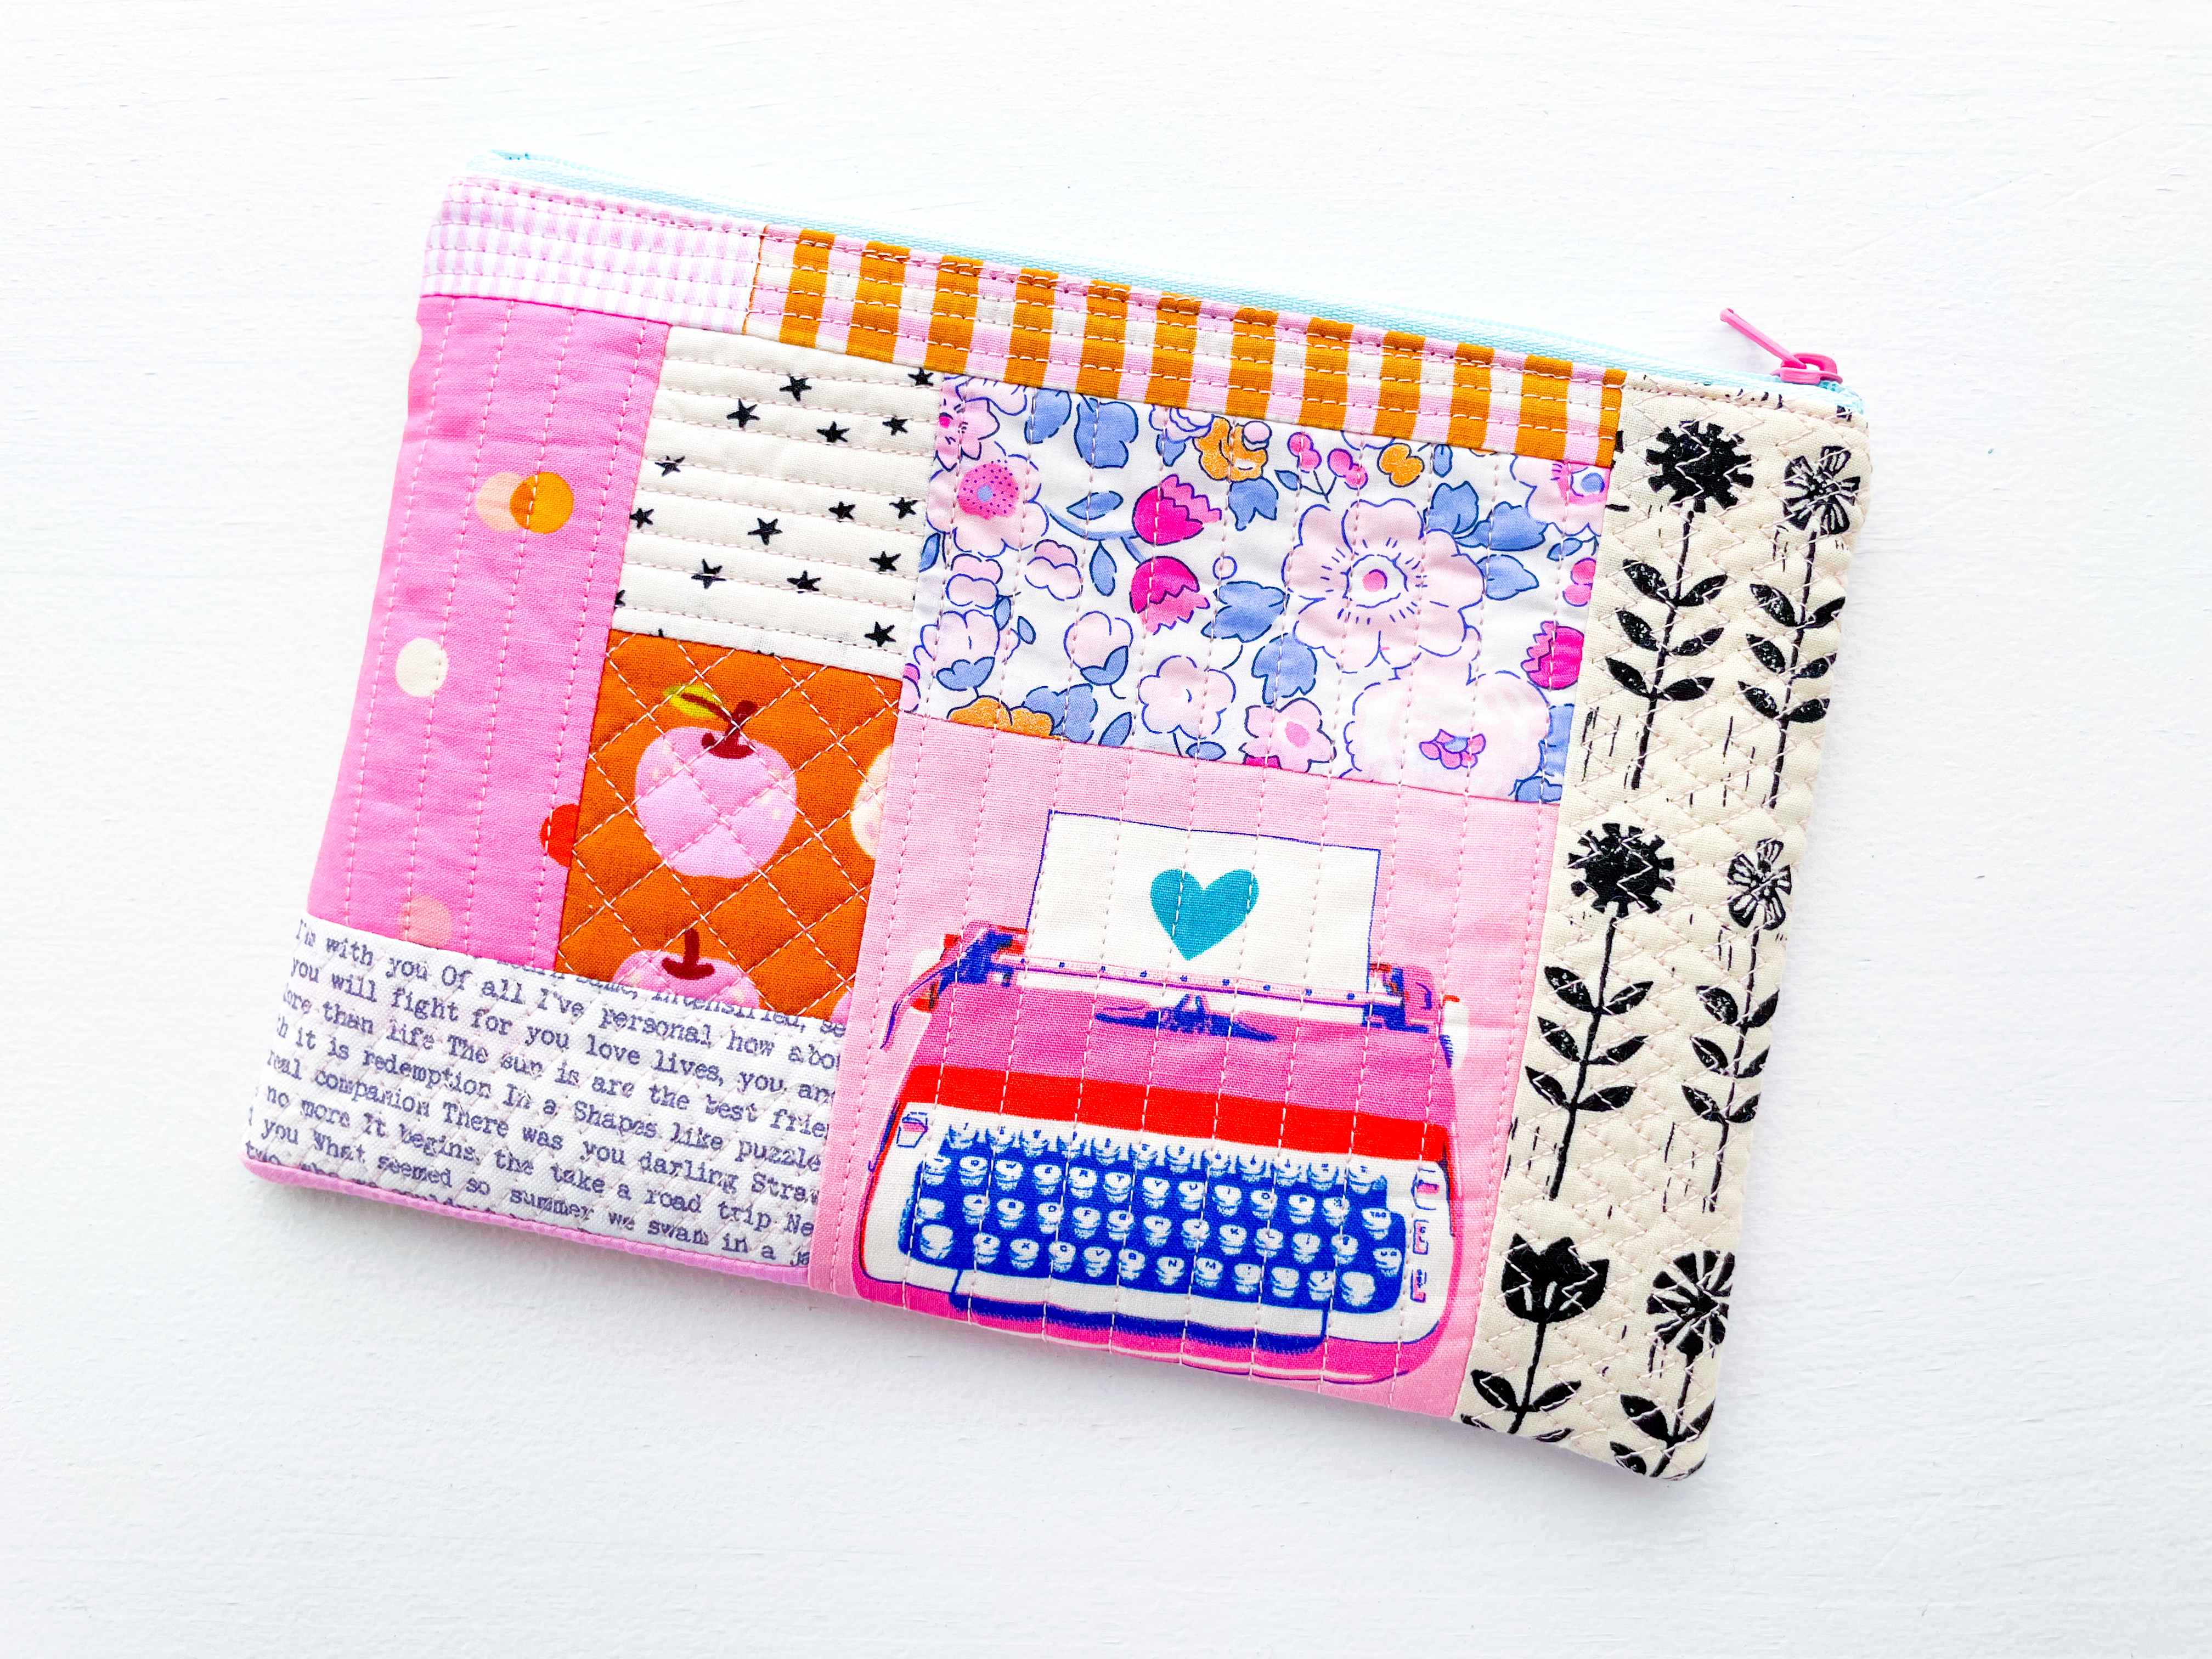
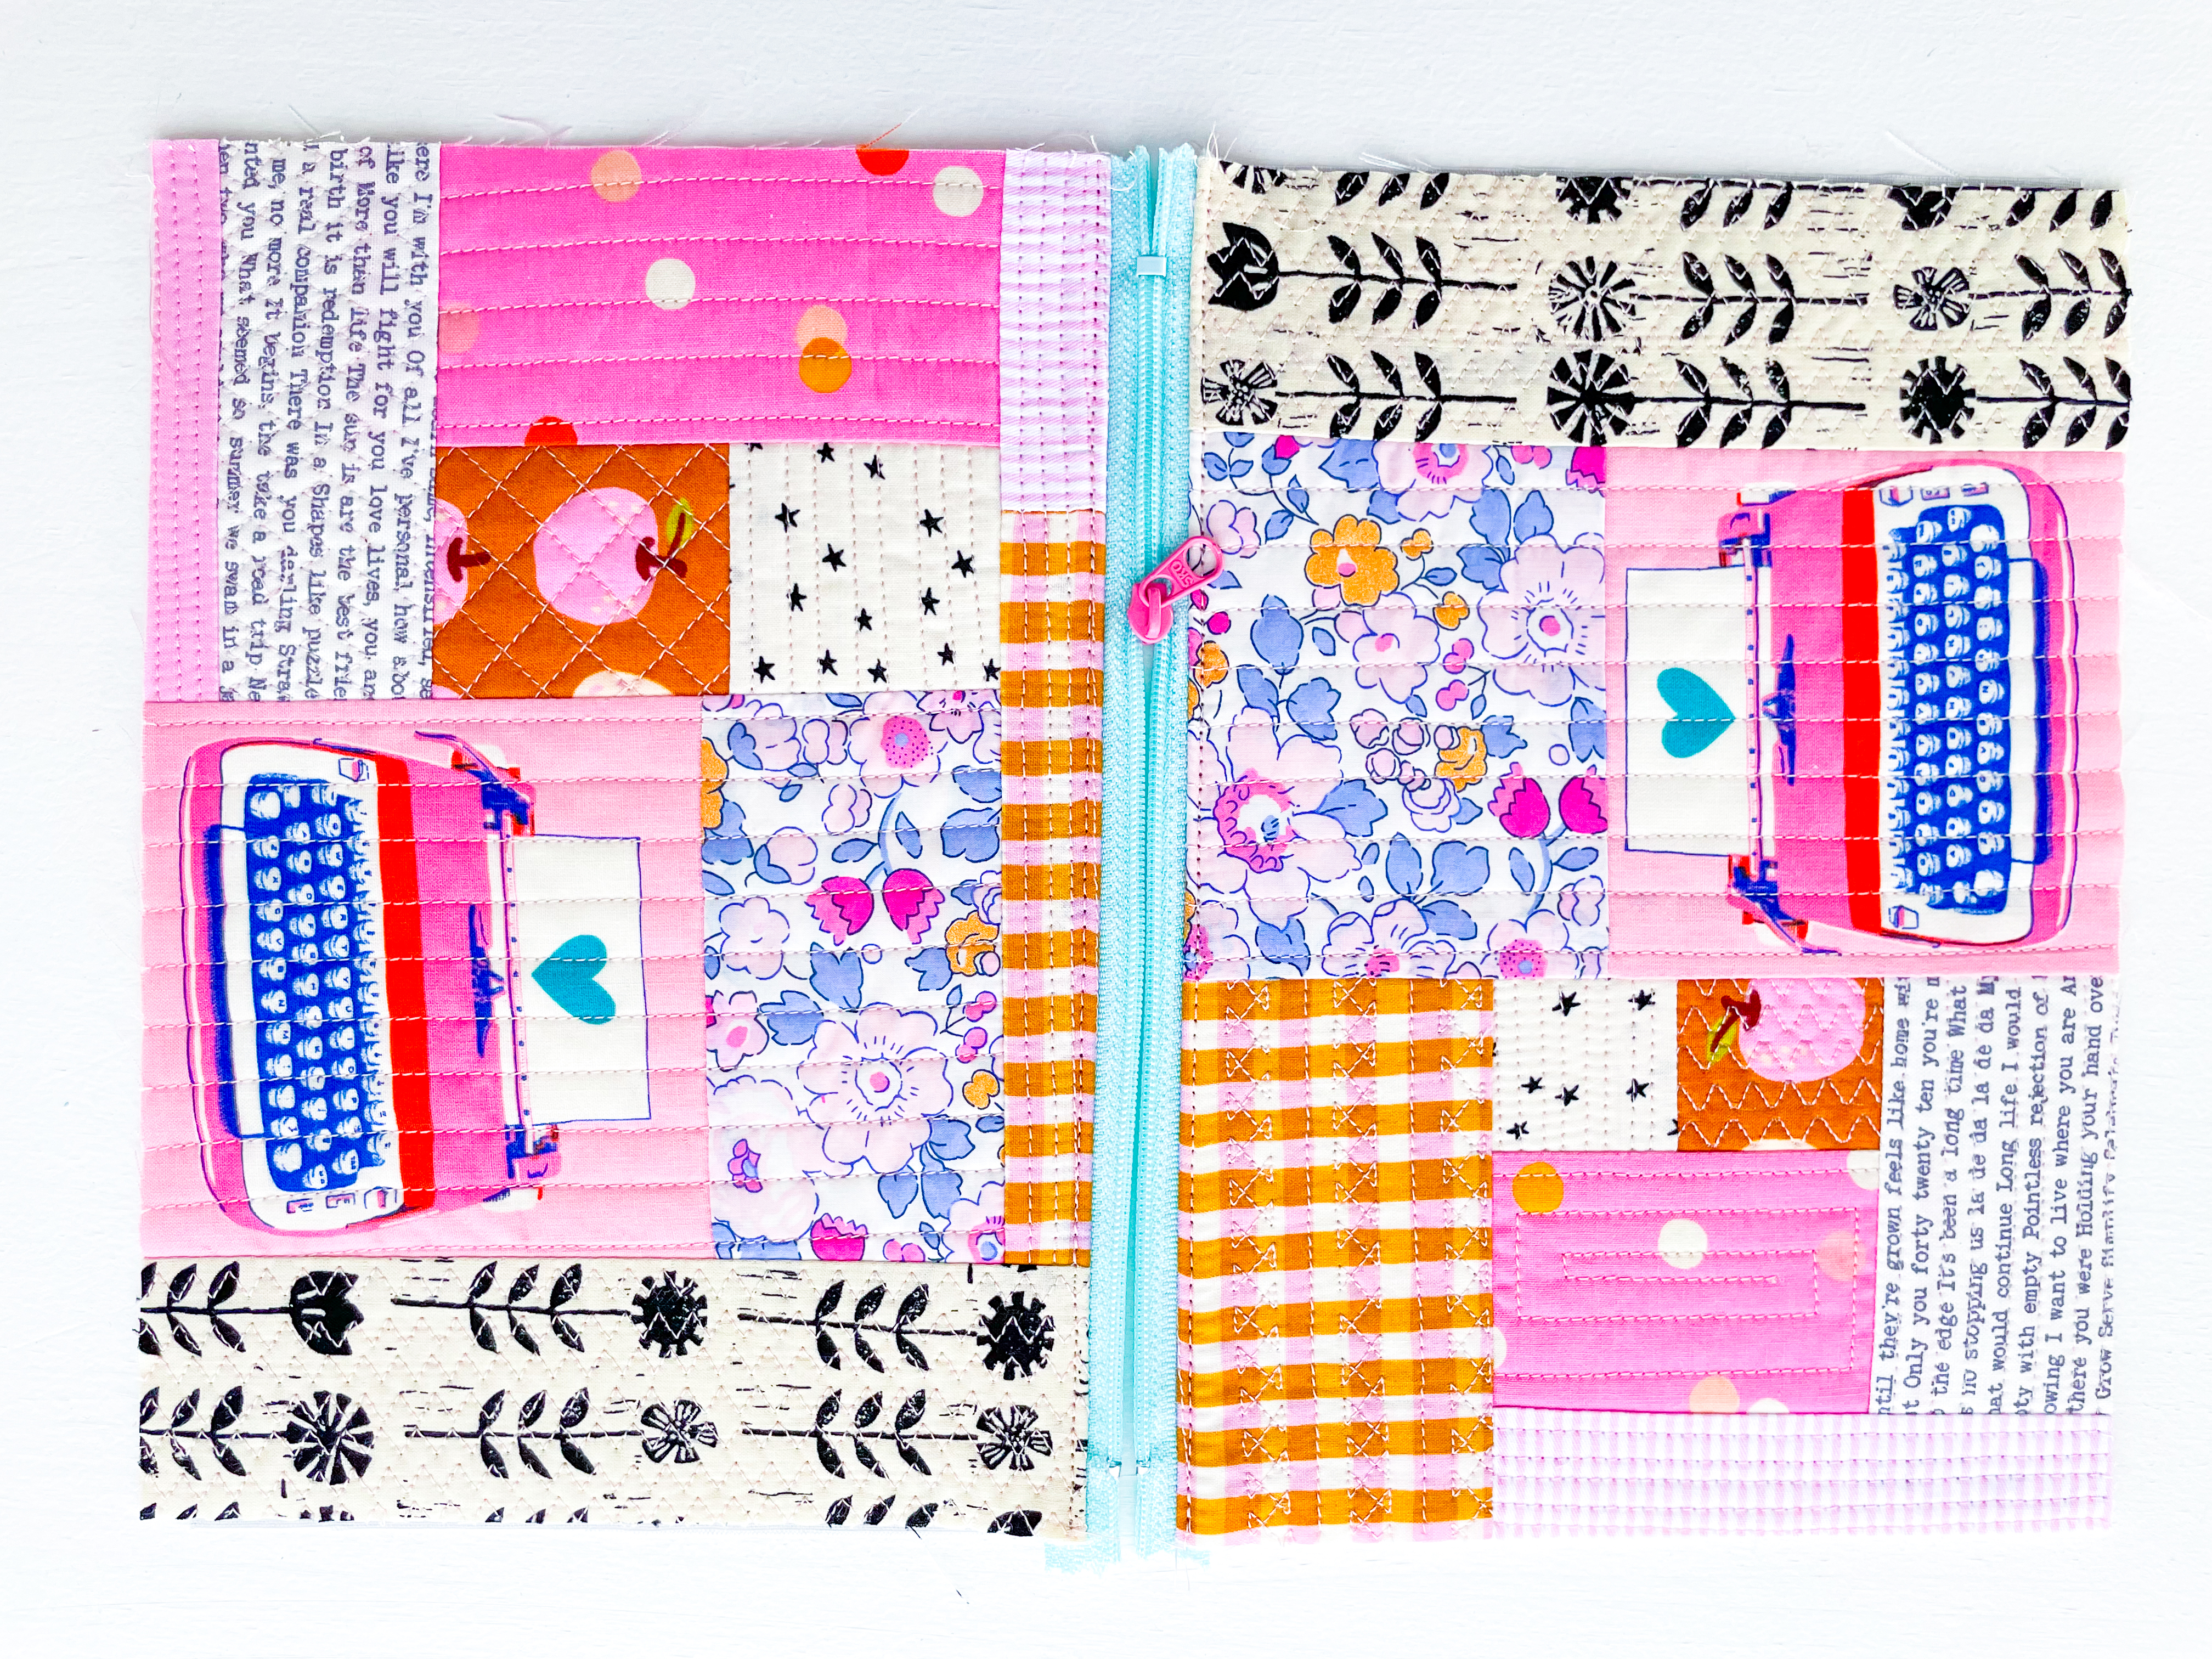
This is exactly what I did with the RSS Typewriter print and the Liberty Betsy print in my panel. Simply sew the small print to a coordinating piece, the panel, press, and quilt it just like any other scrap.
Not only does this let you use your favorite prints, but it also adds even more interest and personality to your quilt-as-you-go panel. You can do this anywhere you like.
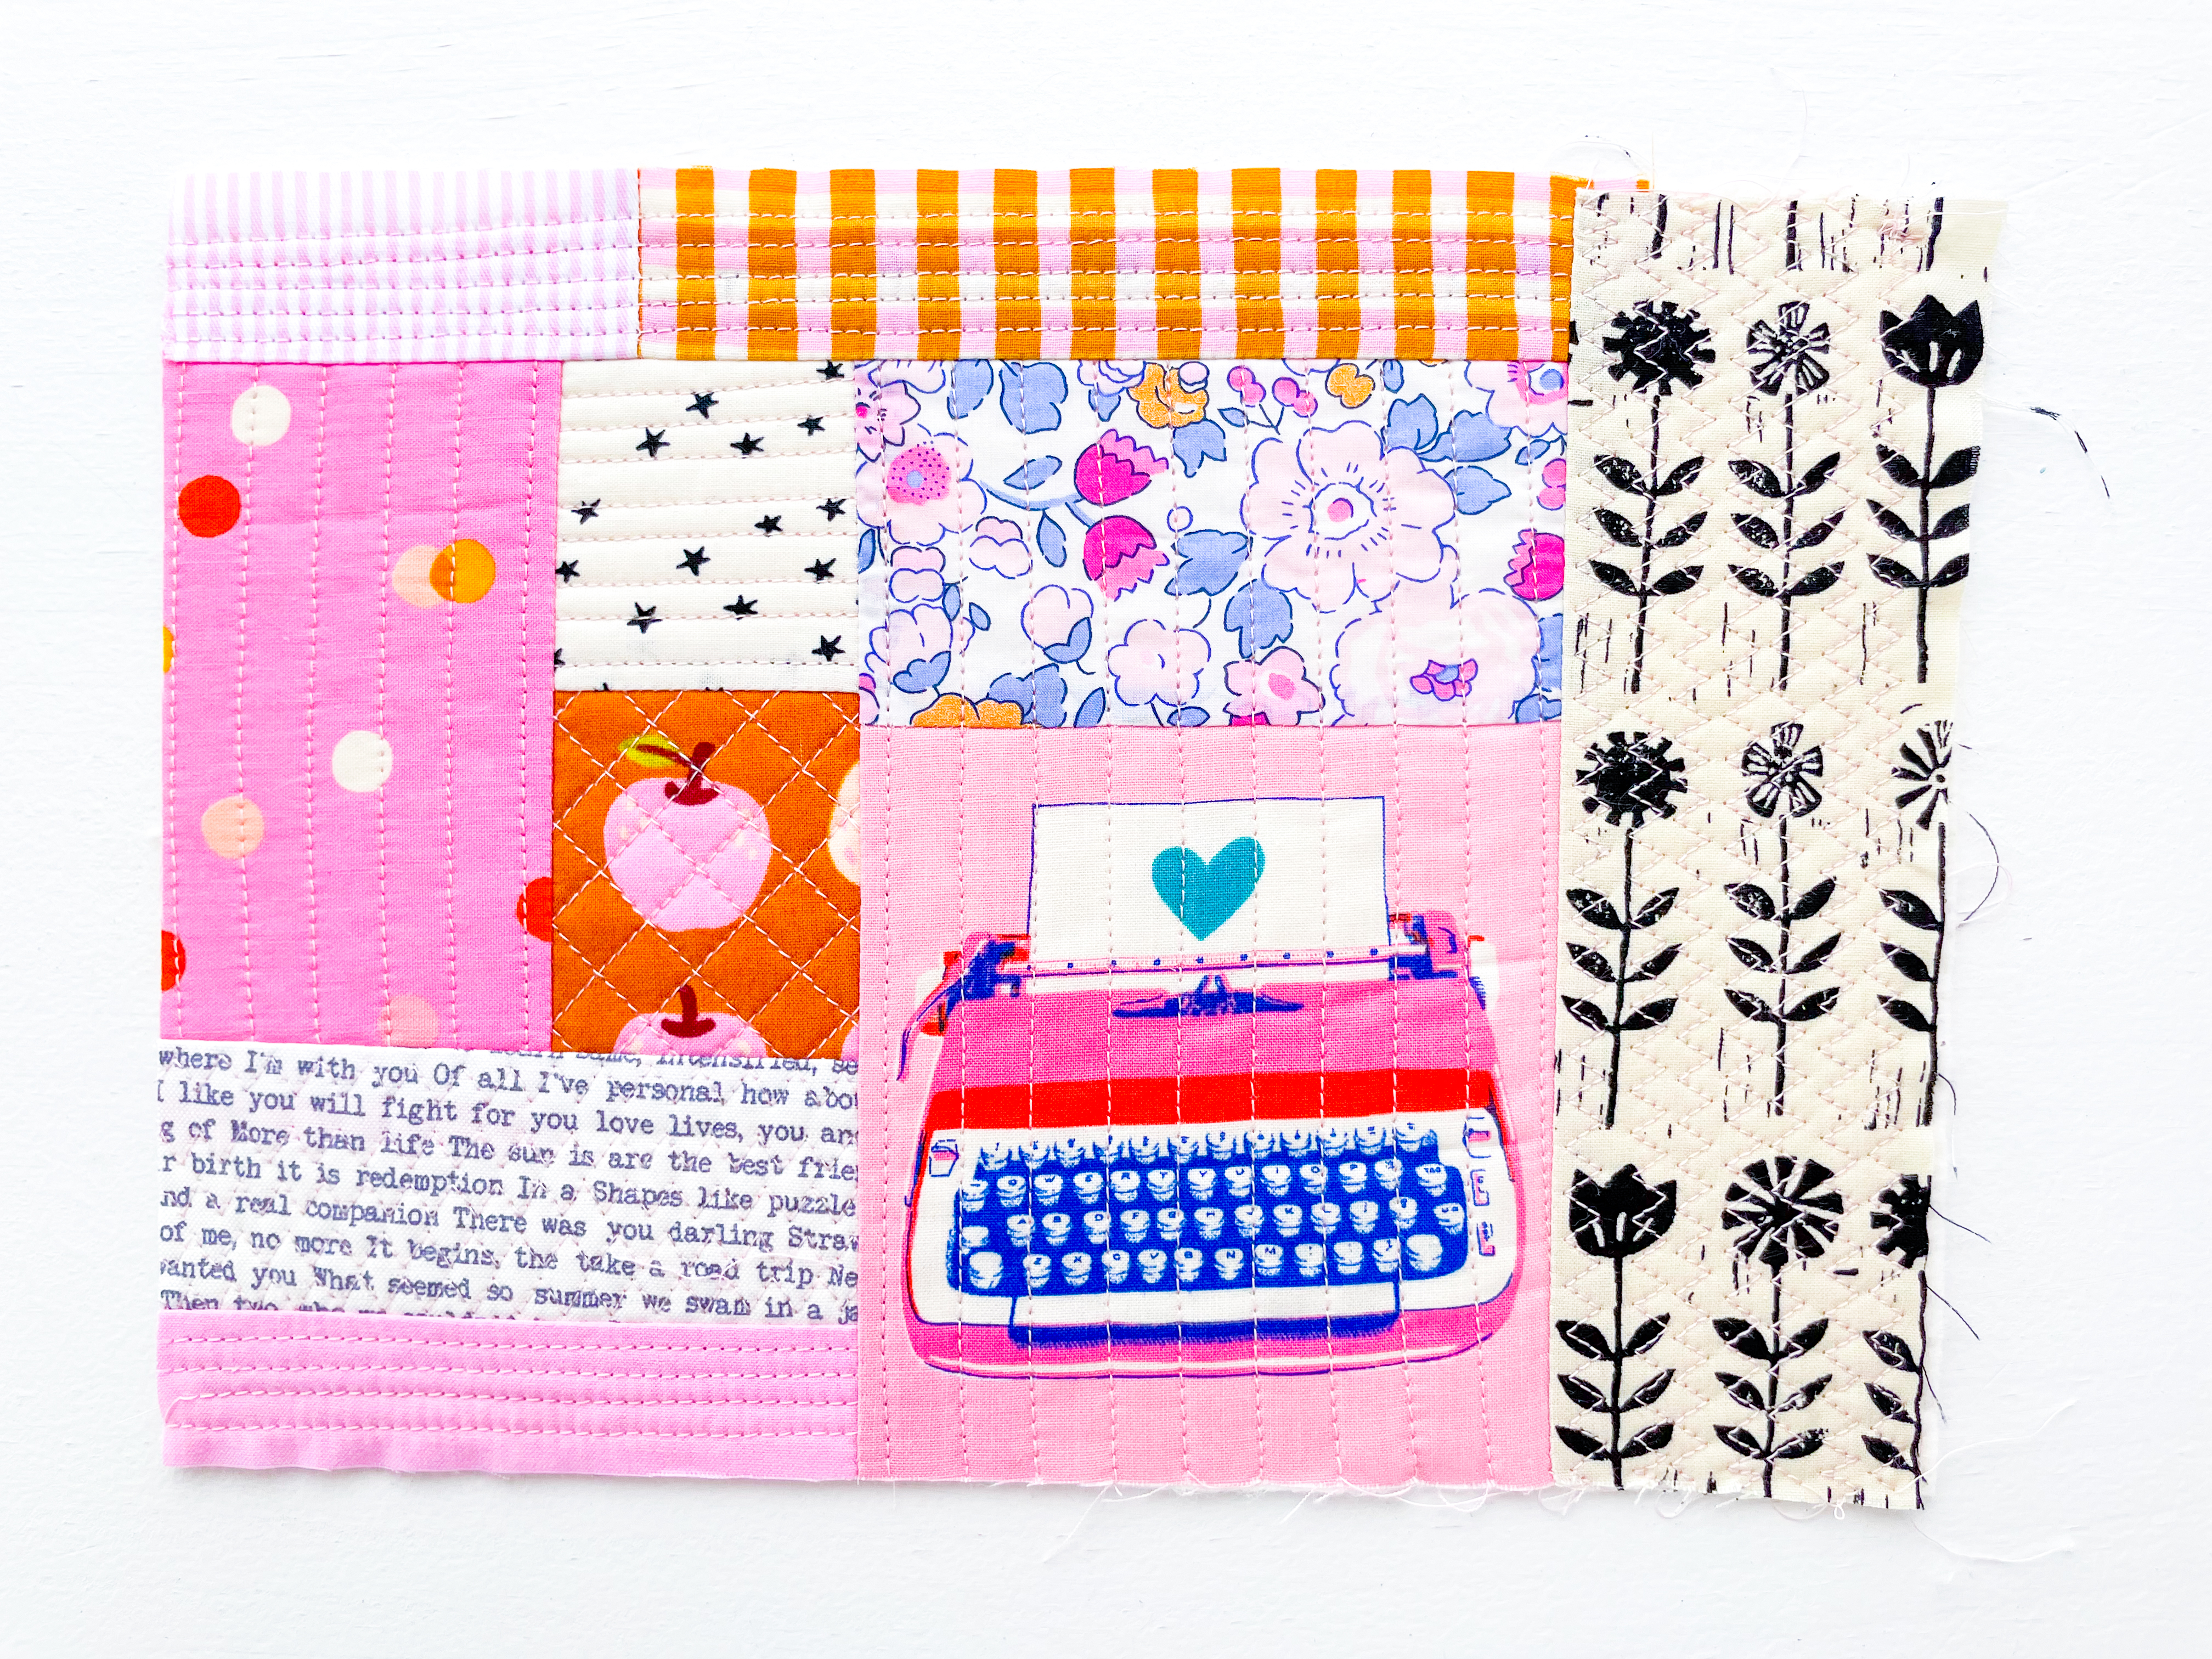
STEP 11: Keep Adding Fabric
Keep adding pieces of fabric in the same manner as before, until all your batting is covered. Then your panel is complete.
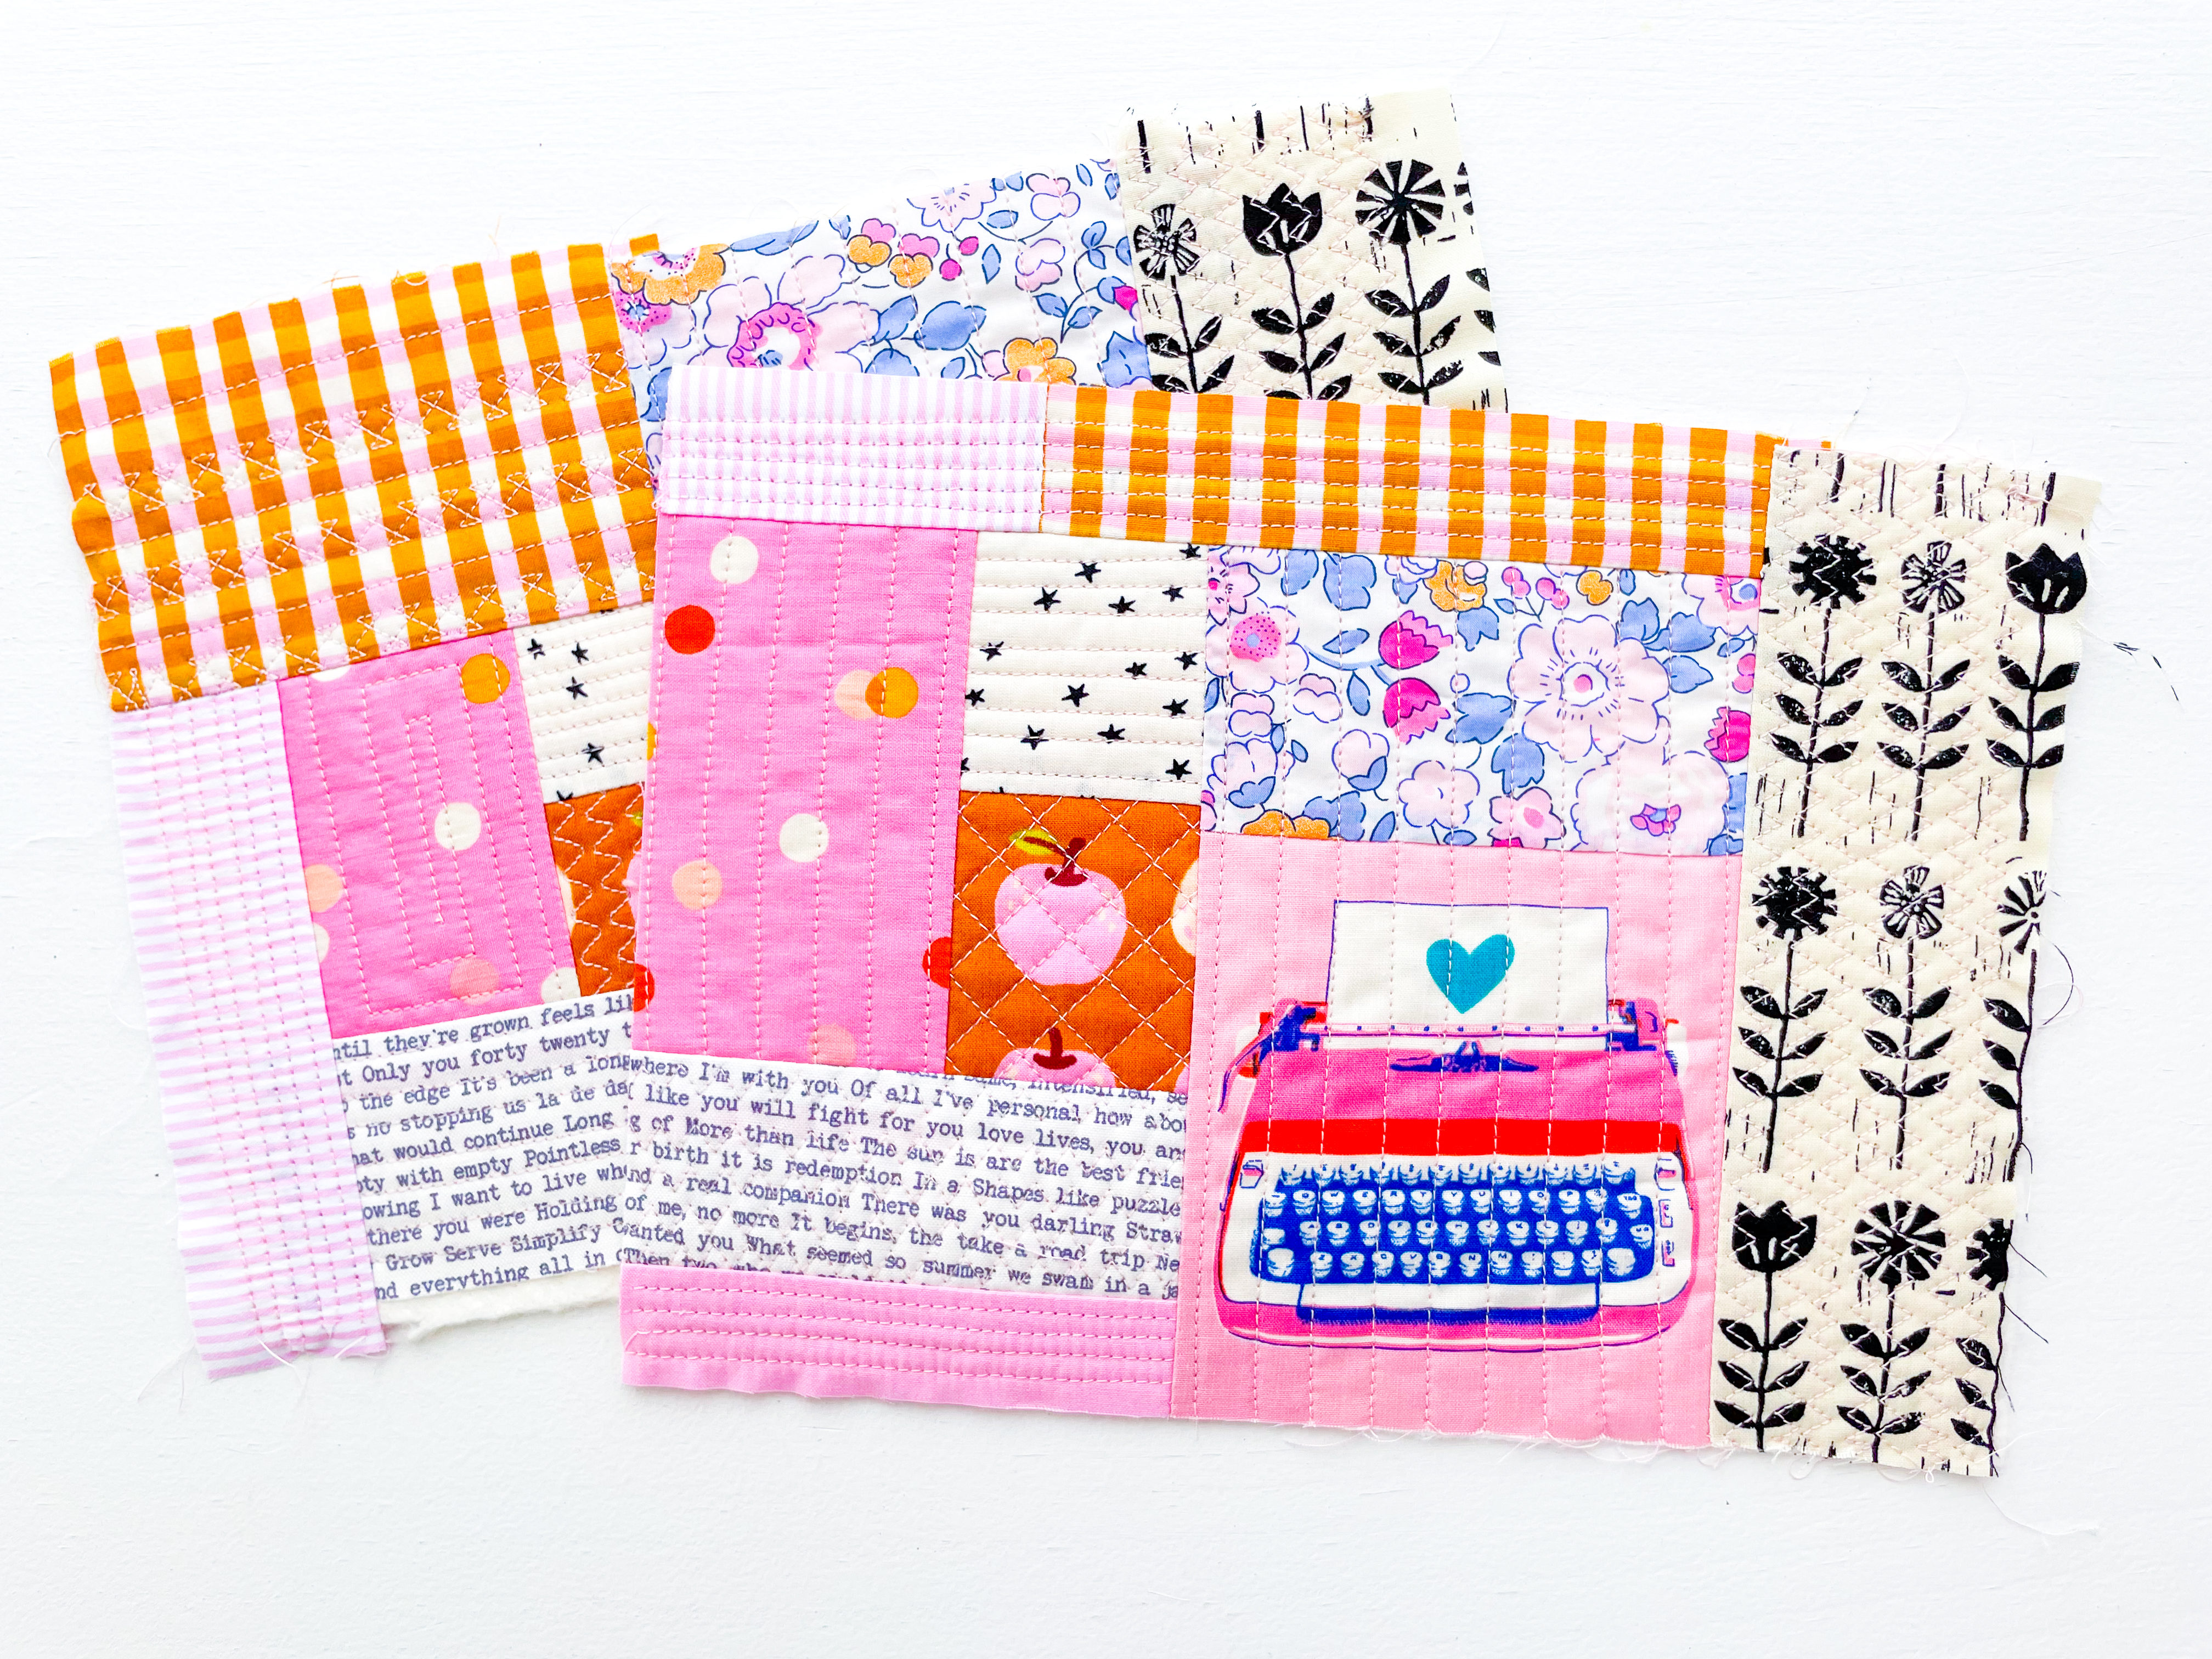
STEP 12: Make a Second Panel
If you’re also making the FREE zipper pouch pattern you will need to make another QAYG panel the same size as the first one, so you have 2 completed panels.
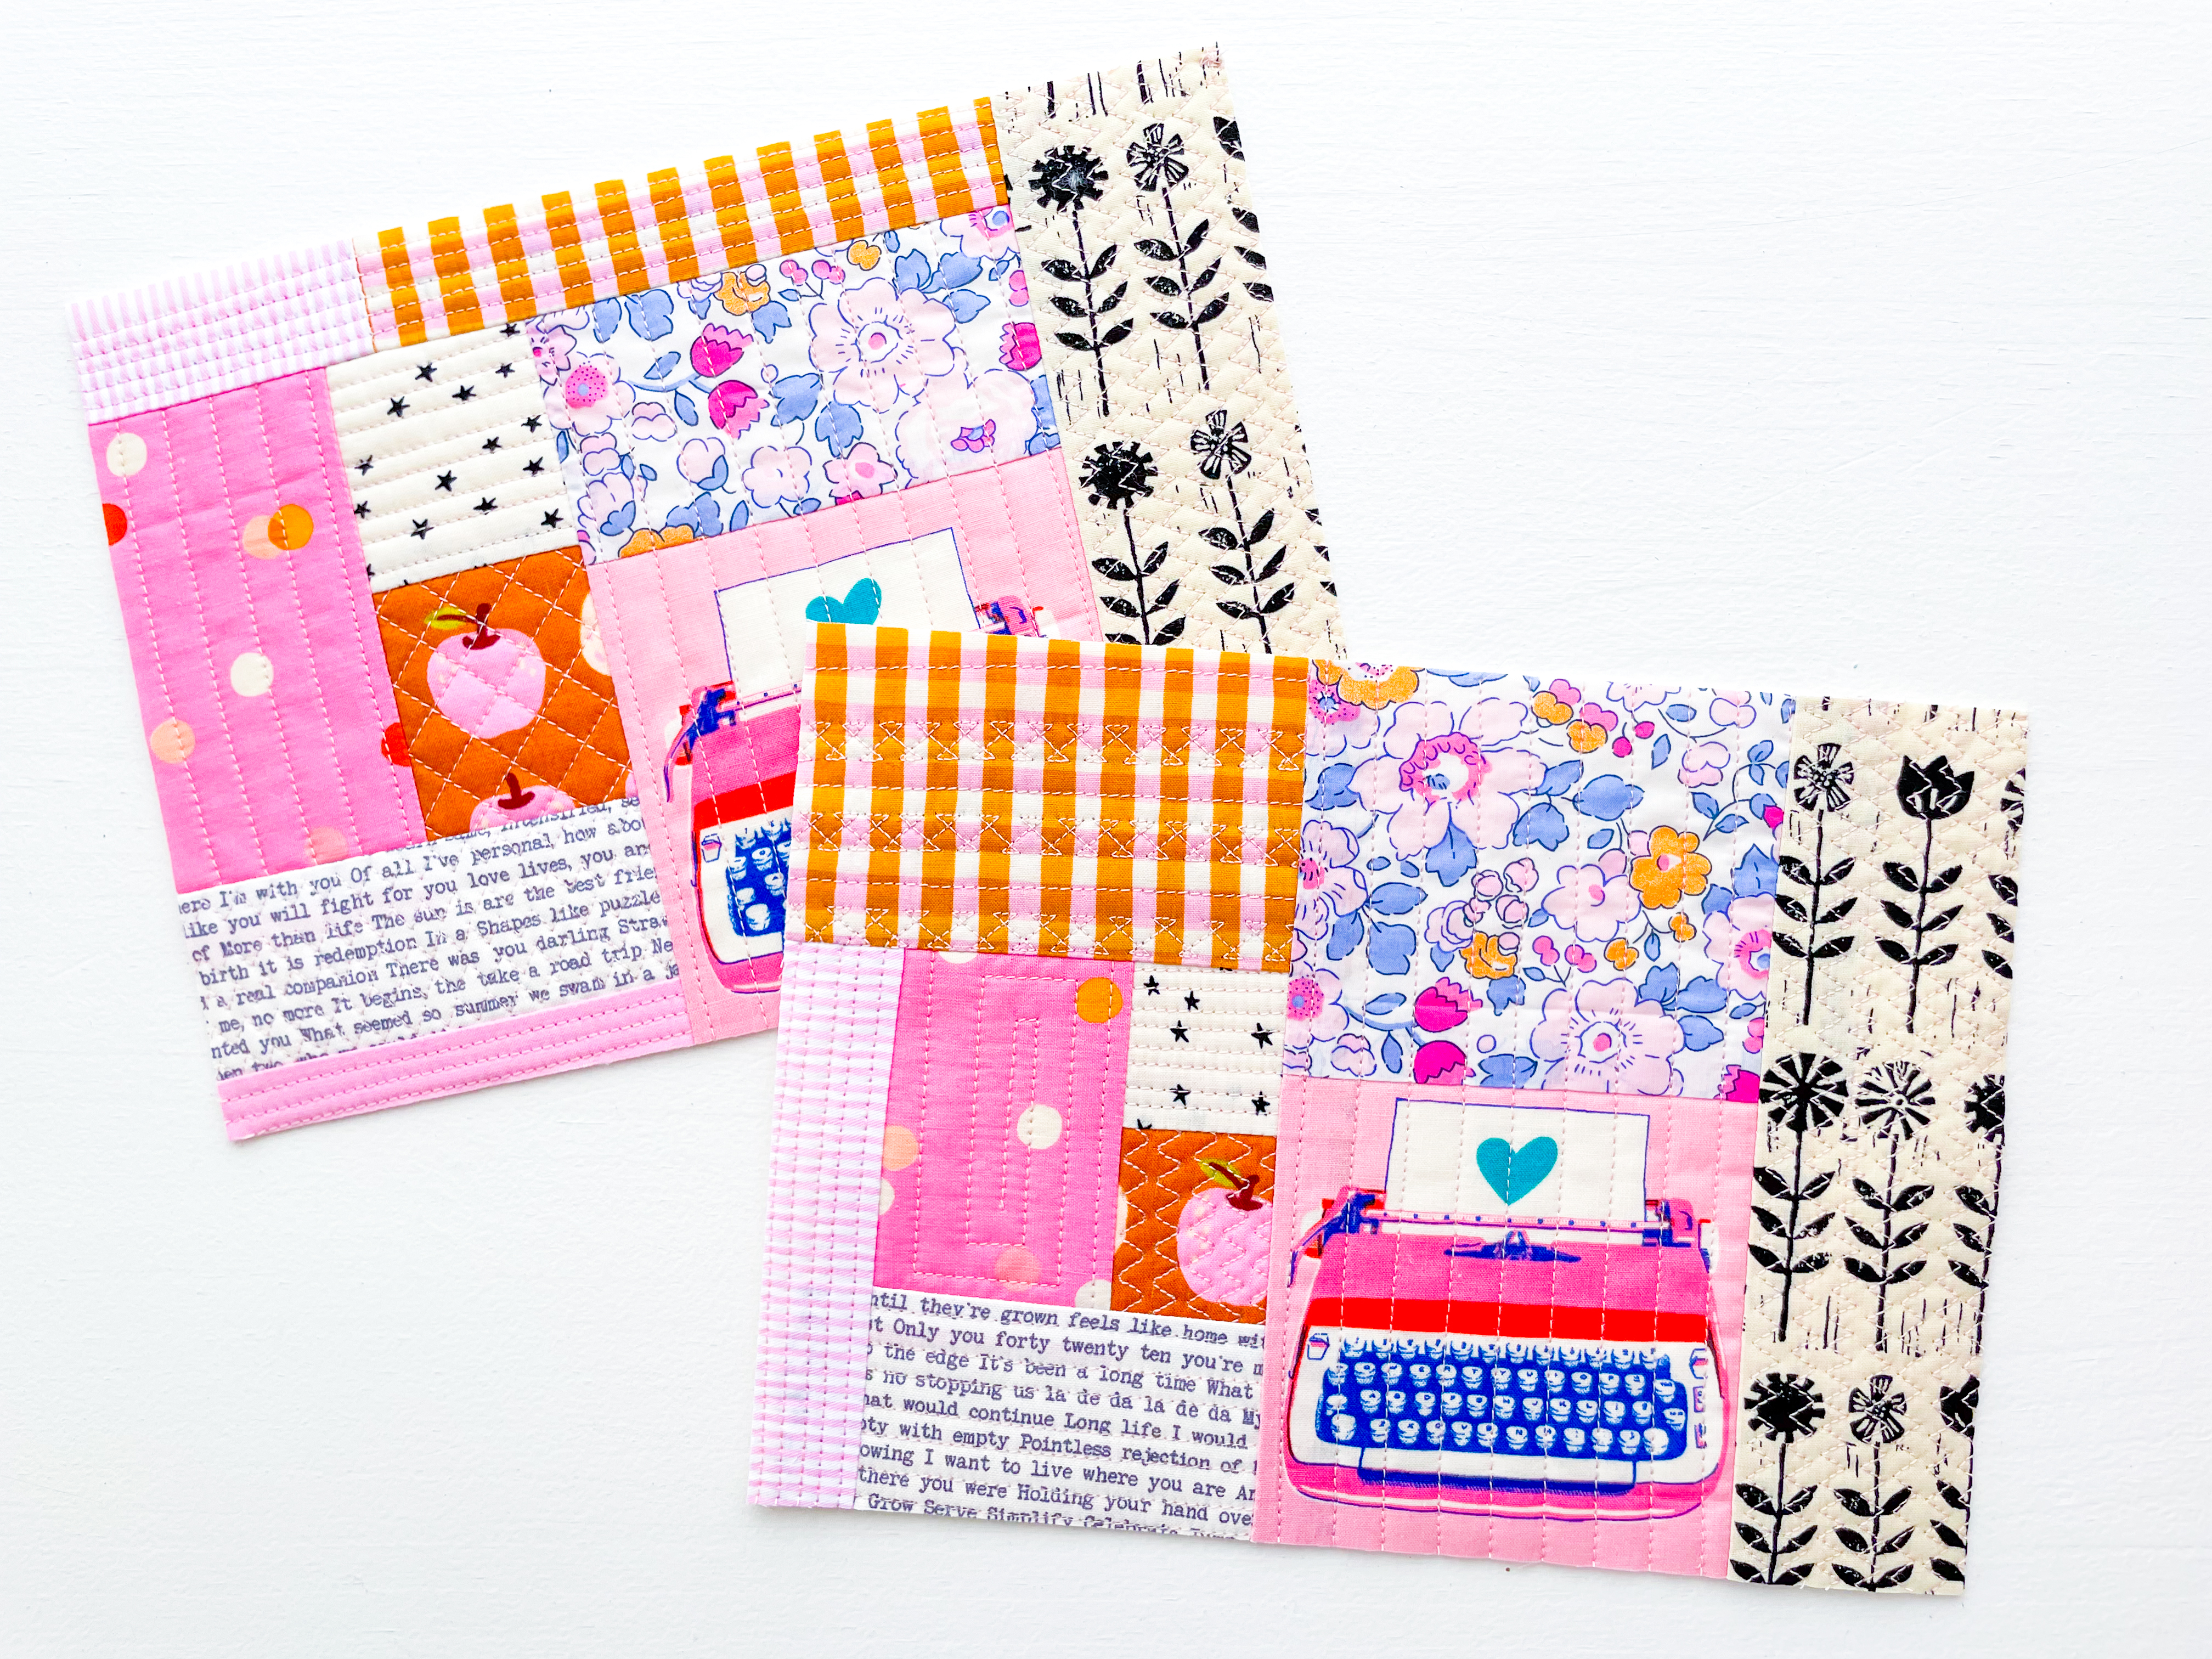
Step 13: Square Up and Trim
Square up and trim your patchwork panels so they measures 9” x 6½”.
Turning Your QAYG Panels into a Zipper Pouch
Once your quilt-as-you-go panels are complete, it’s time to turn them into a zipper pouch. Here’s what you’ll need for this project:
Materials:
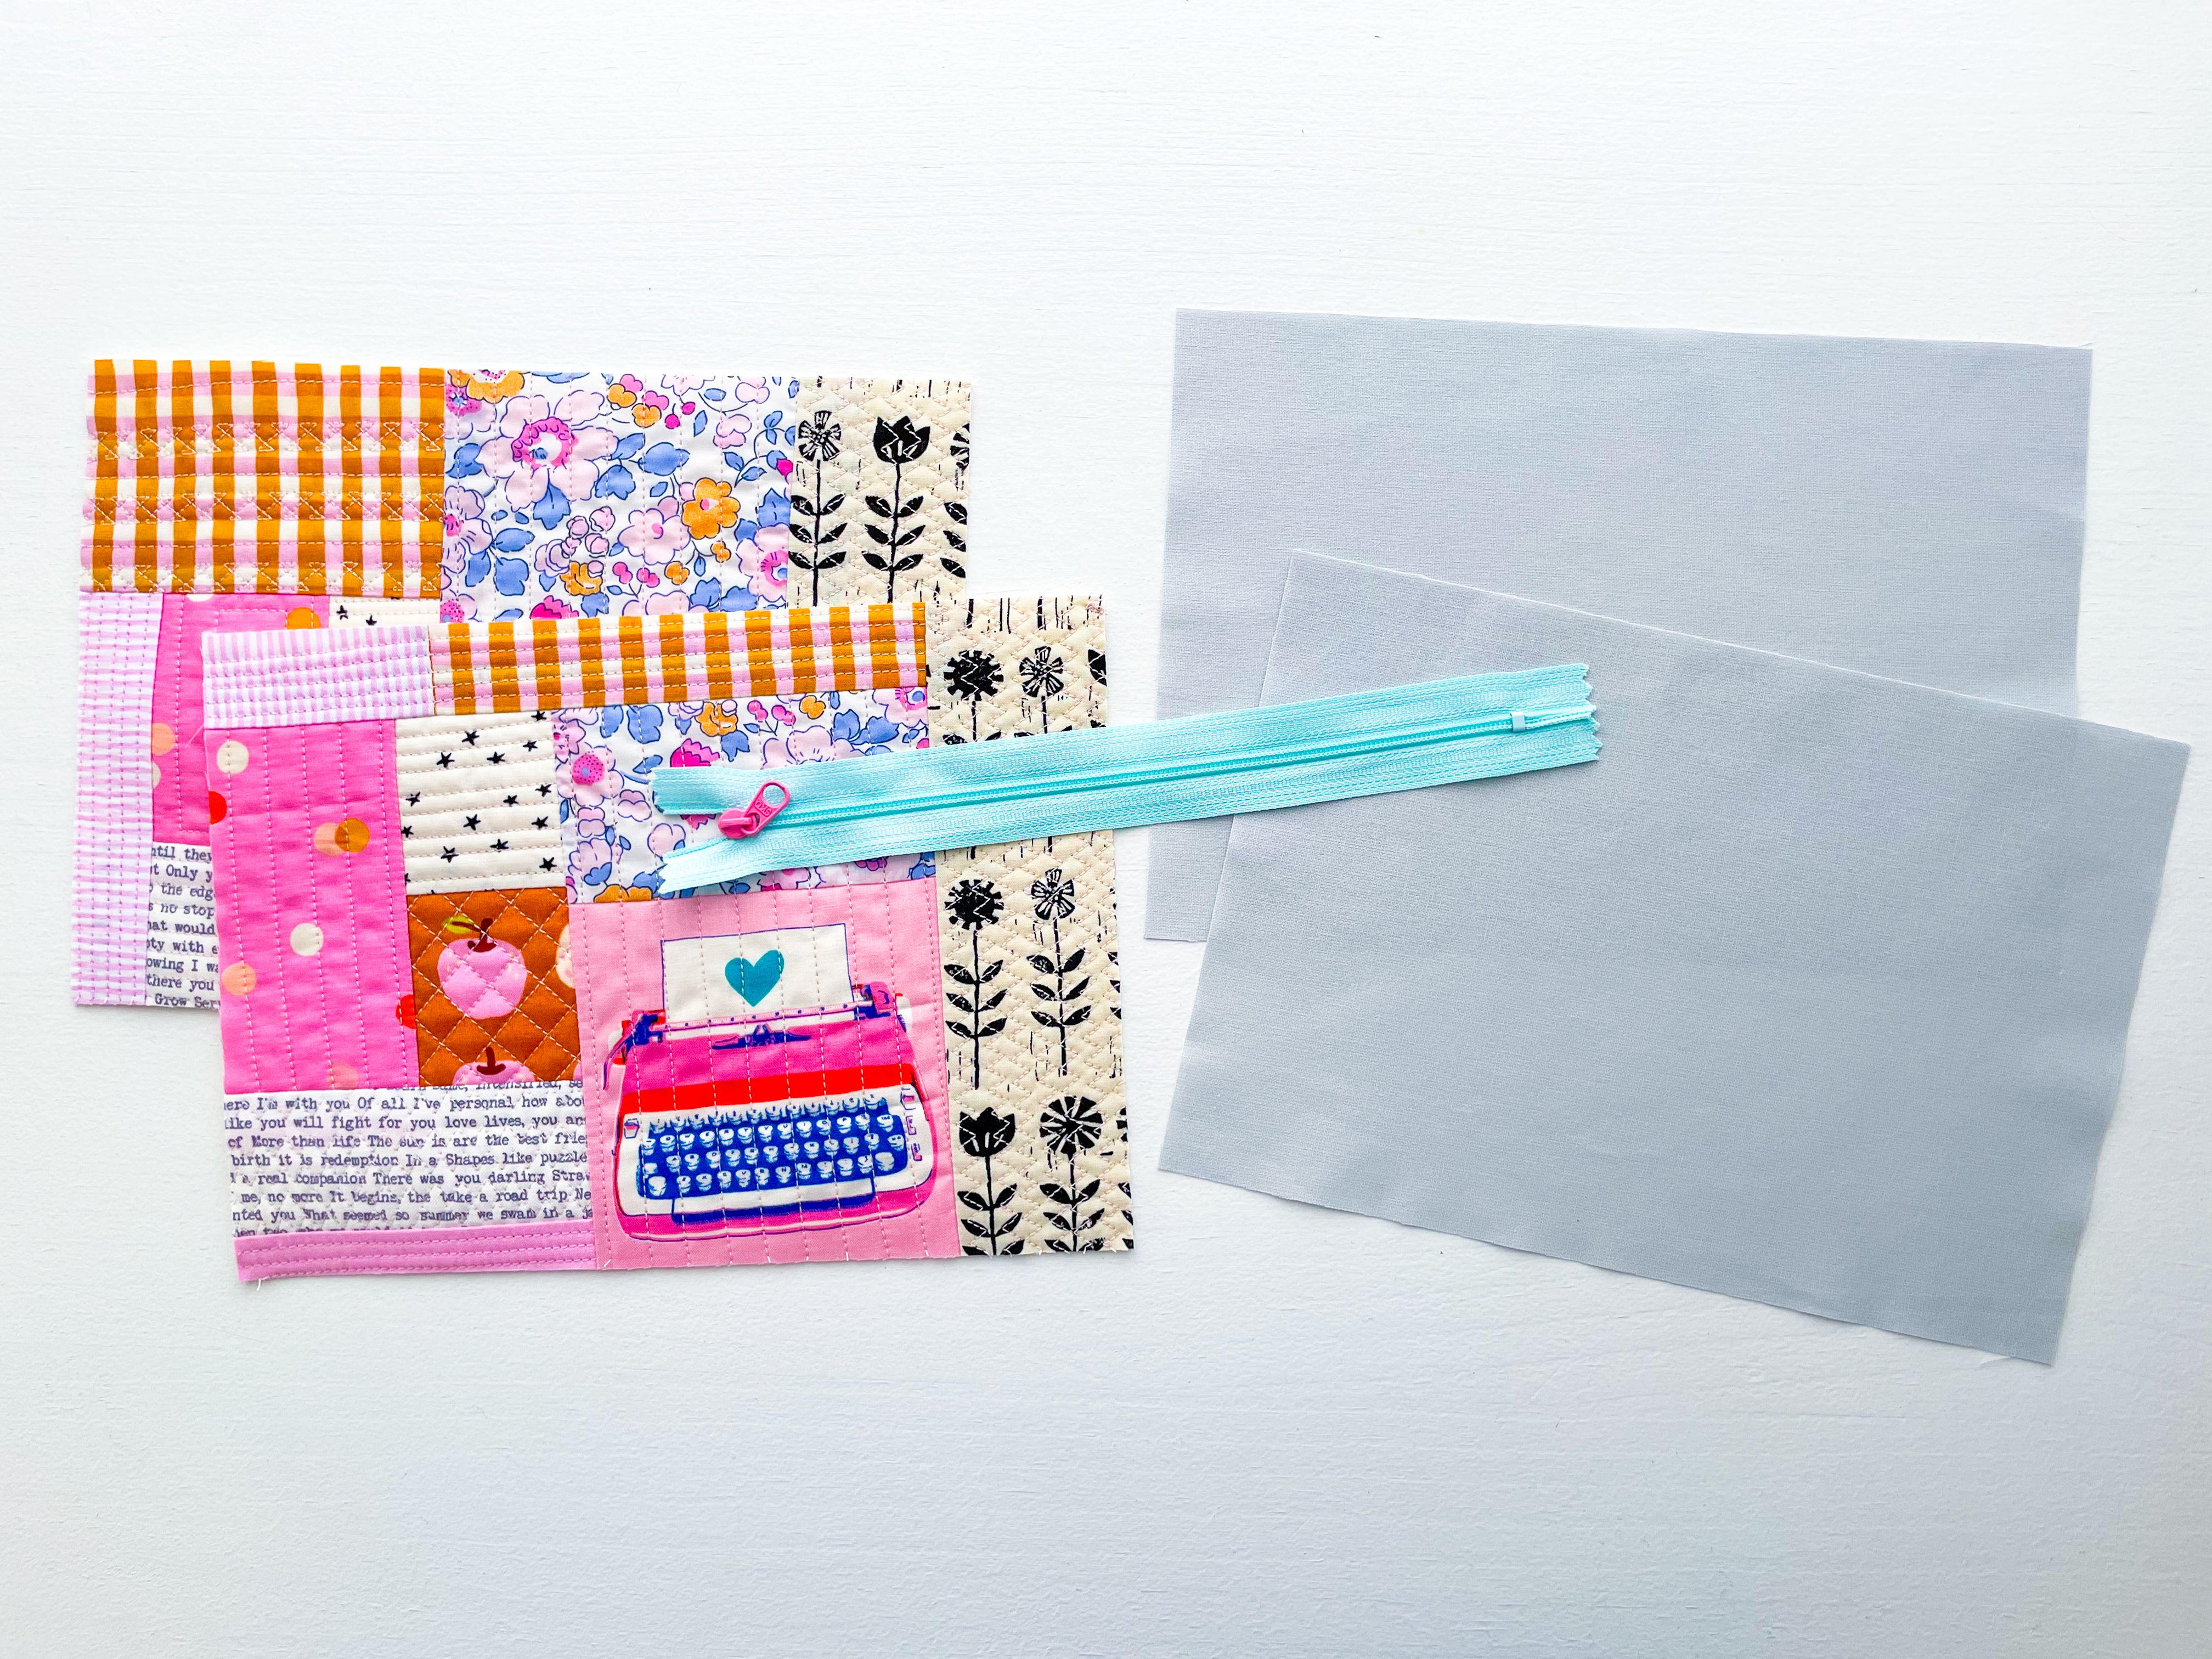
- 2 quilt-as-you-go panels for the exterior, trimmed to 9″ x 6½″
- 2 lining panels, 9″ x 6¼″
- 1 zipper, 8″ long (important: make sure it’s 8″ that means the teeth measure 8” and the tape extends beyond that)
- A zipper foot
- Sewline glue pen
- Binding clips
Zipper Pouch Instructions
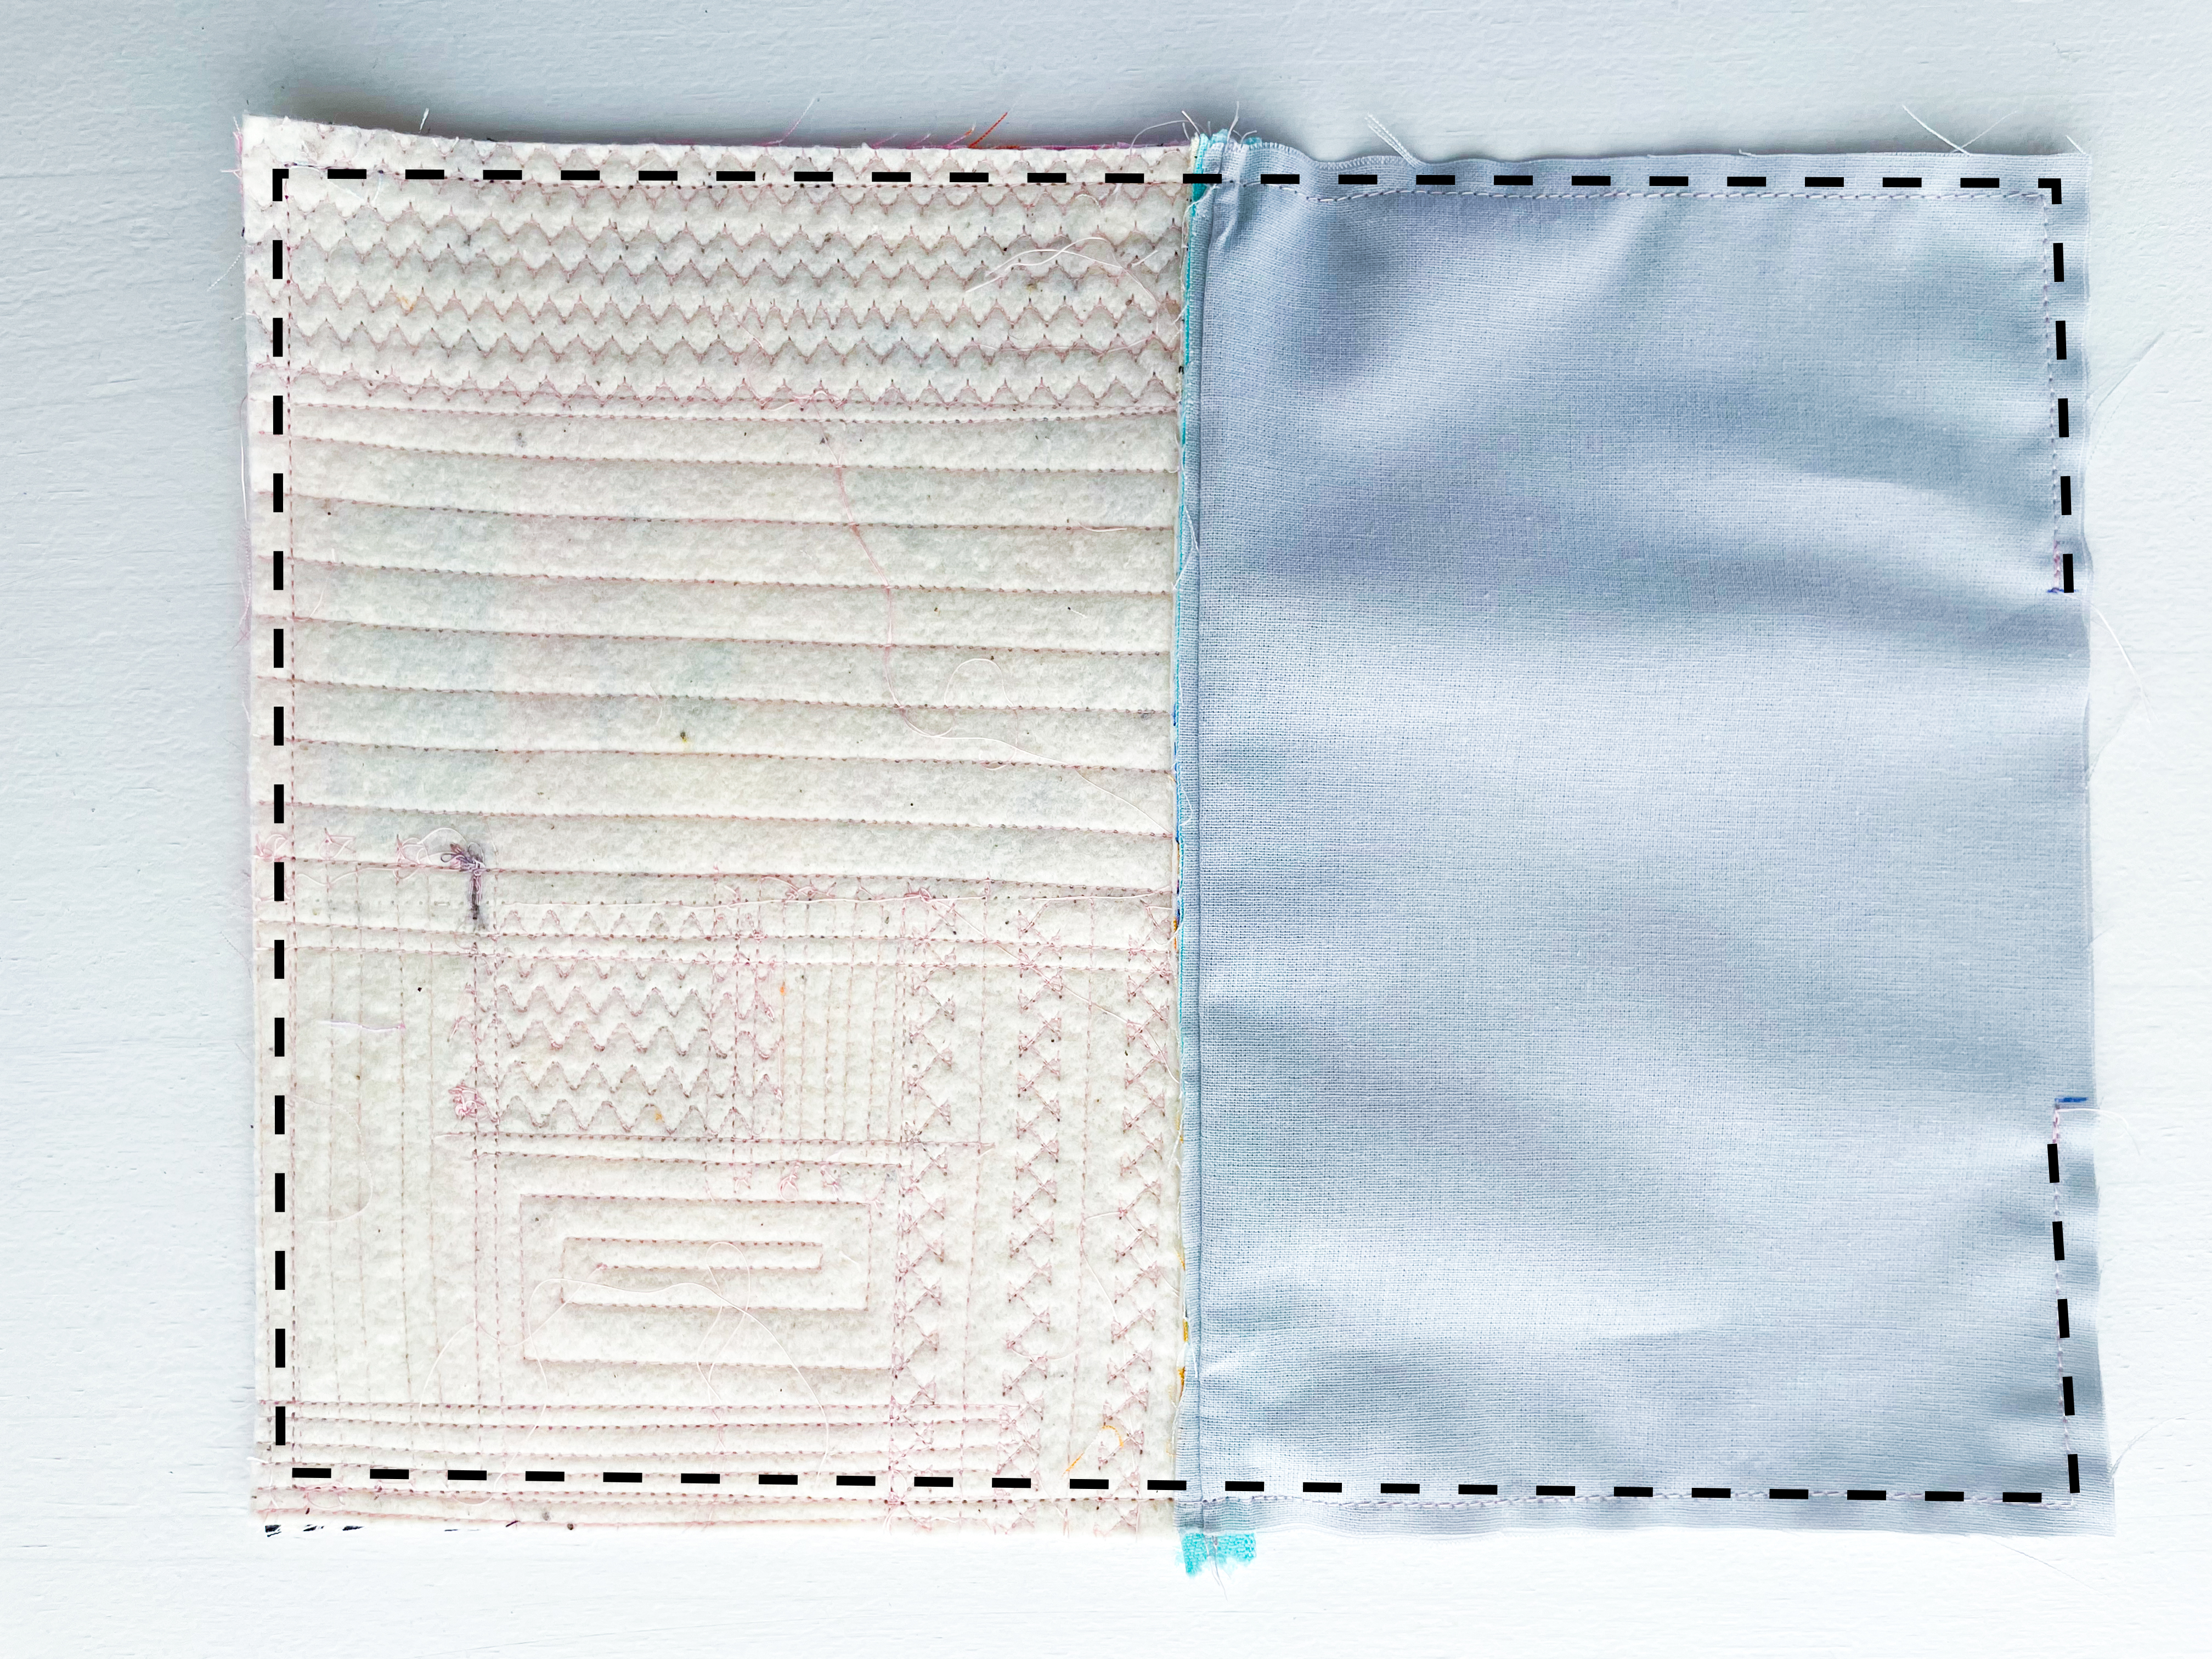
Step 1: Layer for Zipper Insertion
-Place your first lining panel right side up in front of you.
-Lay your zipper along the top edge, right side up. I like to use a little fabric glue to hold it in place — it keeps everything from shifting while you sew.
-Take your first exterior panel and place it right side down on top of the zipper.
-Make sure all edges are aligned along the top. You can also use a bit of glue to hold the exterior panel to the zipper.
Now clip everything in place.

Step 2: Sew the Zipper in Place
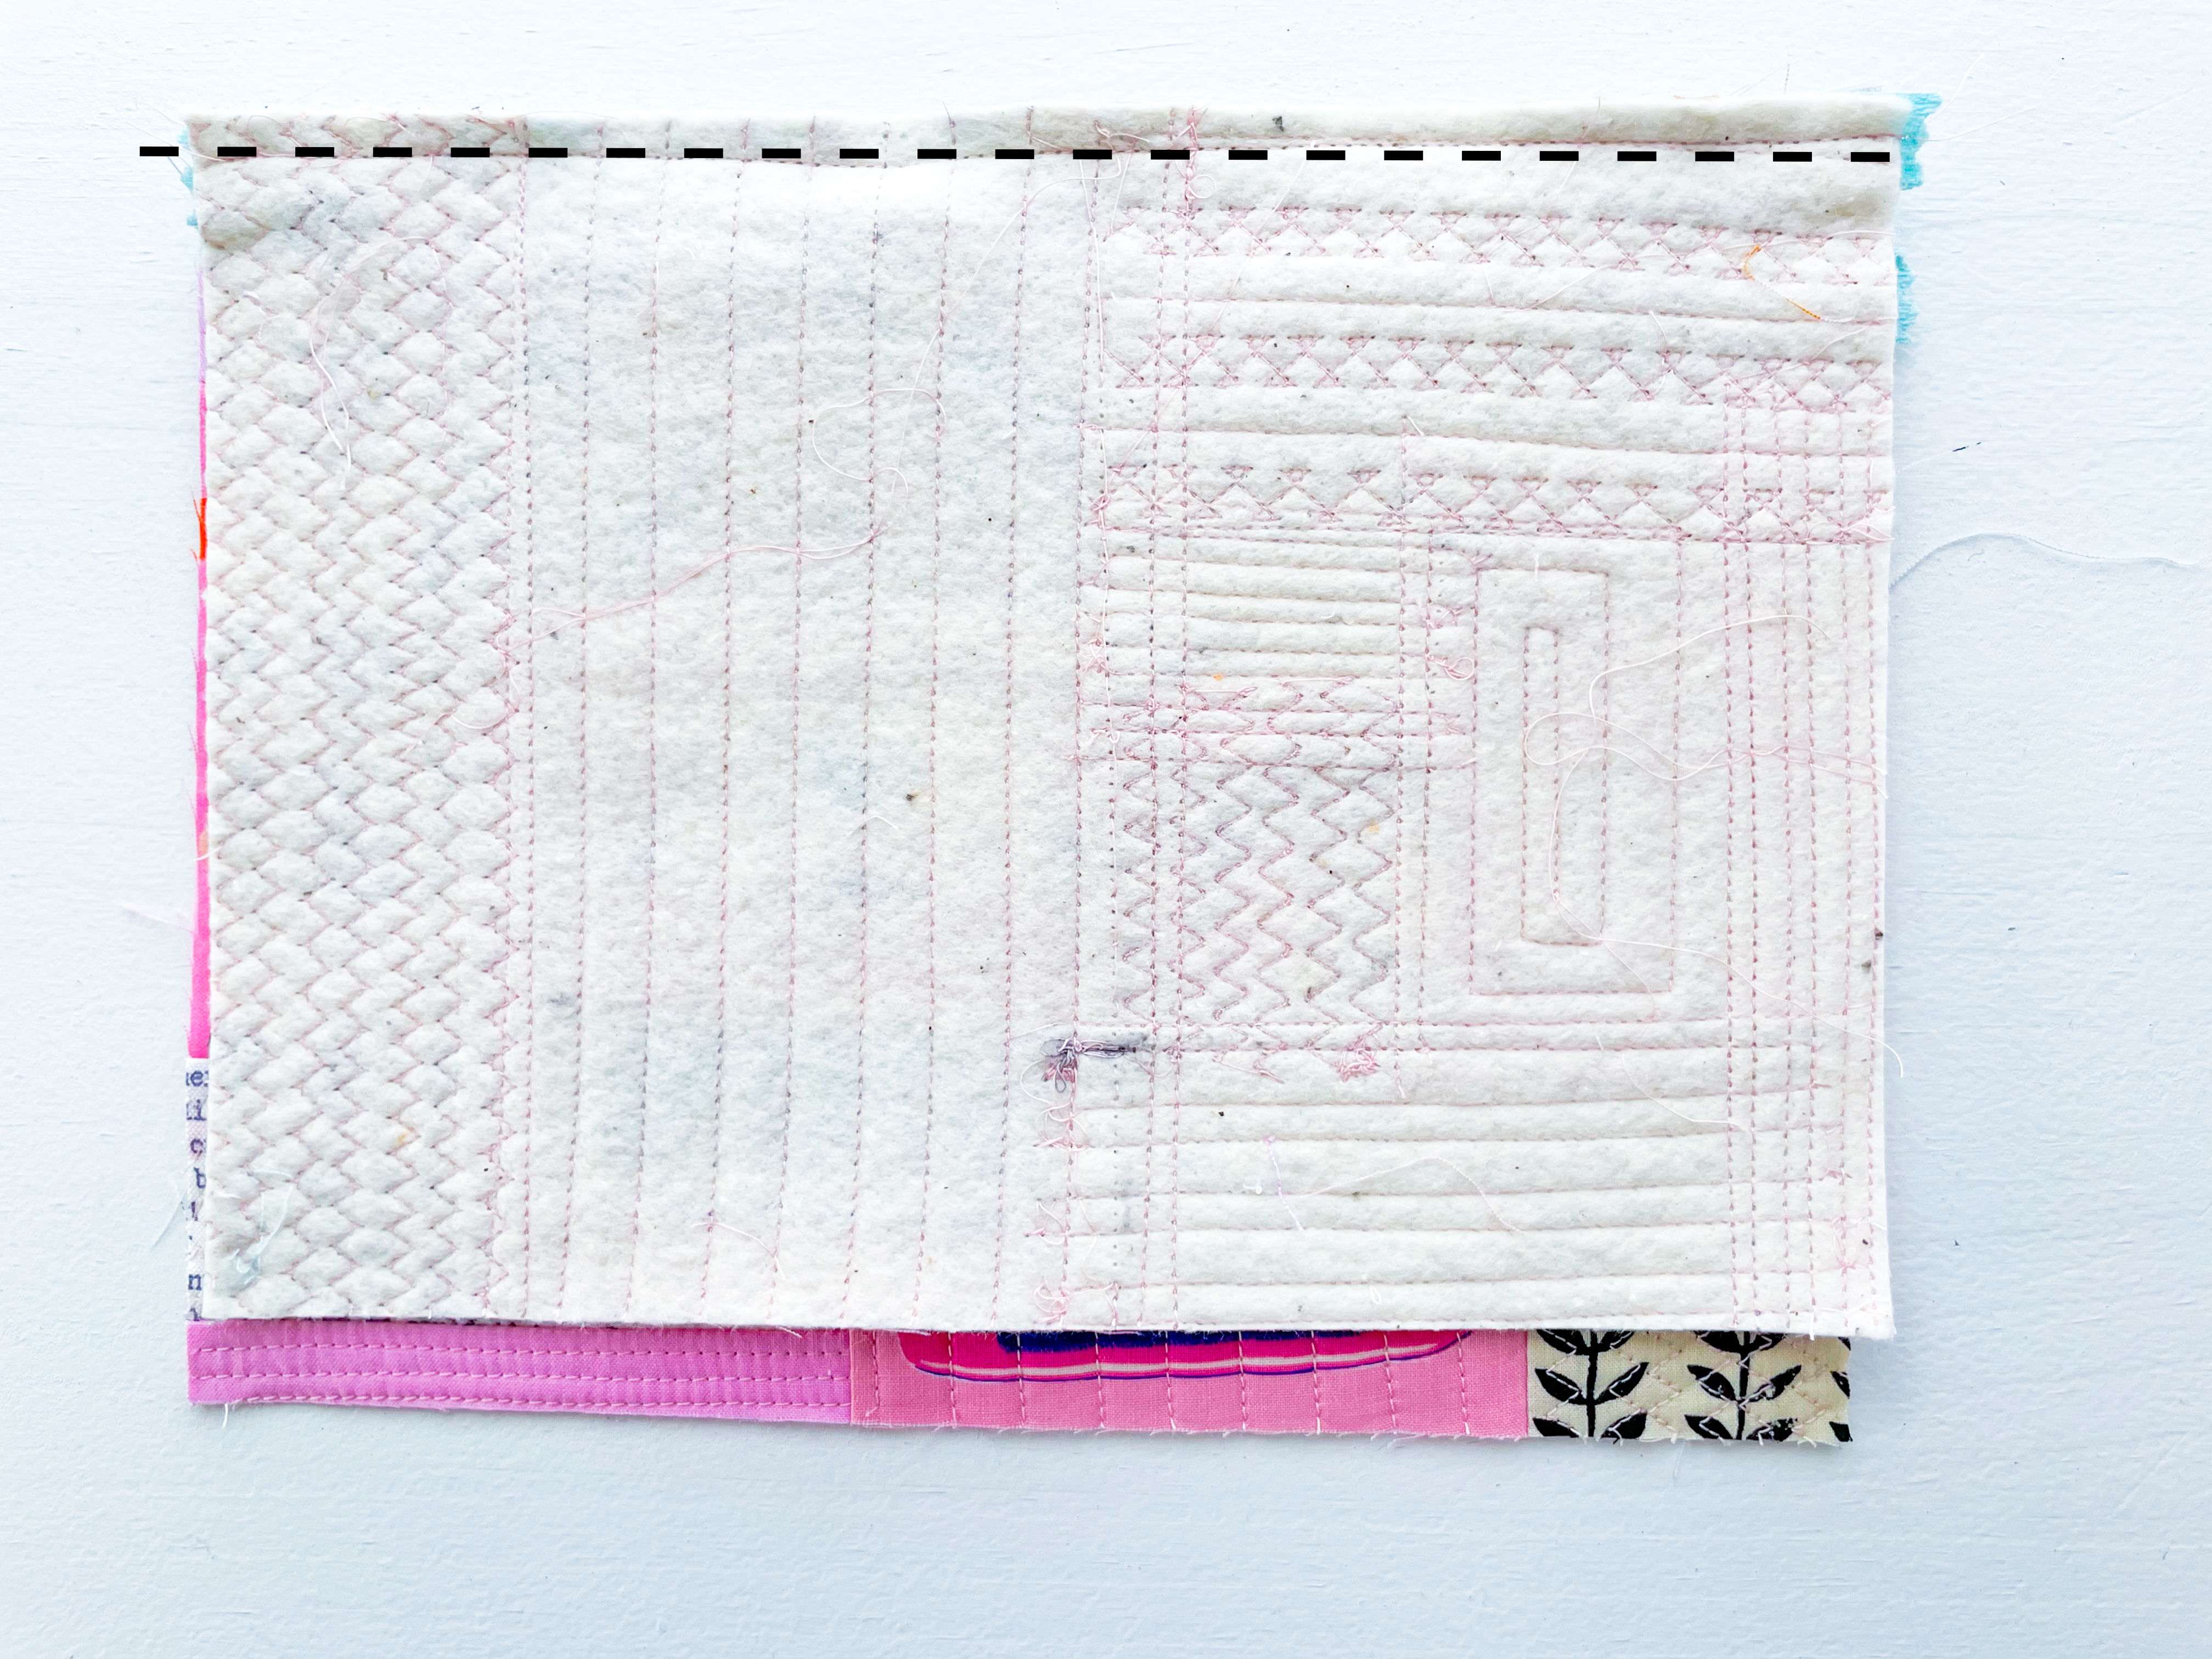
Using a zipper foot, sew along the top edge of the zipper with a ¼″ seam allowance, stitching through the exterior panel, zipper tape, and lining panel.
When you reach the zipper pull, do the following:
- Leave the needle down in your work.
- Lift the zipper foot and slide the zipper pull just behind the foot.
- Place the zipper foot back down and continue sewing.
Tip: If your layers are thick and difficult to feed, you can increase your stitch length to 3.0 — this makes it much easier to feed through your machine and reduces puckering.
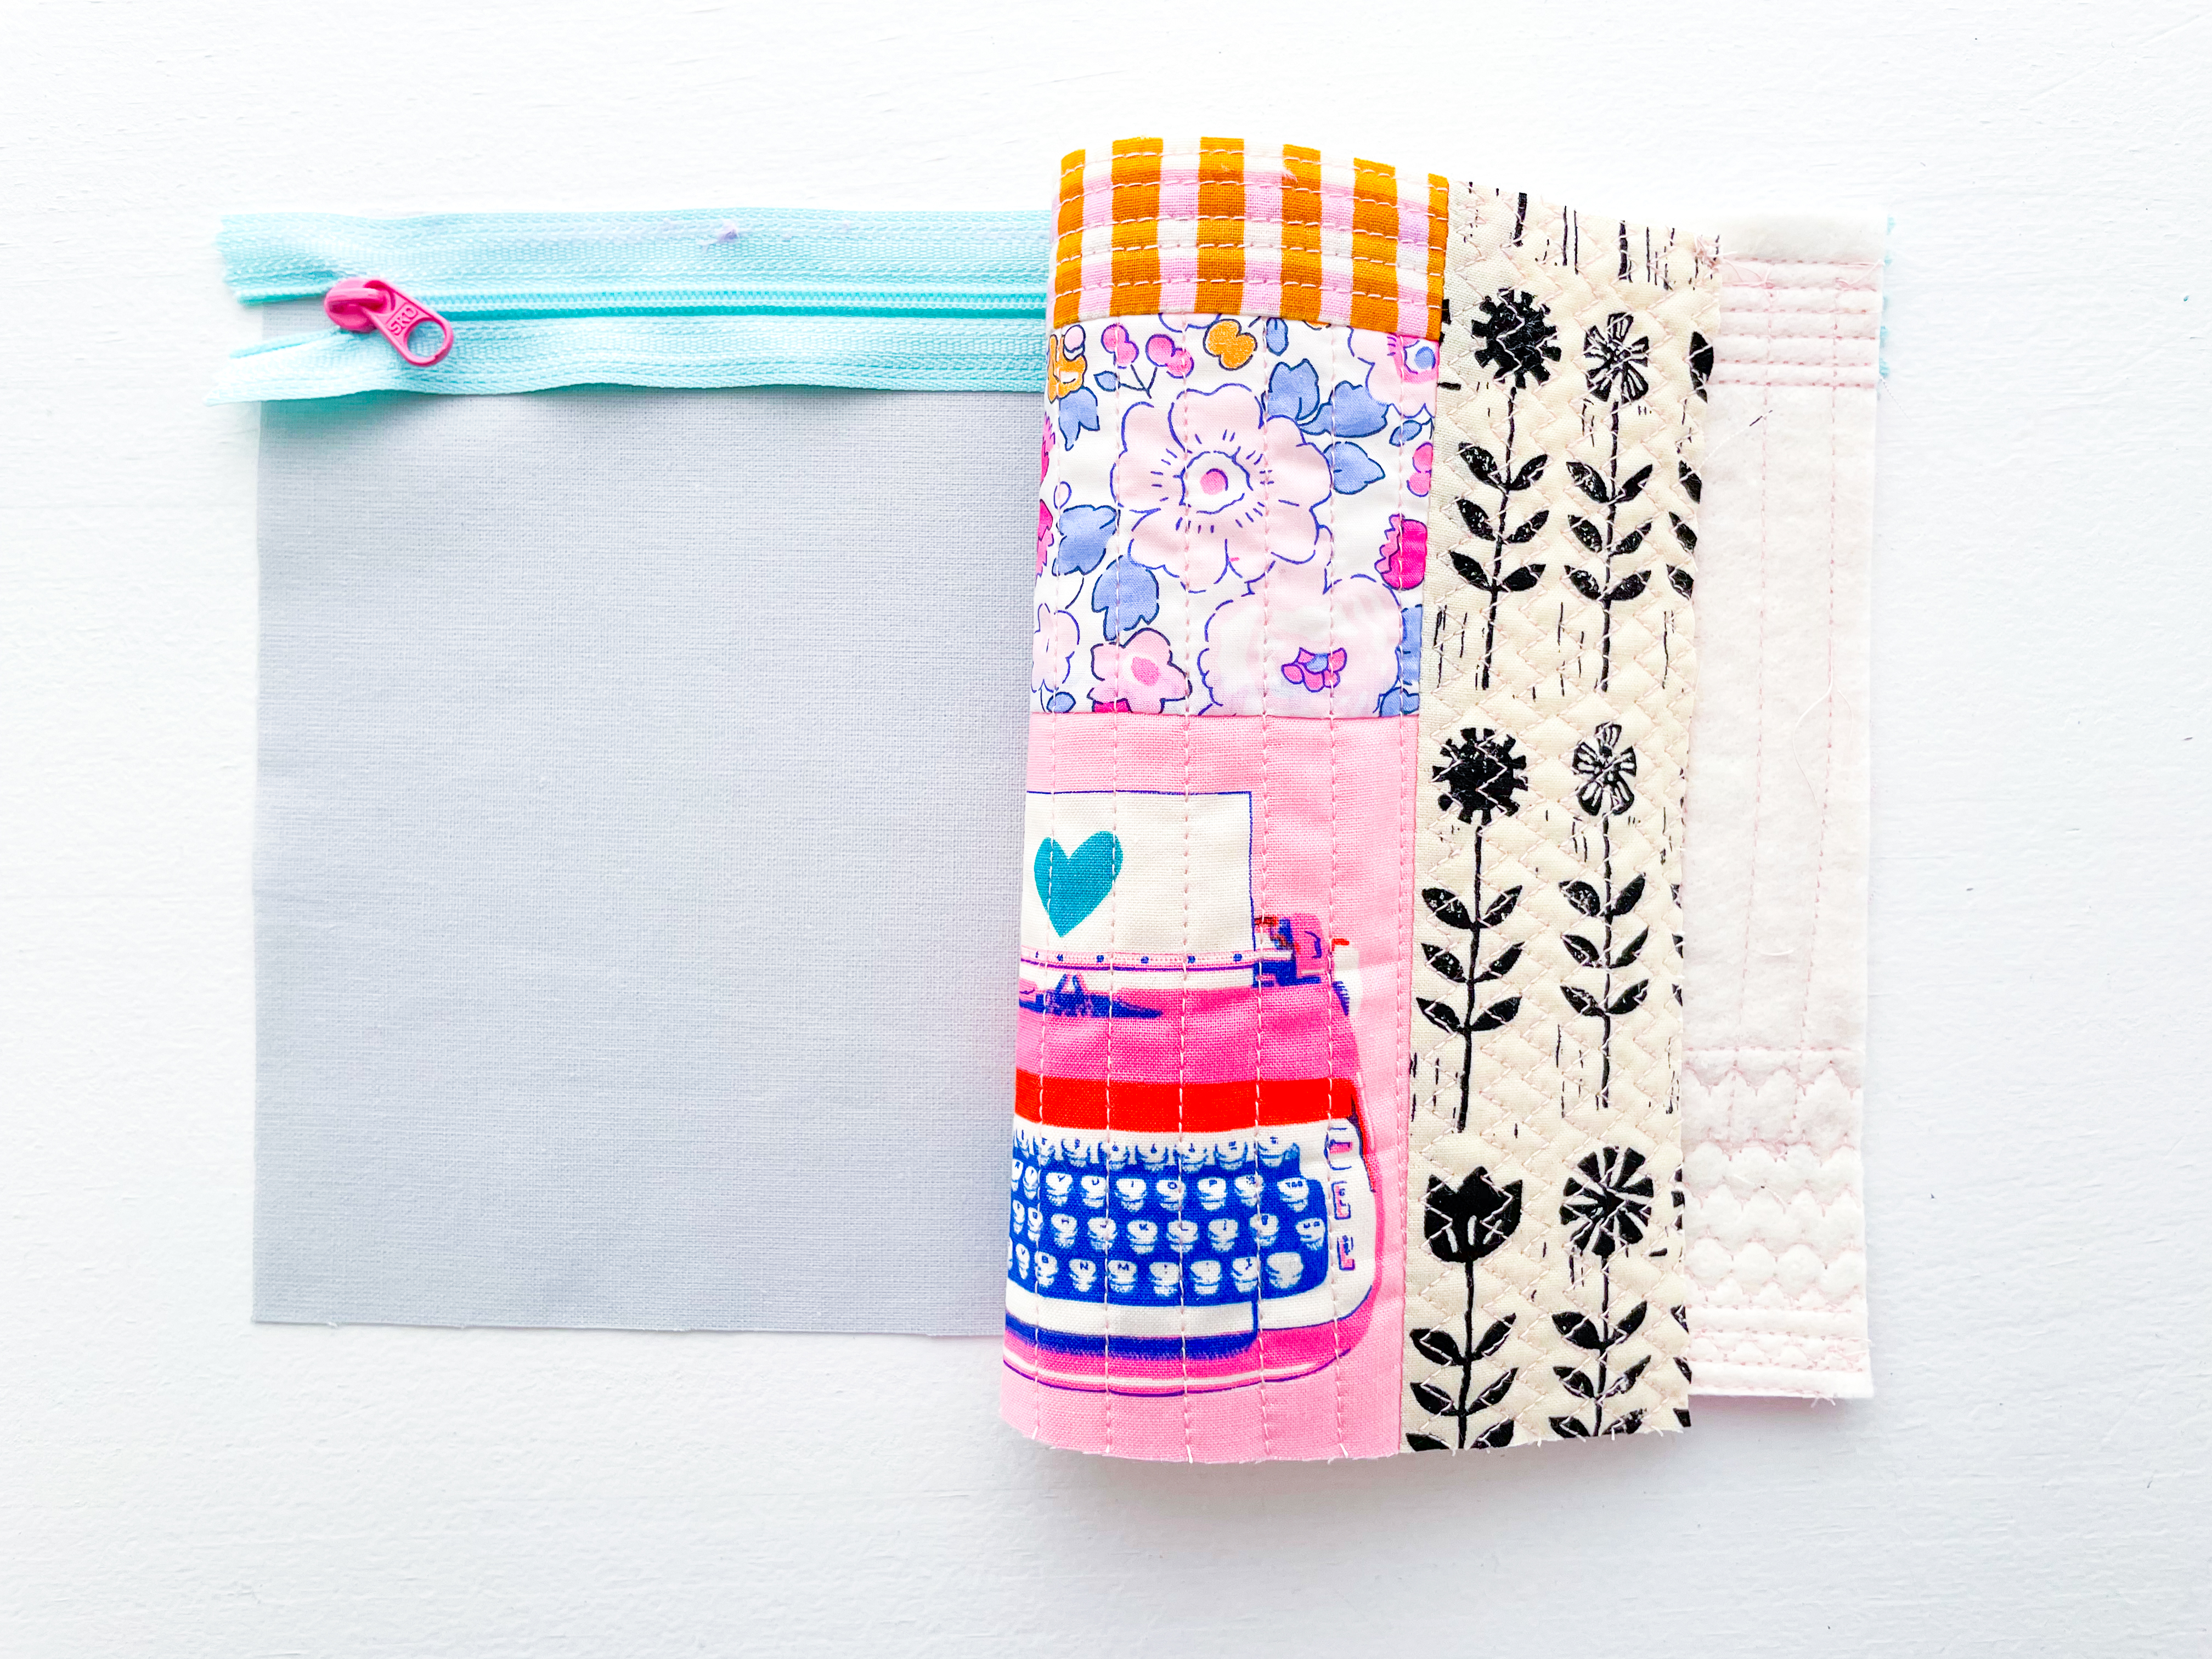
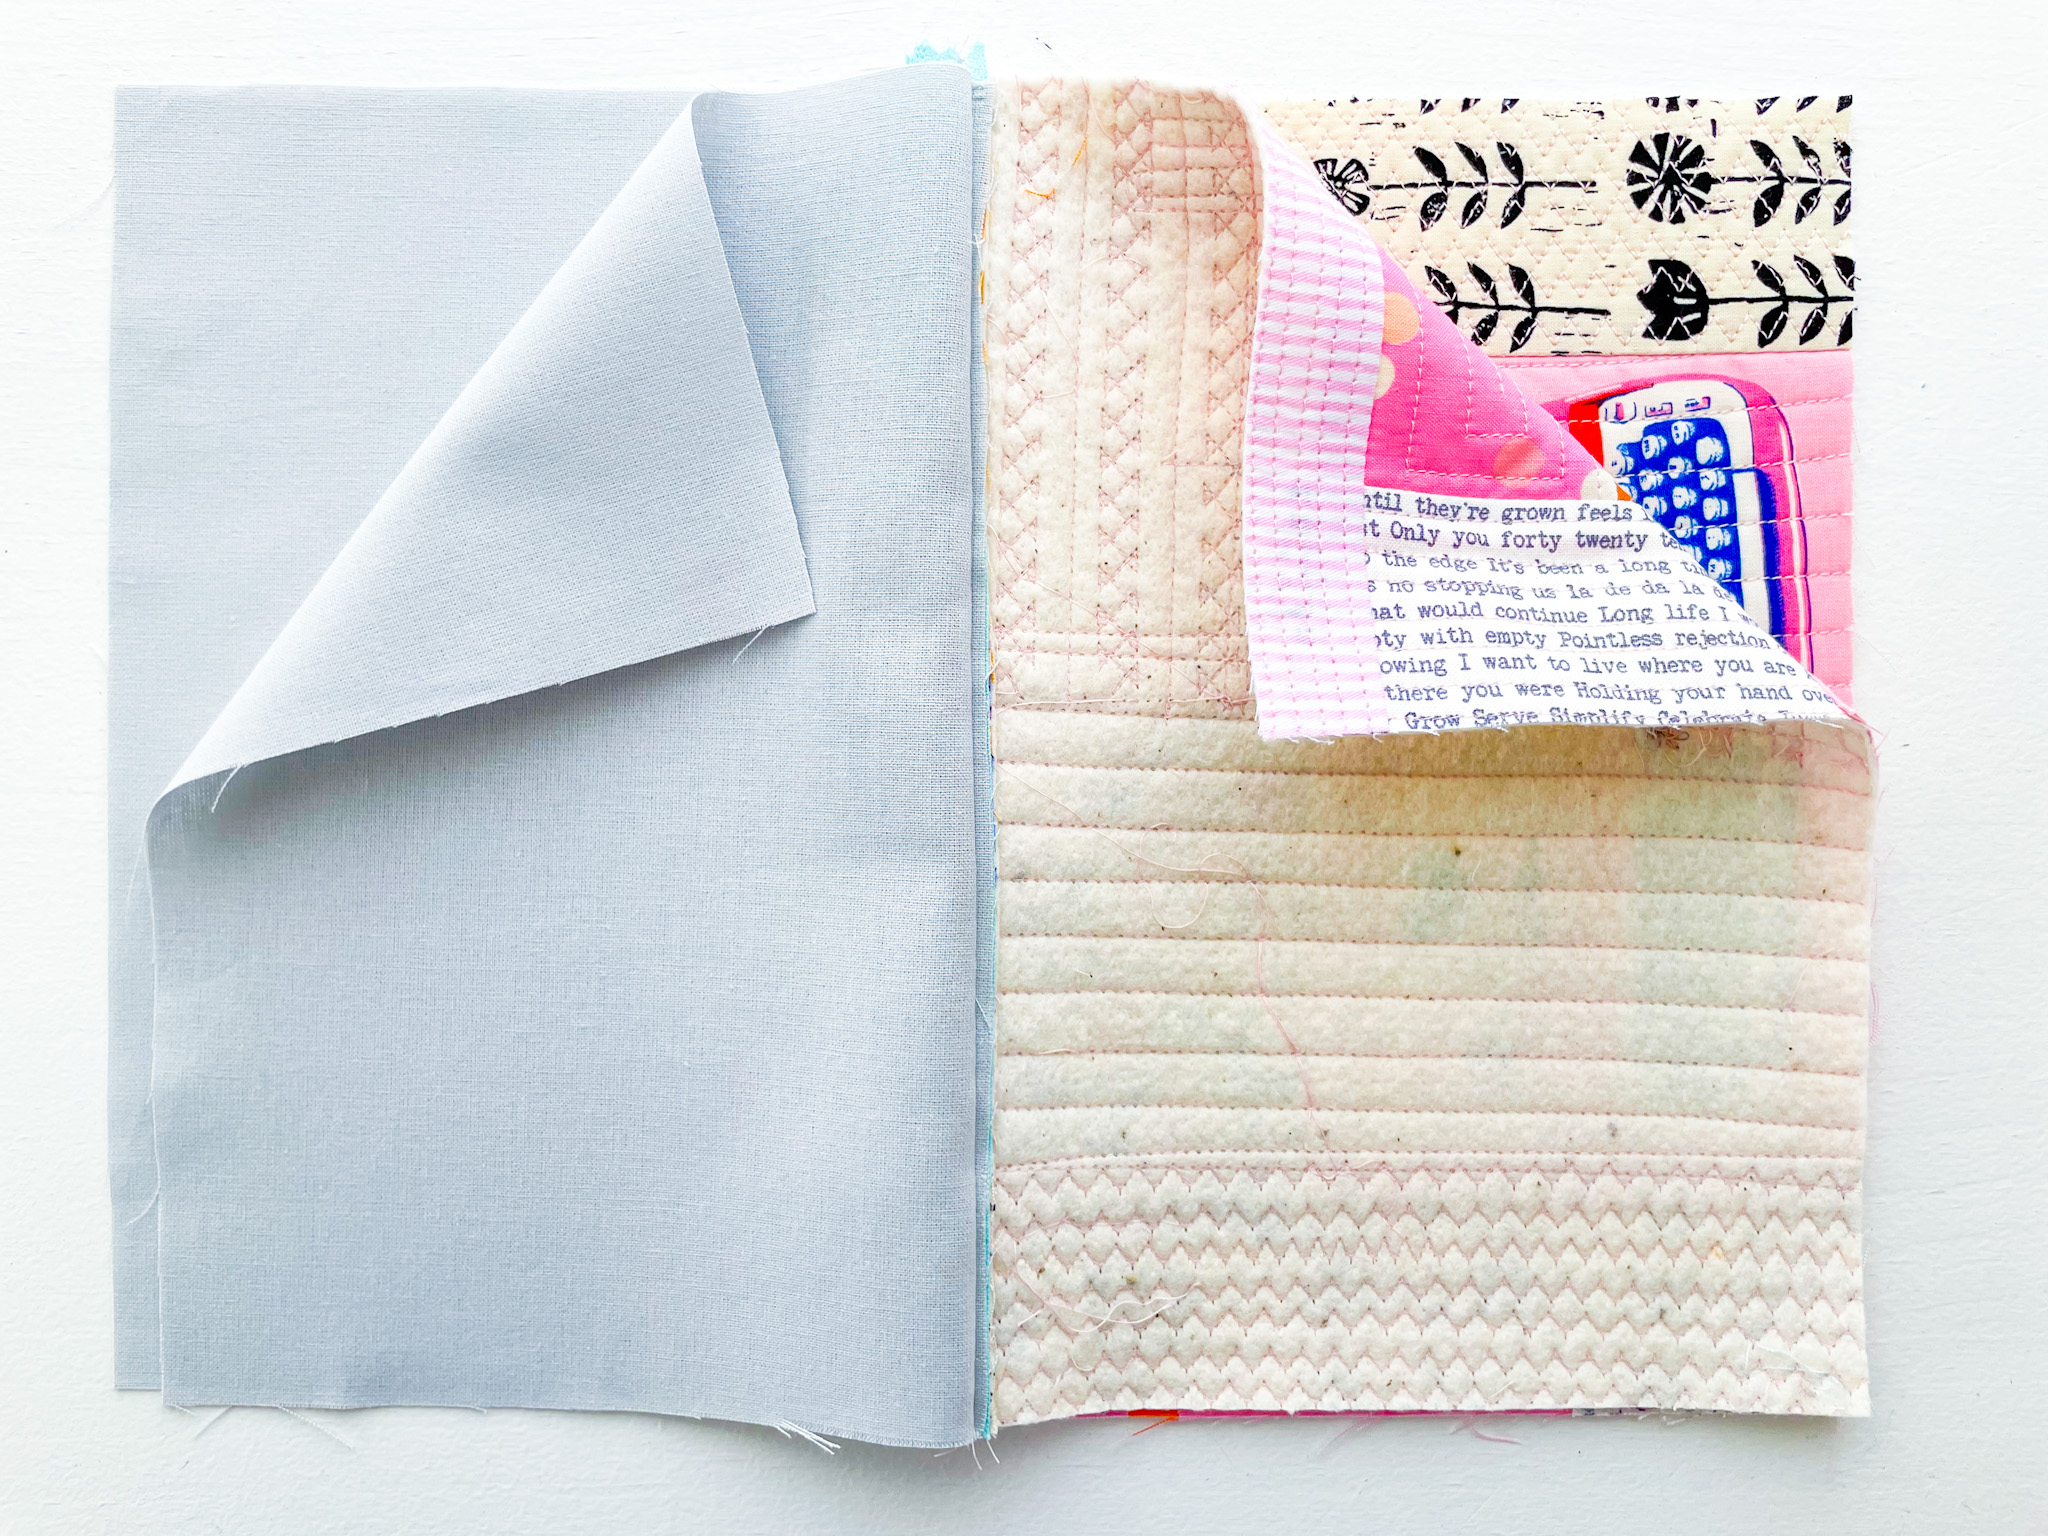
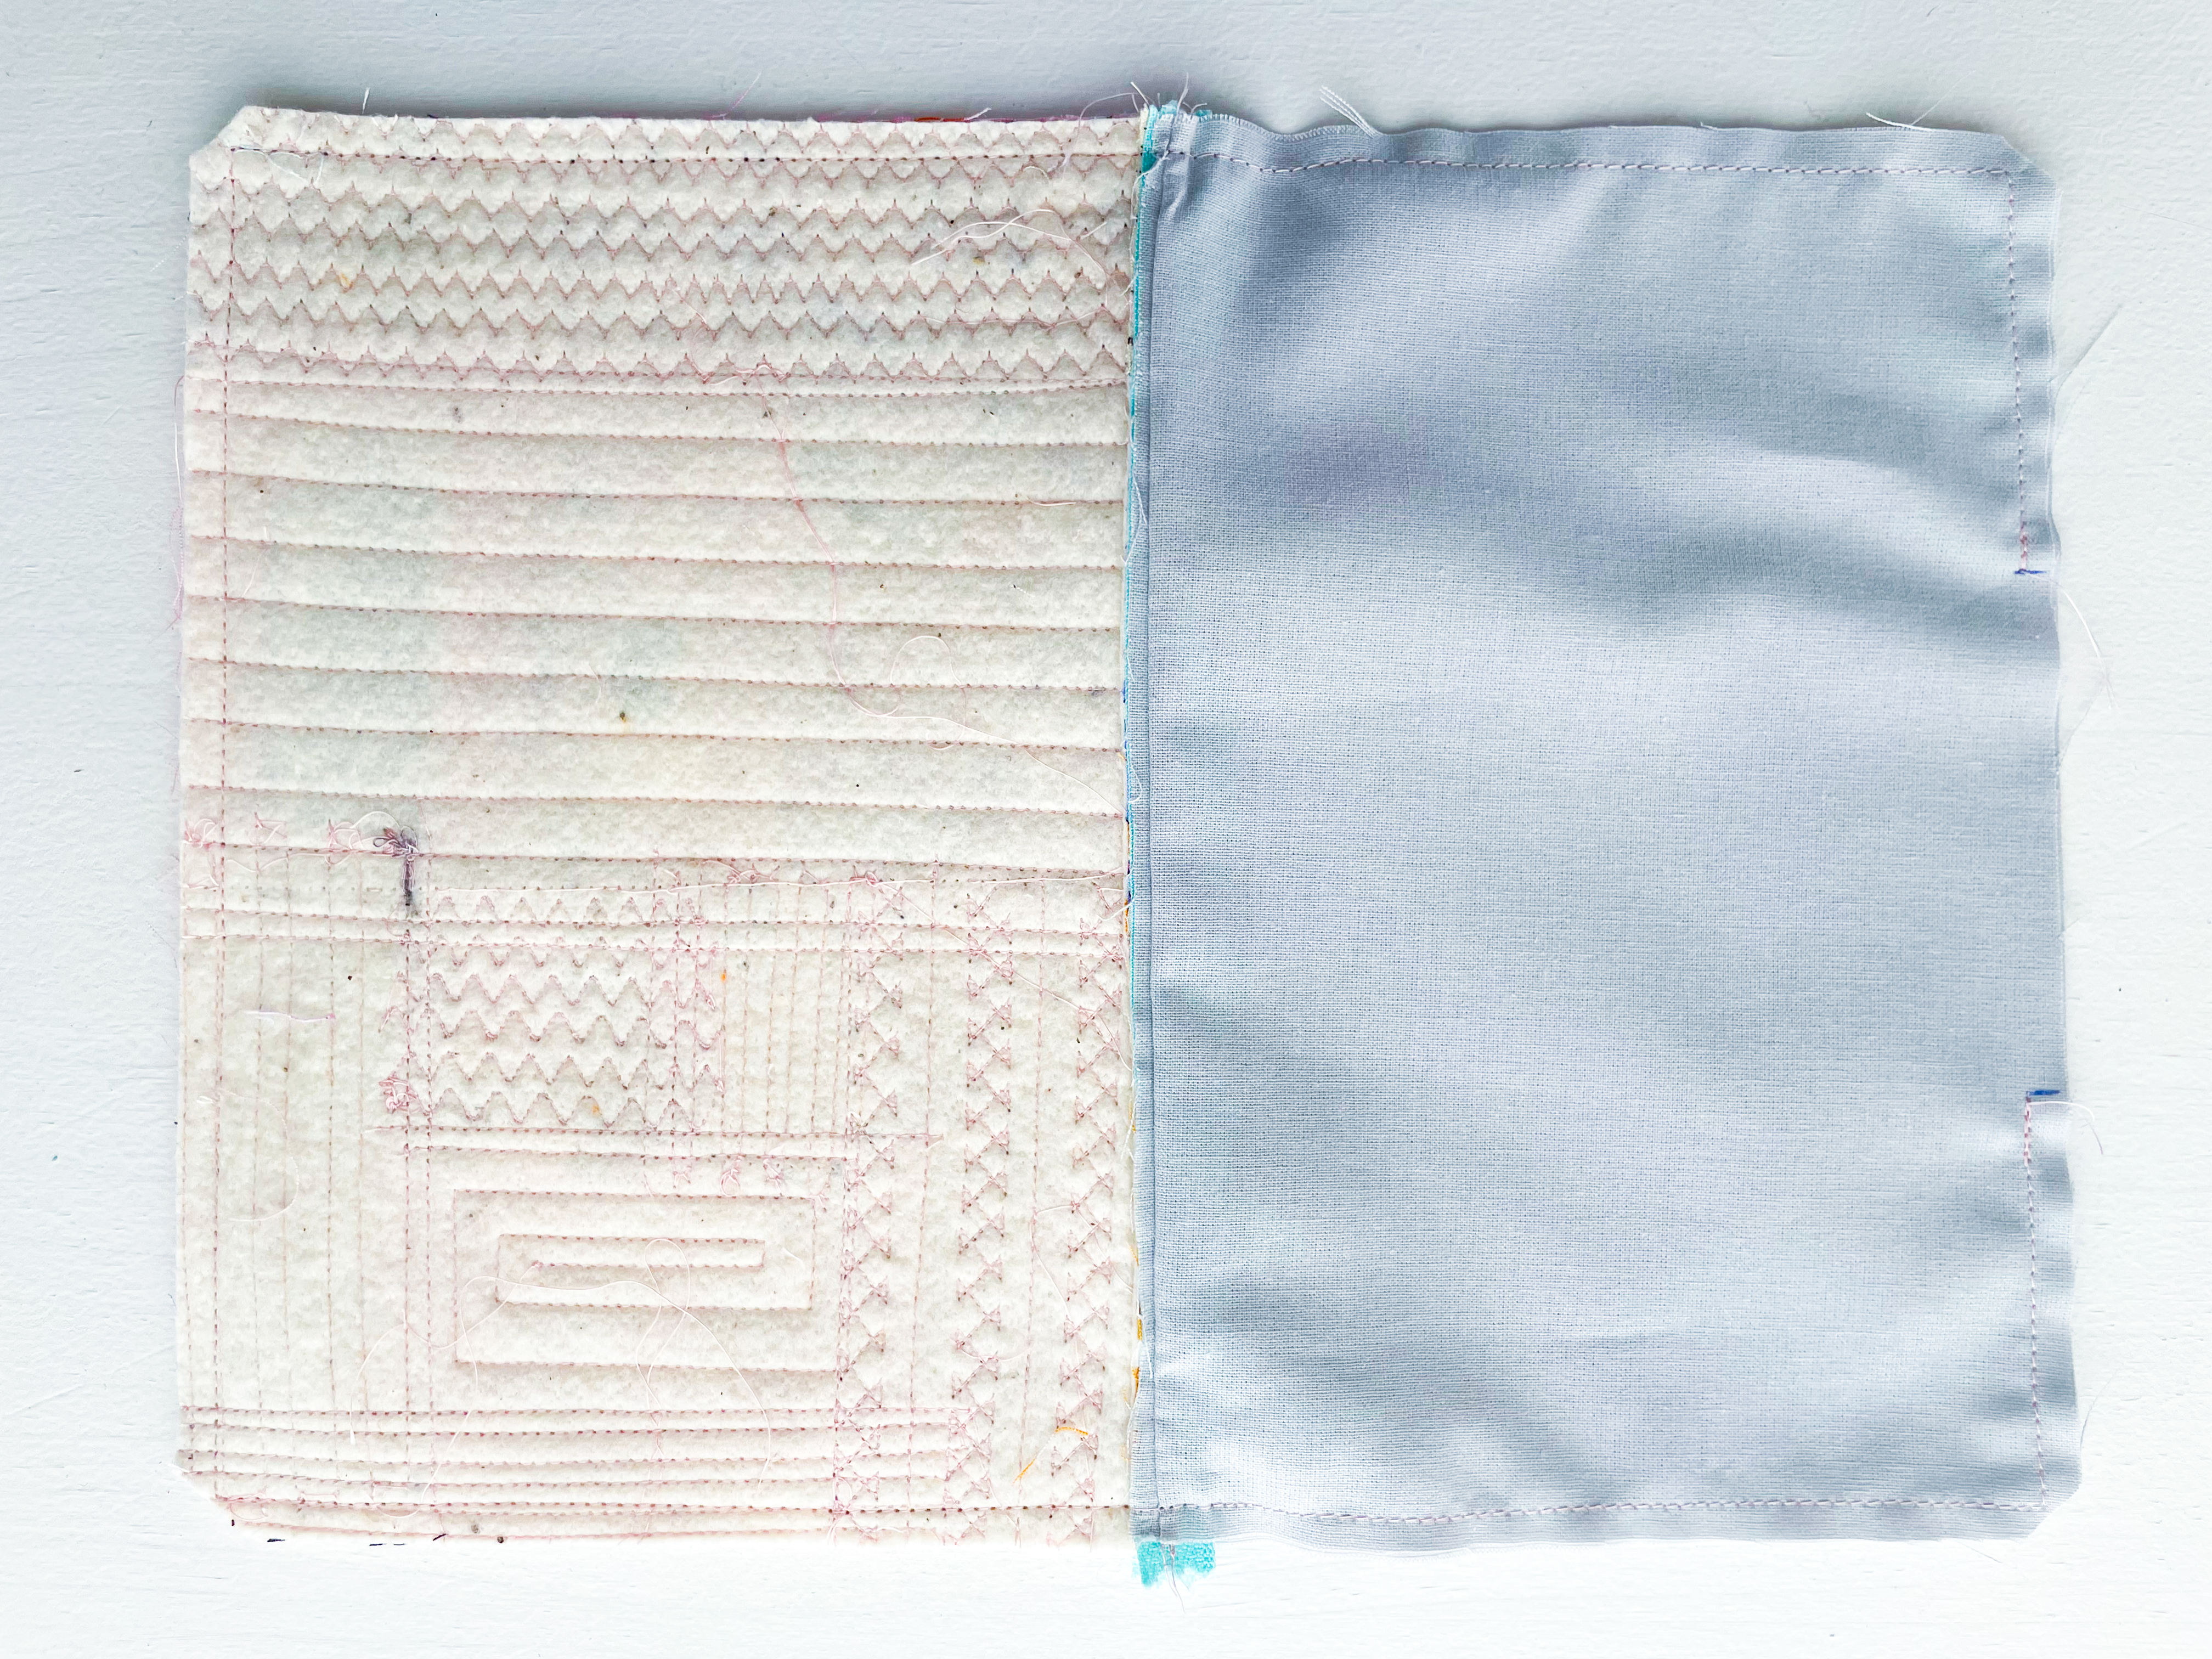
Step 3: Press
Fold the exterior and lining panels away from the zipper and press with a hot iron.
Step 4: Attach the Second Side
Repeat Steps 1–2 on the opposite side of the zipper using the remaining exterior panel and lining piece.
-Place the lining right side up
-Zipper right side up
-Exterior right side down
Secure with glue and clips, then sew with a ¼″ seam allowance.
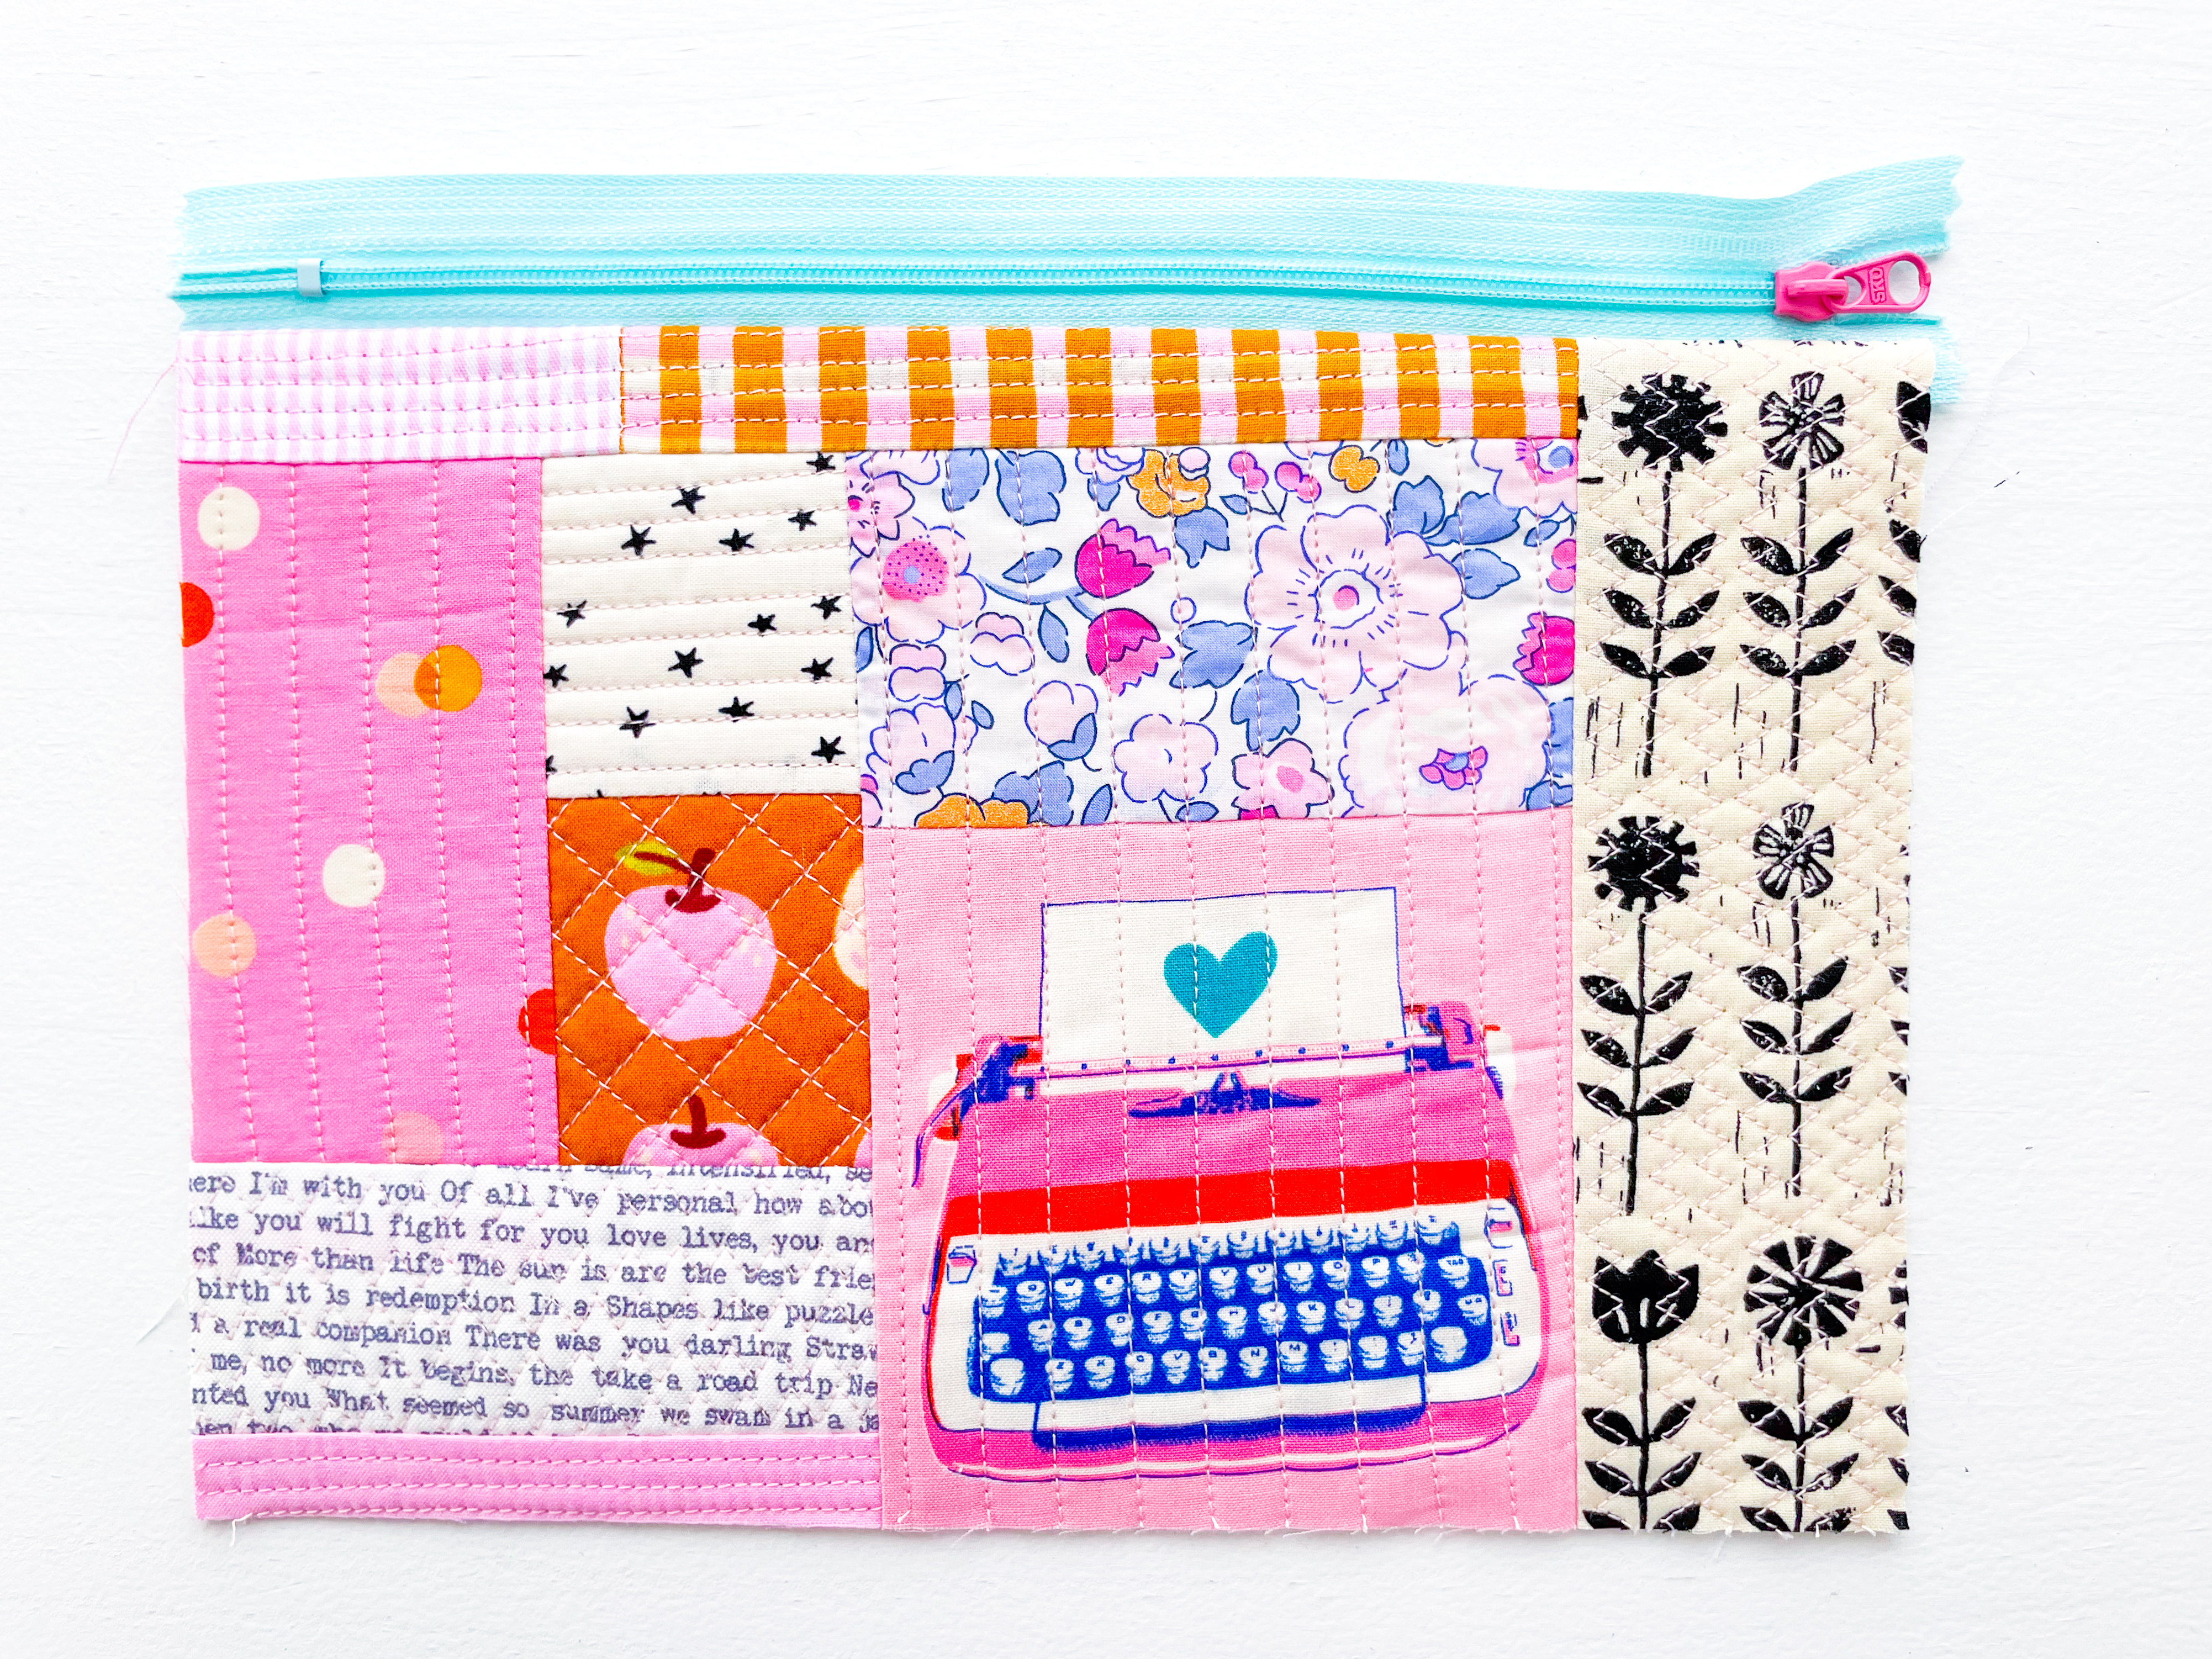
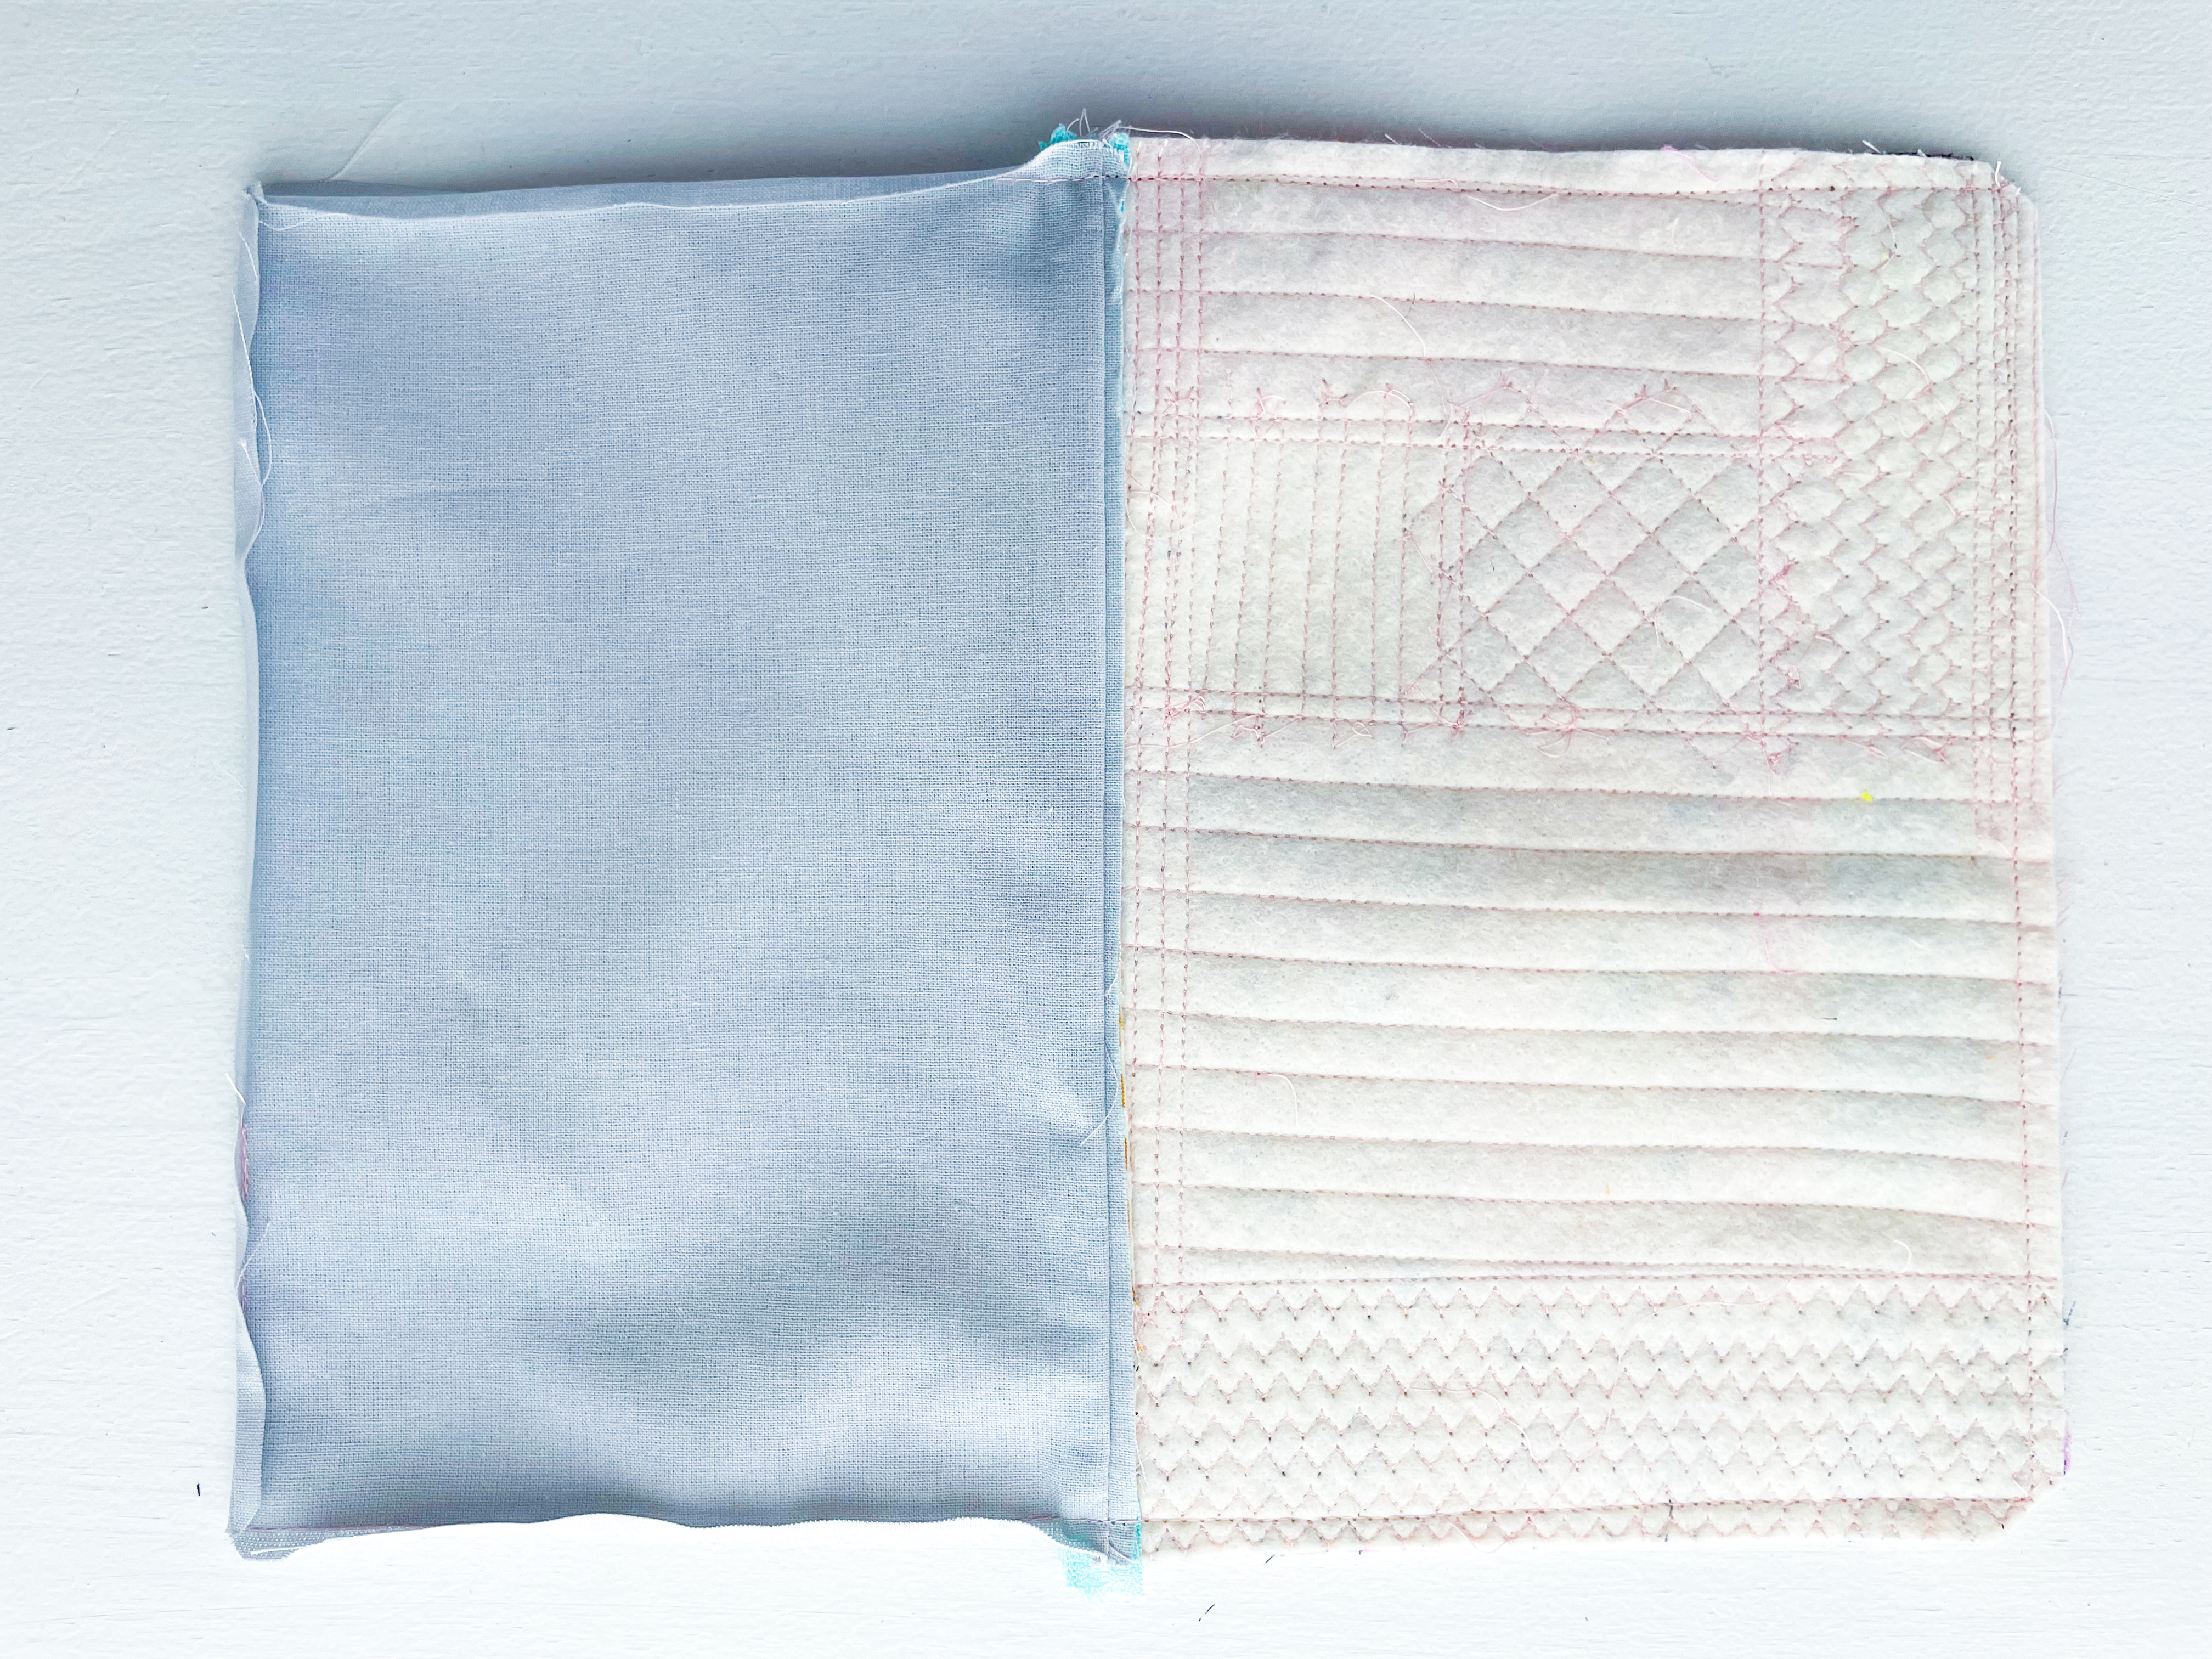
Step 5: Press Again
Press the exterior and lining panels away from the zipper.
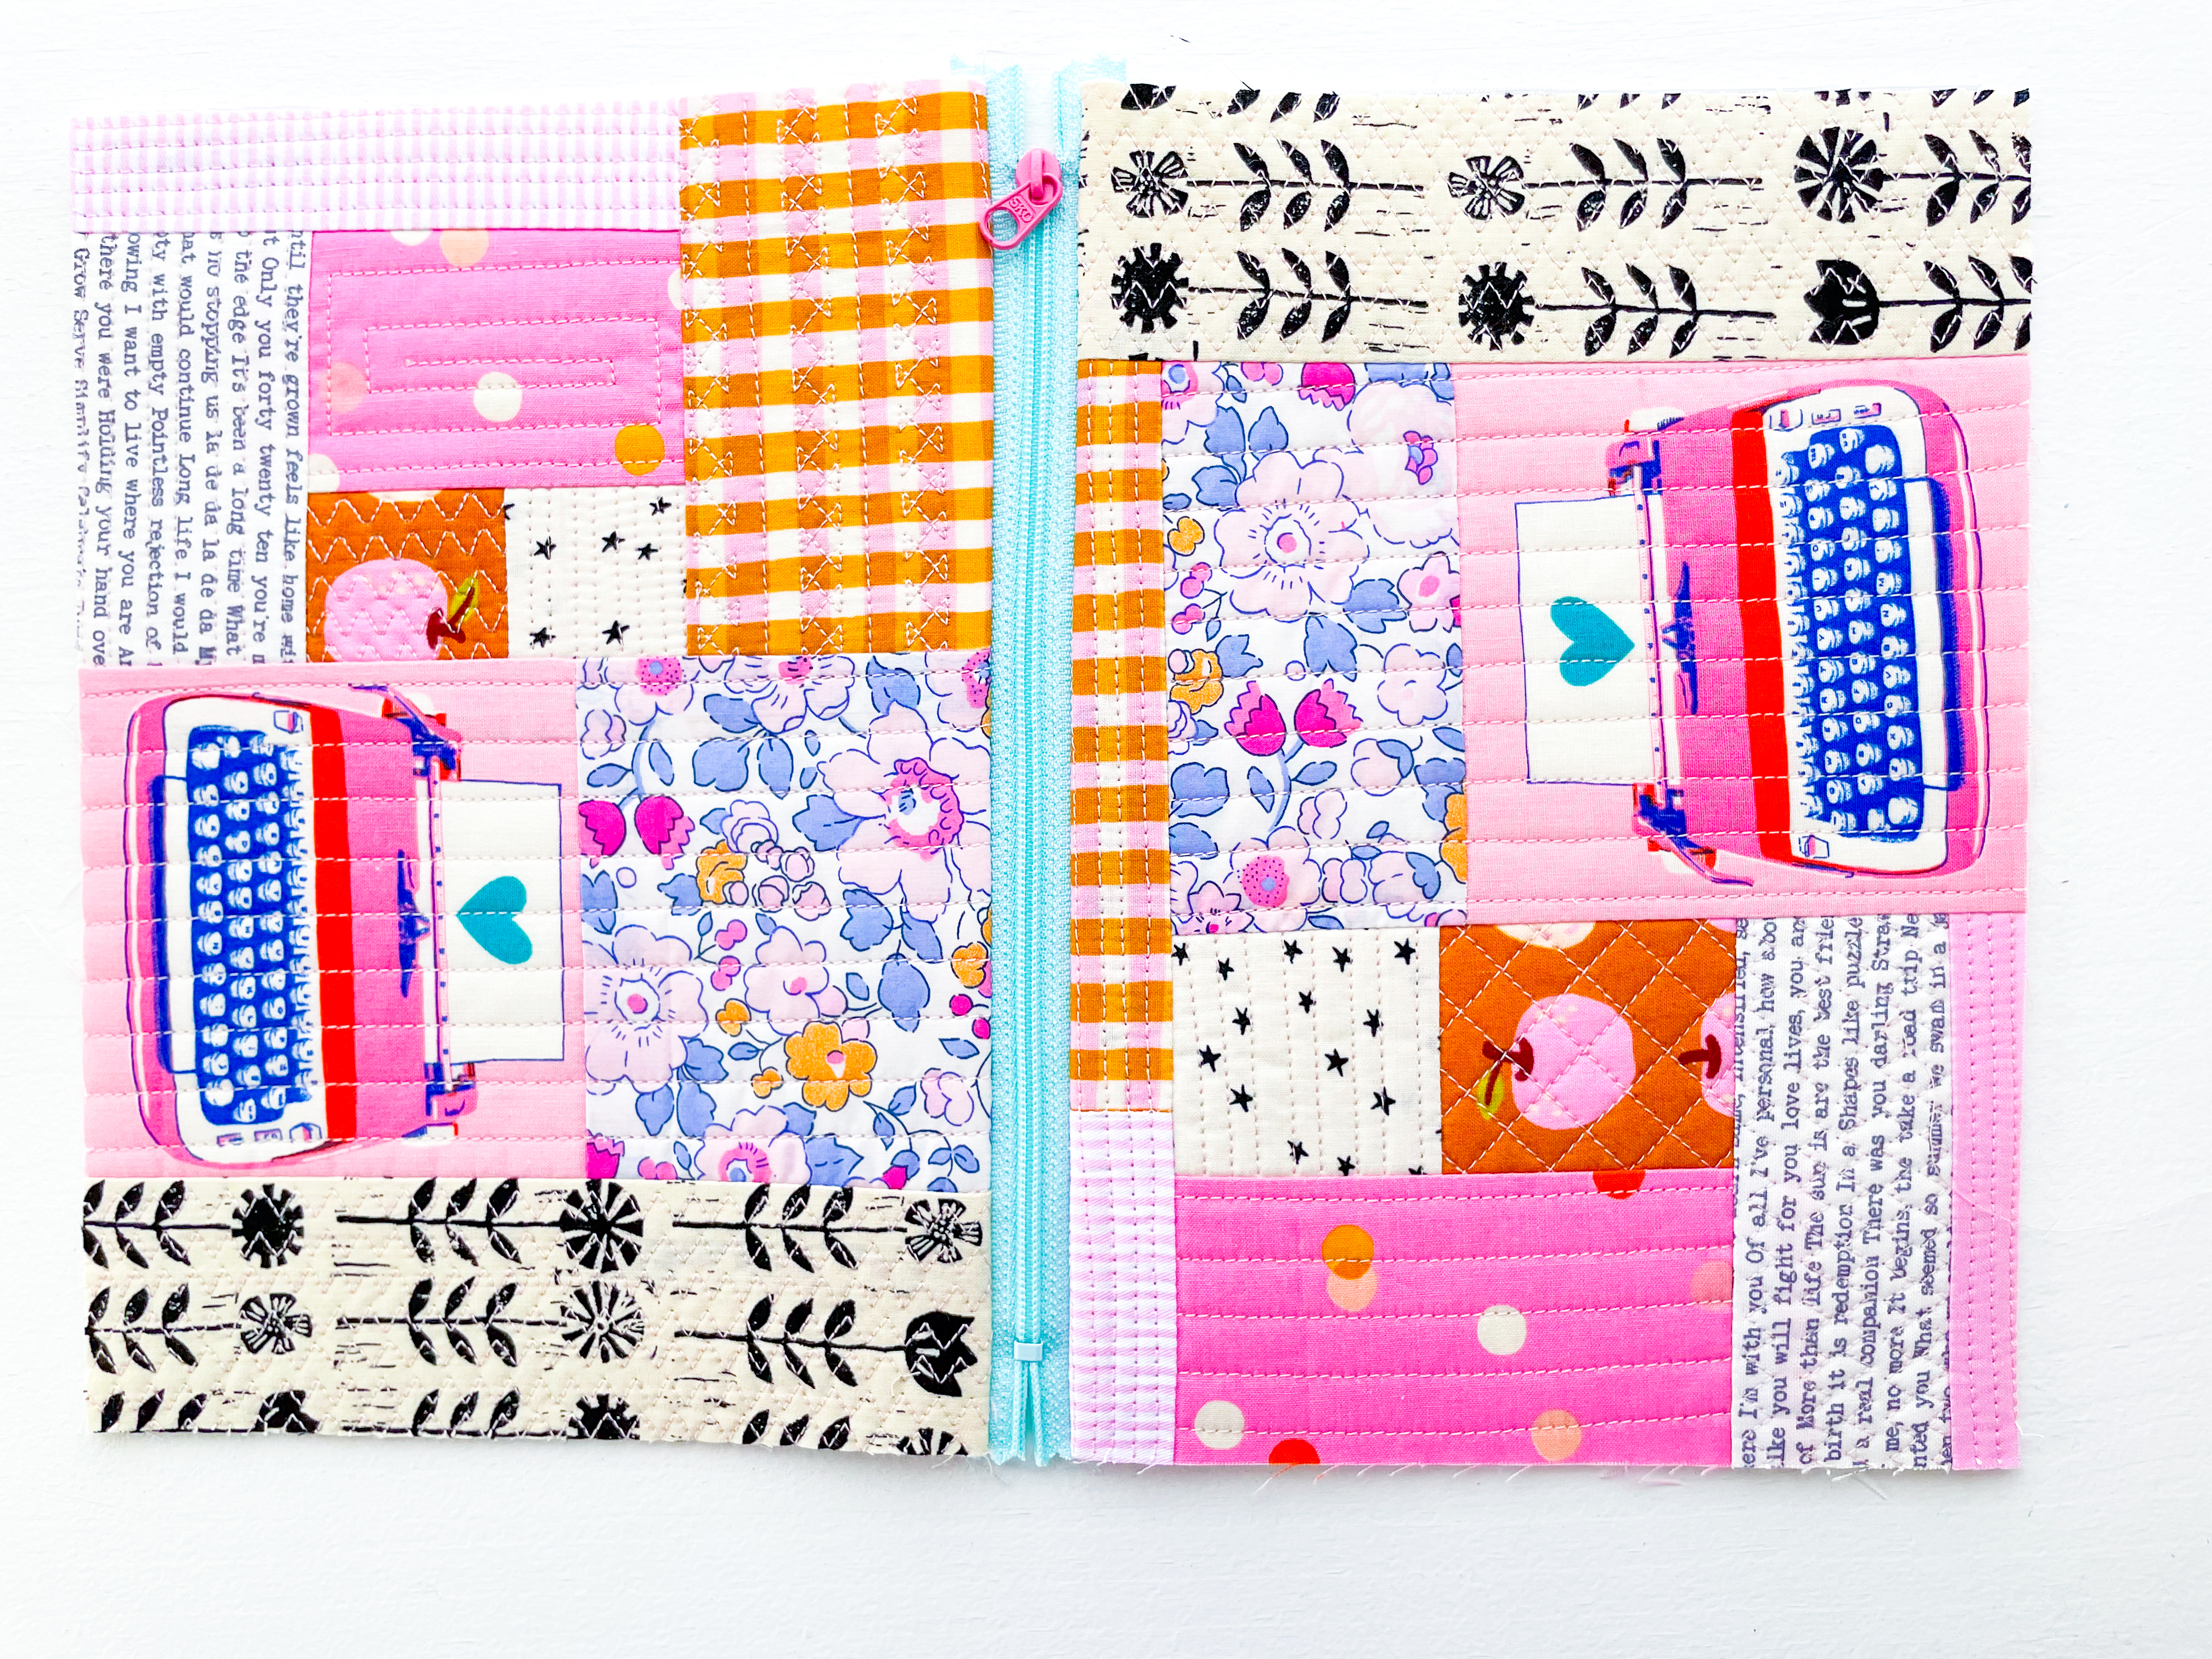
It will look like this on the front:
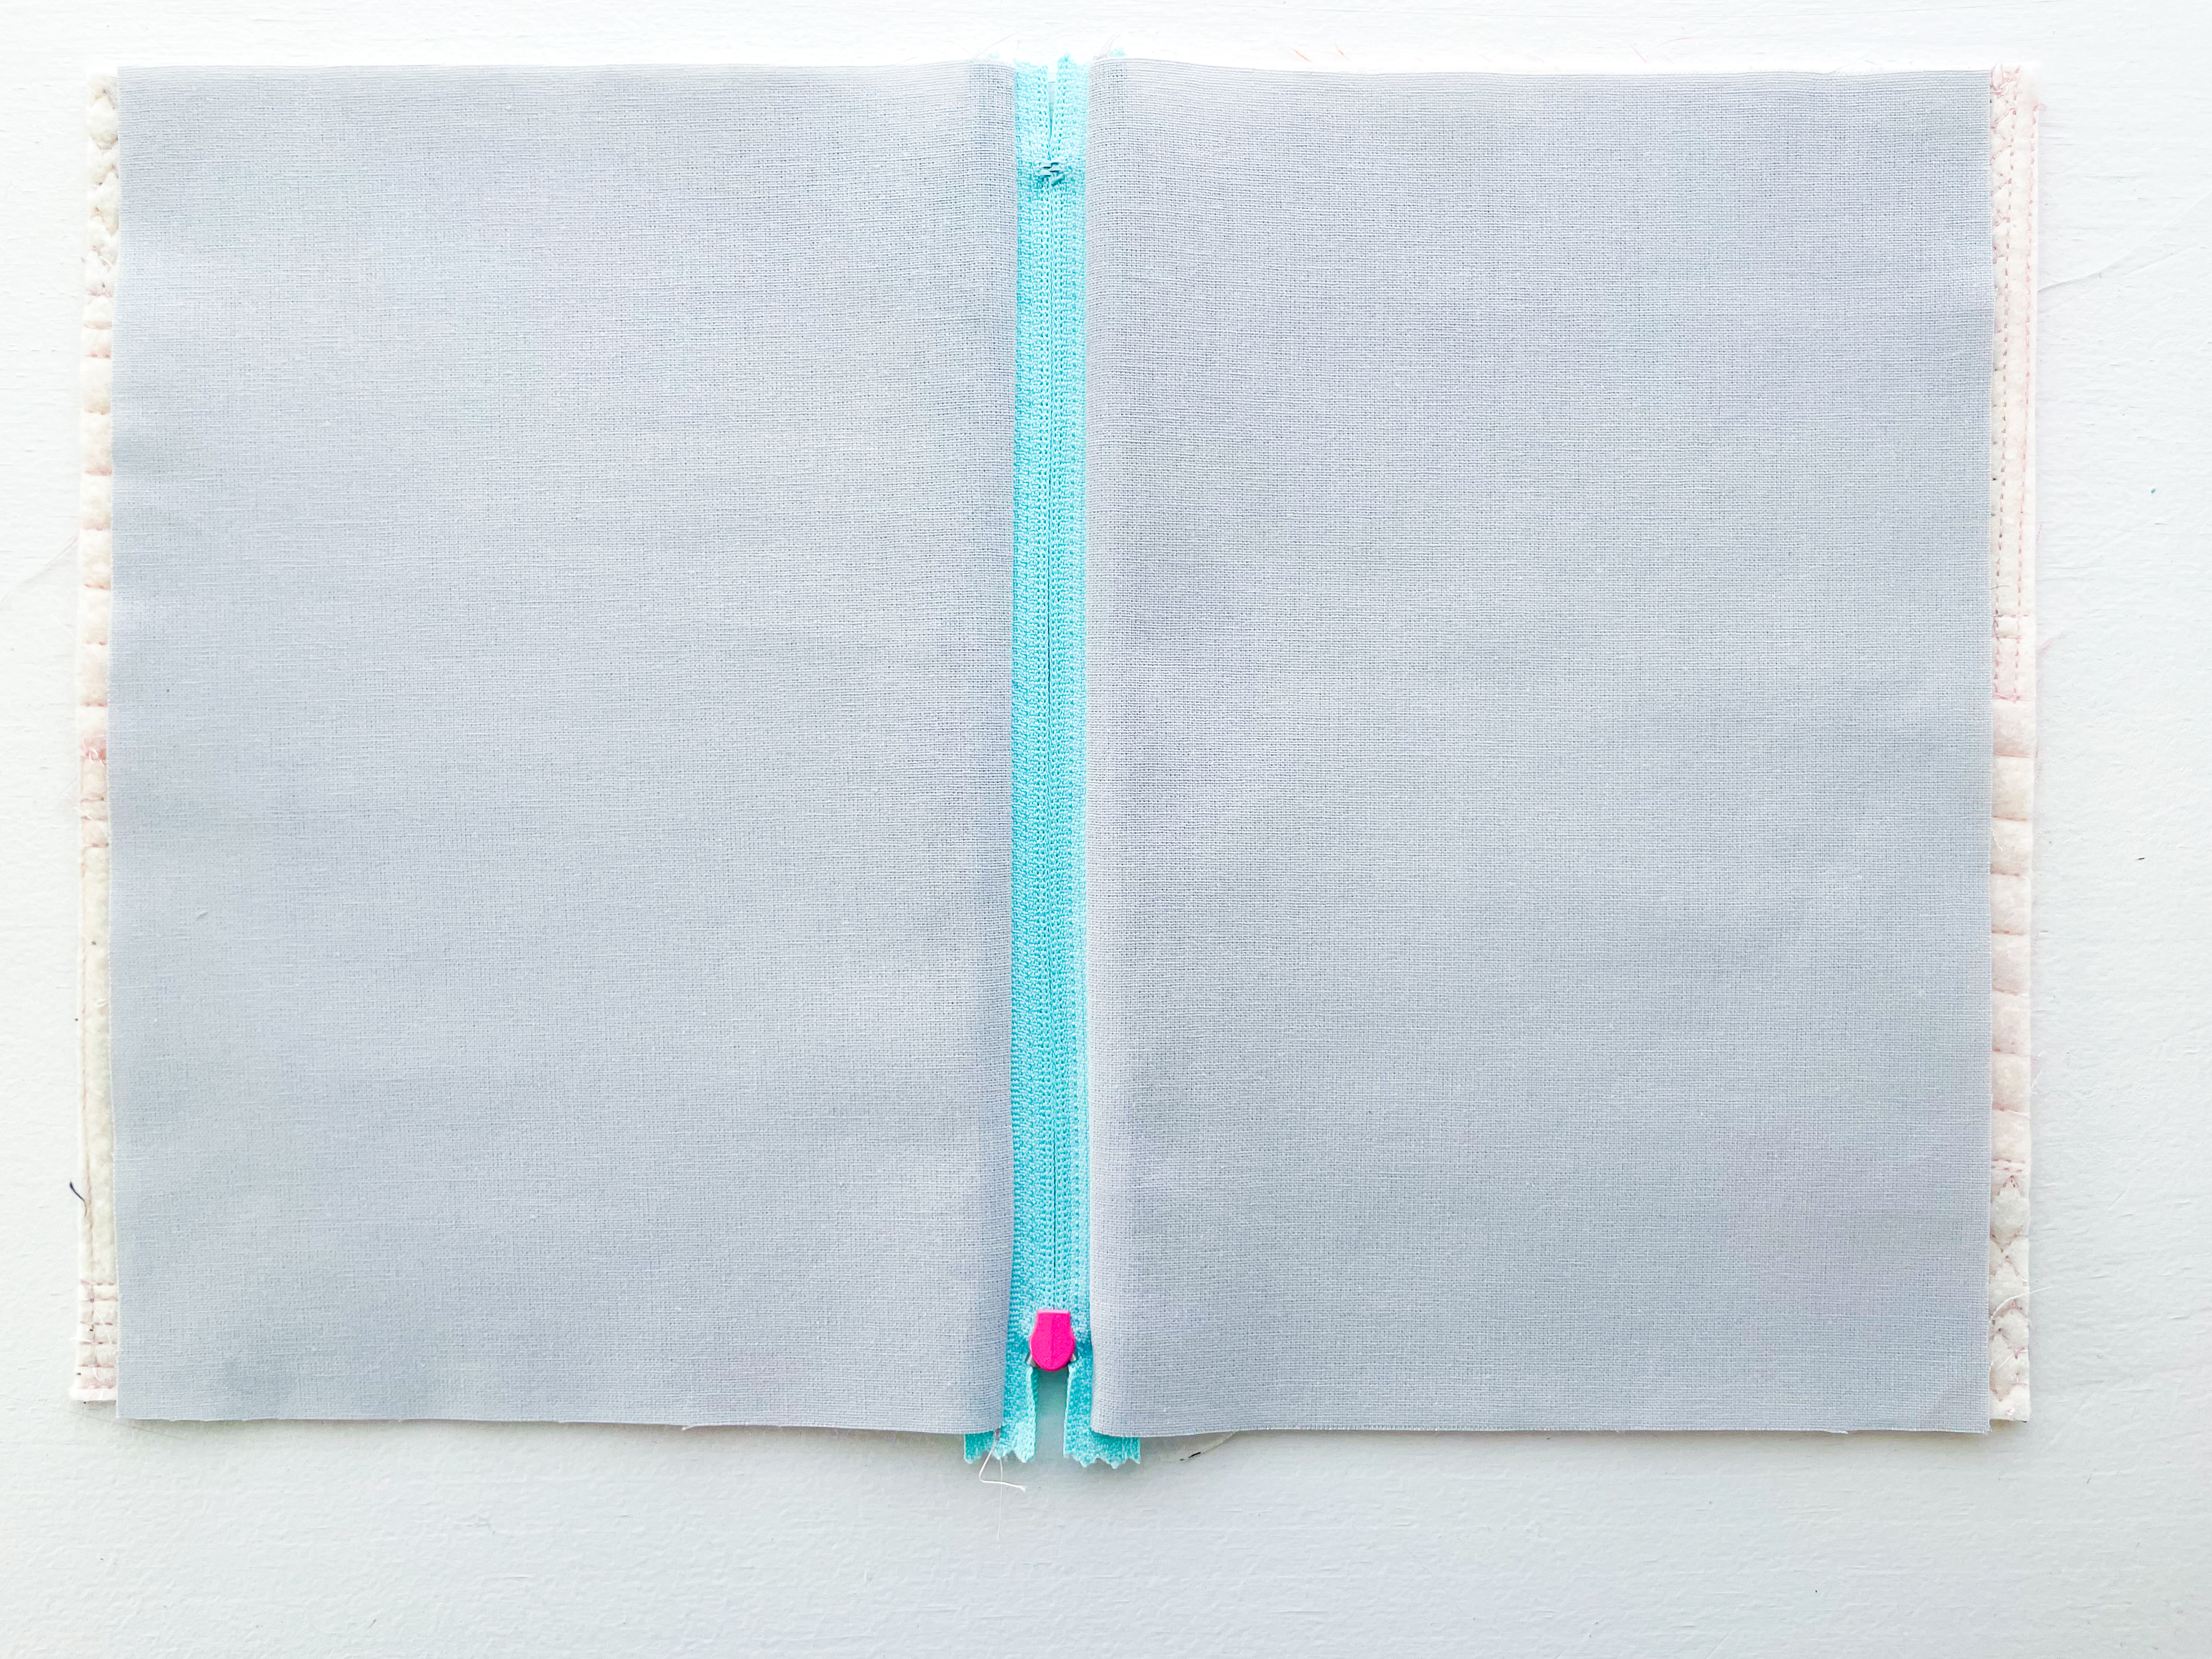
and this on the back:
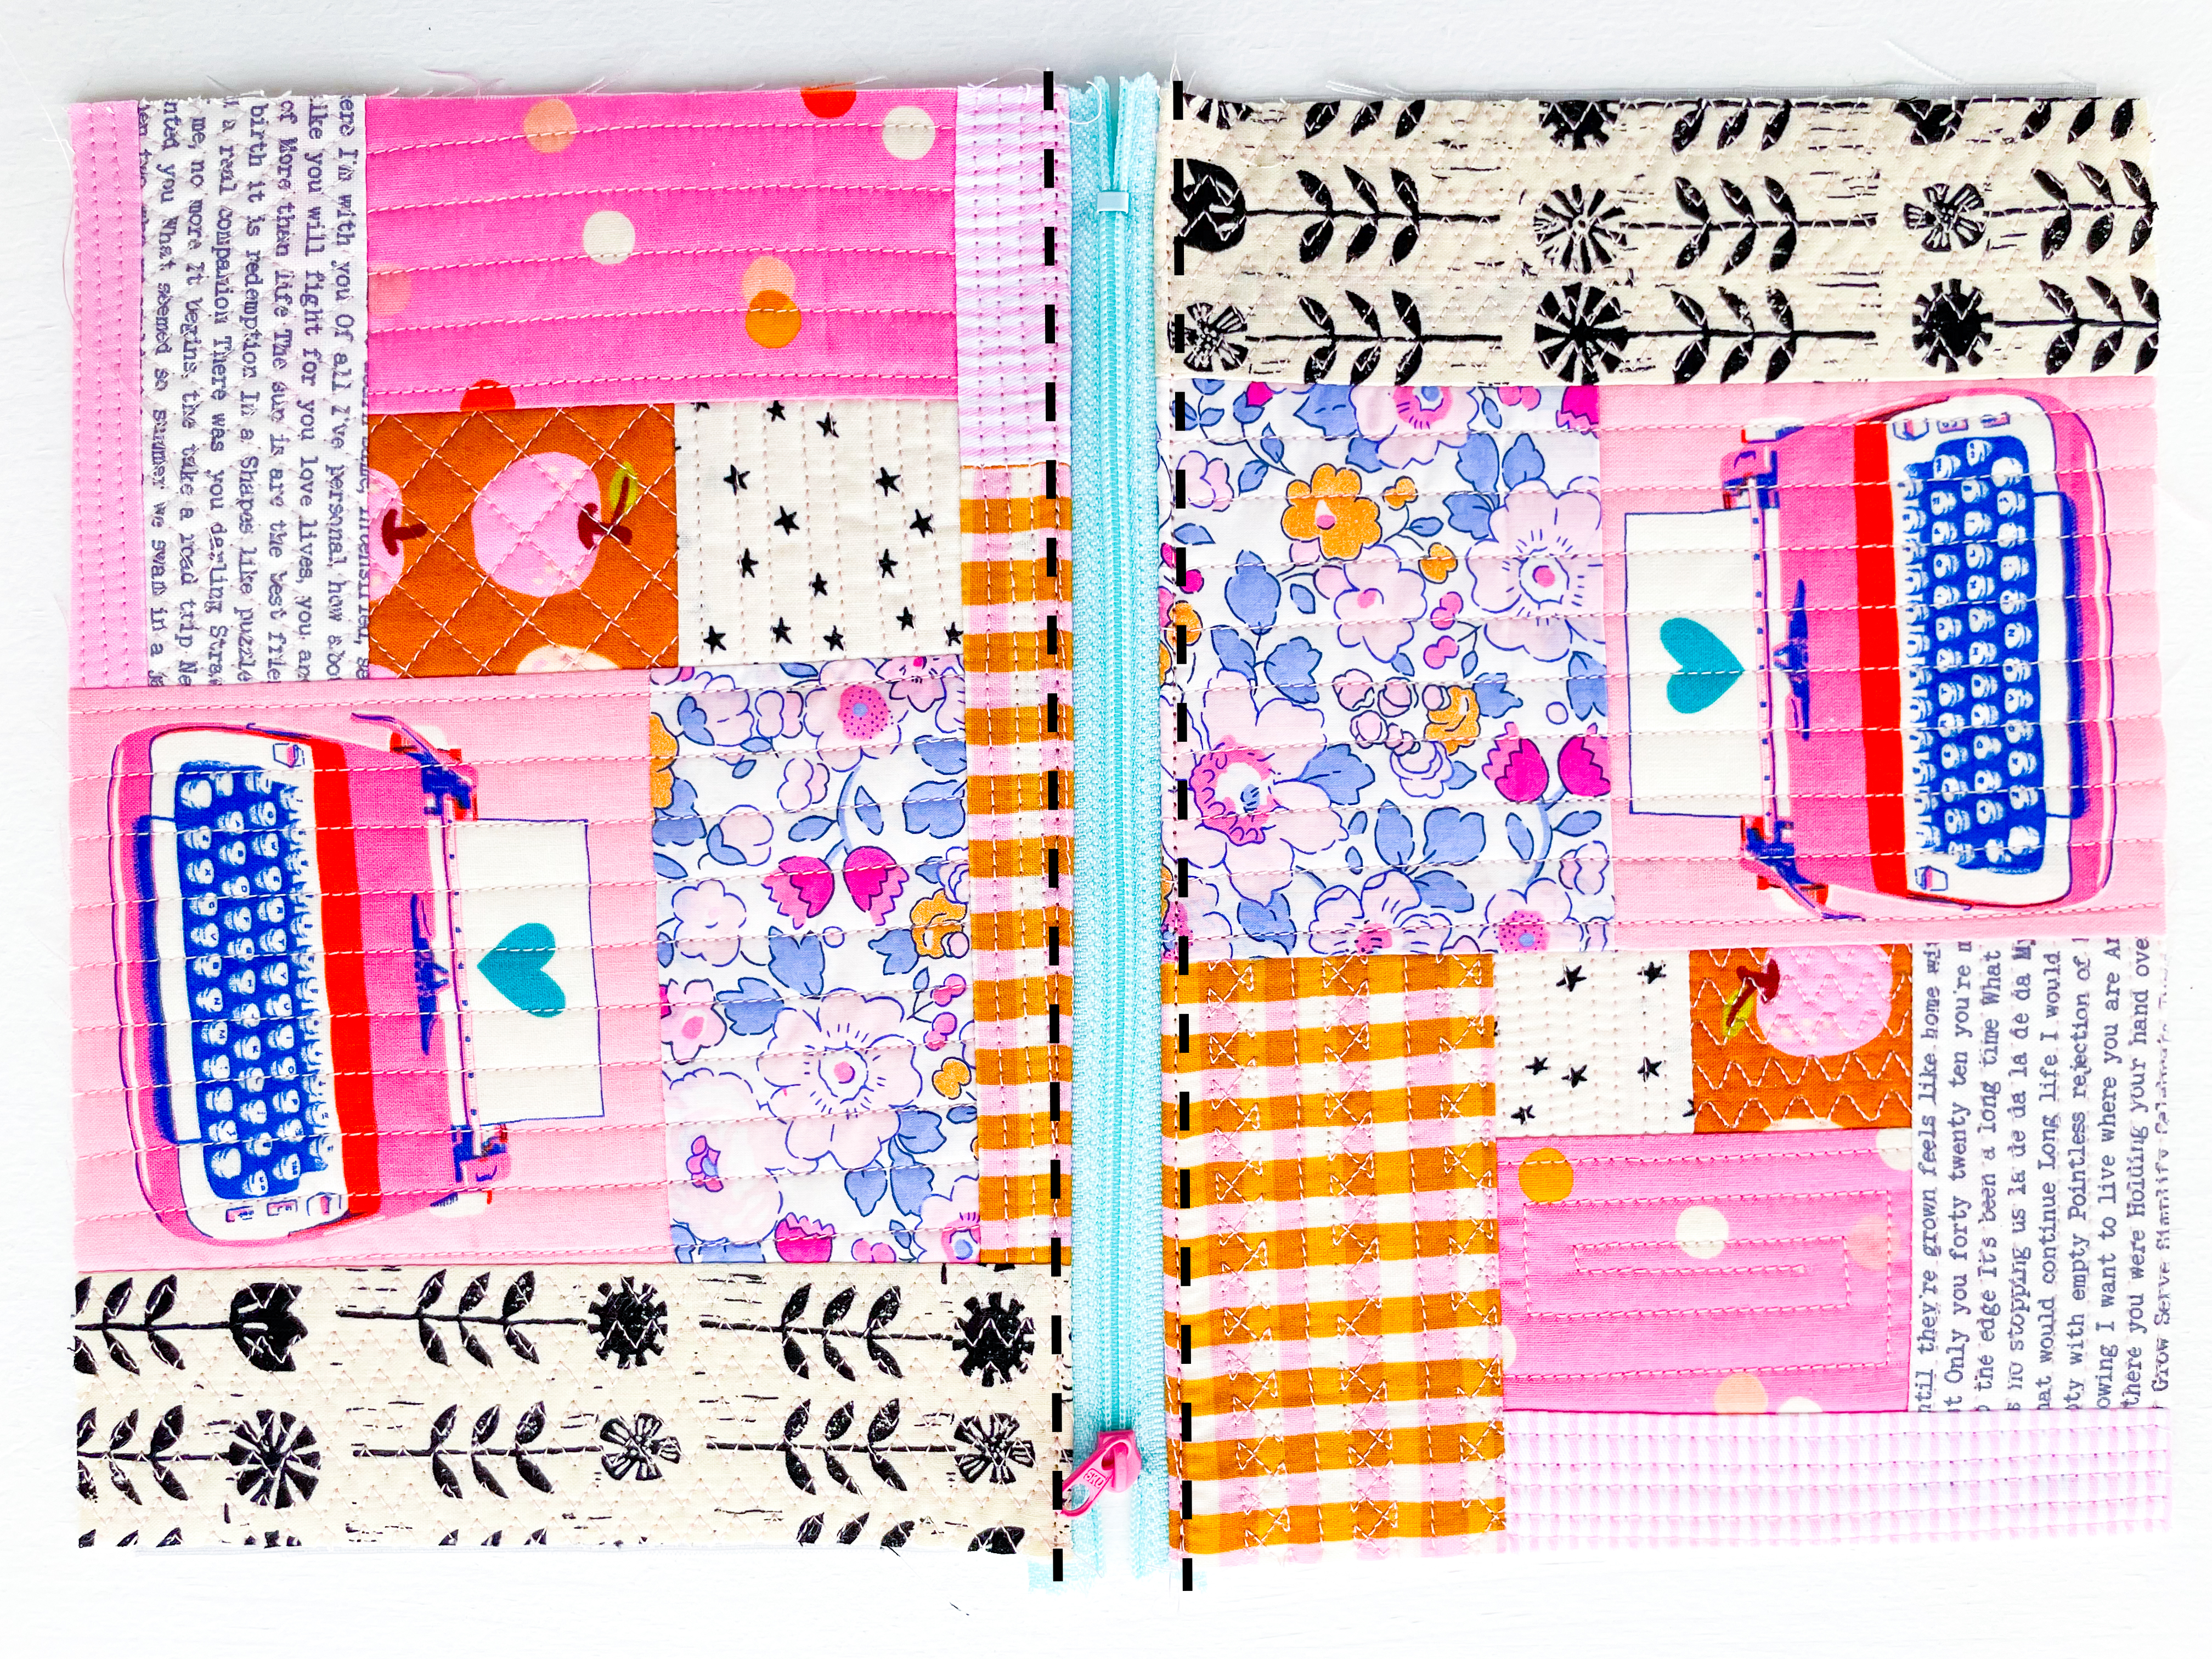
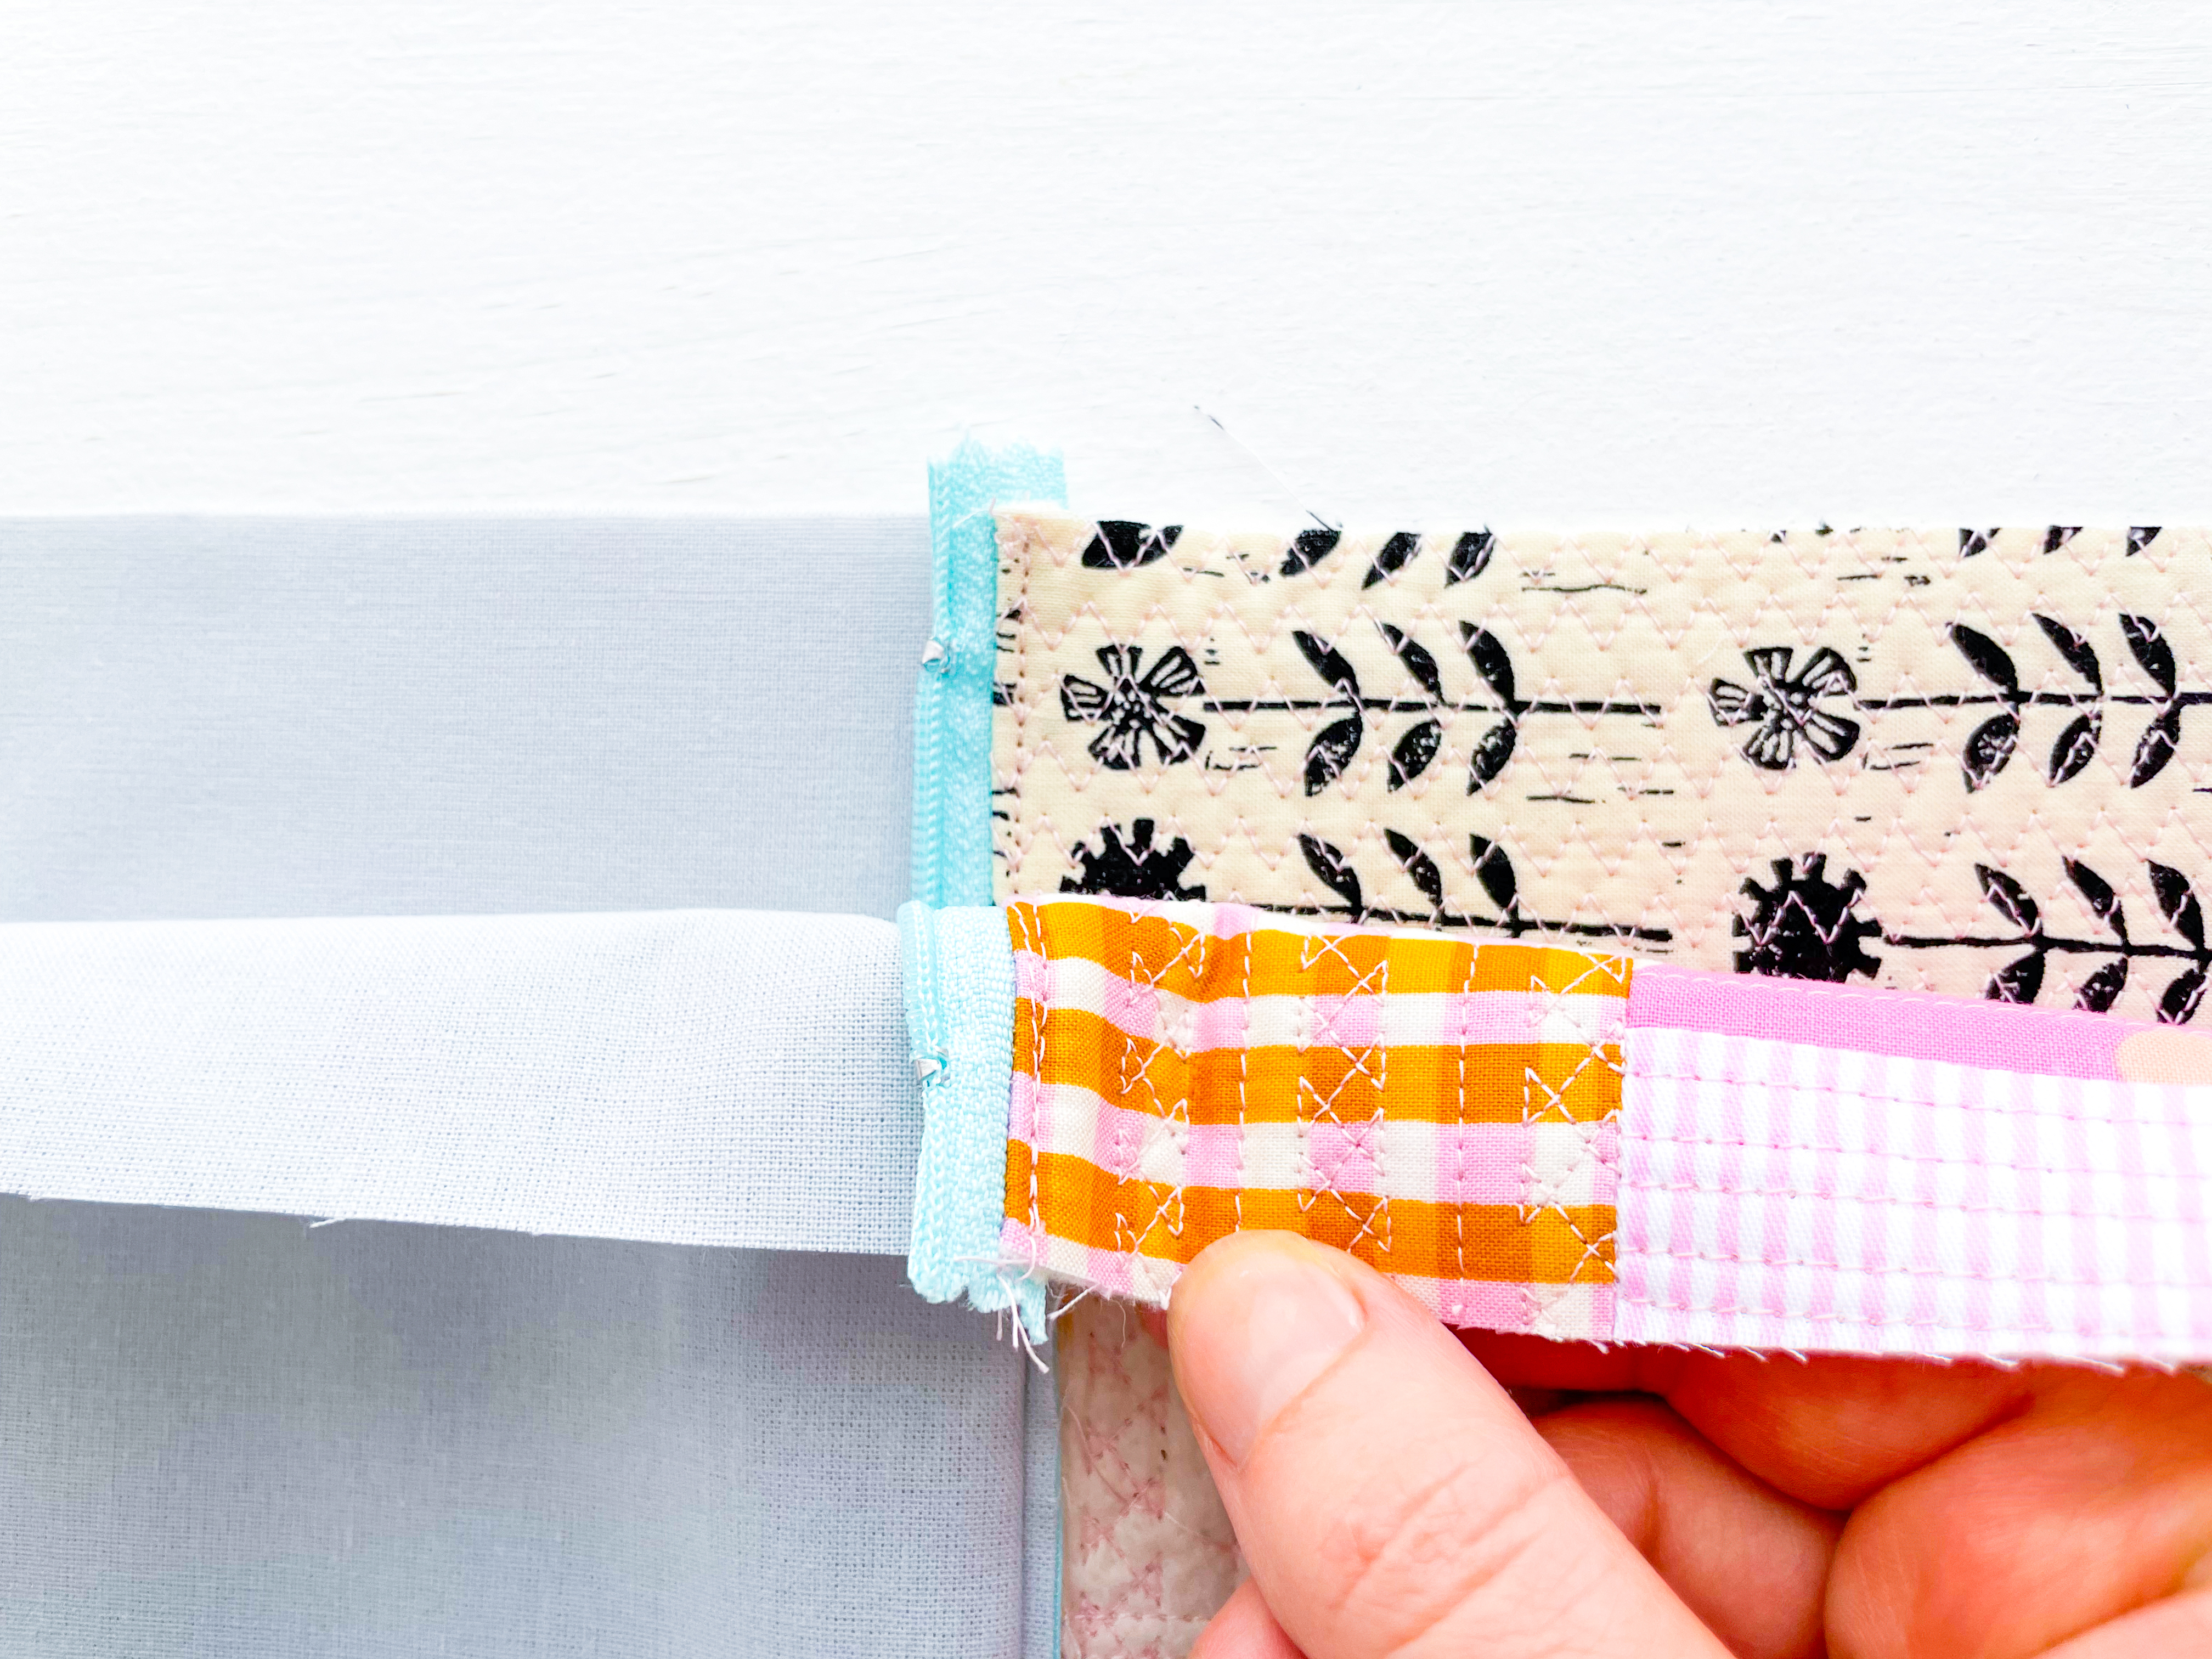
Step 6: Topstitch
Using a stitch length of 3.5, topstitch ⅛″ from the zipper edge.
Make sure the lining is sitting flat and you are stitching through both the exterior and lining layers.
Step 7: Open the Zipper
Open the zipper about ⅔rds of the way.
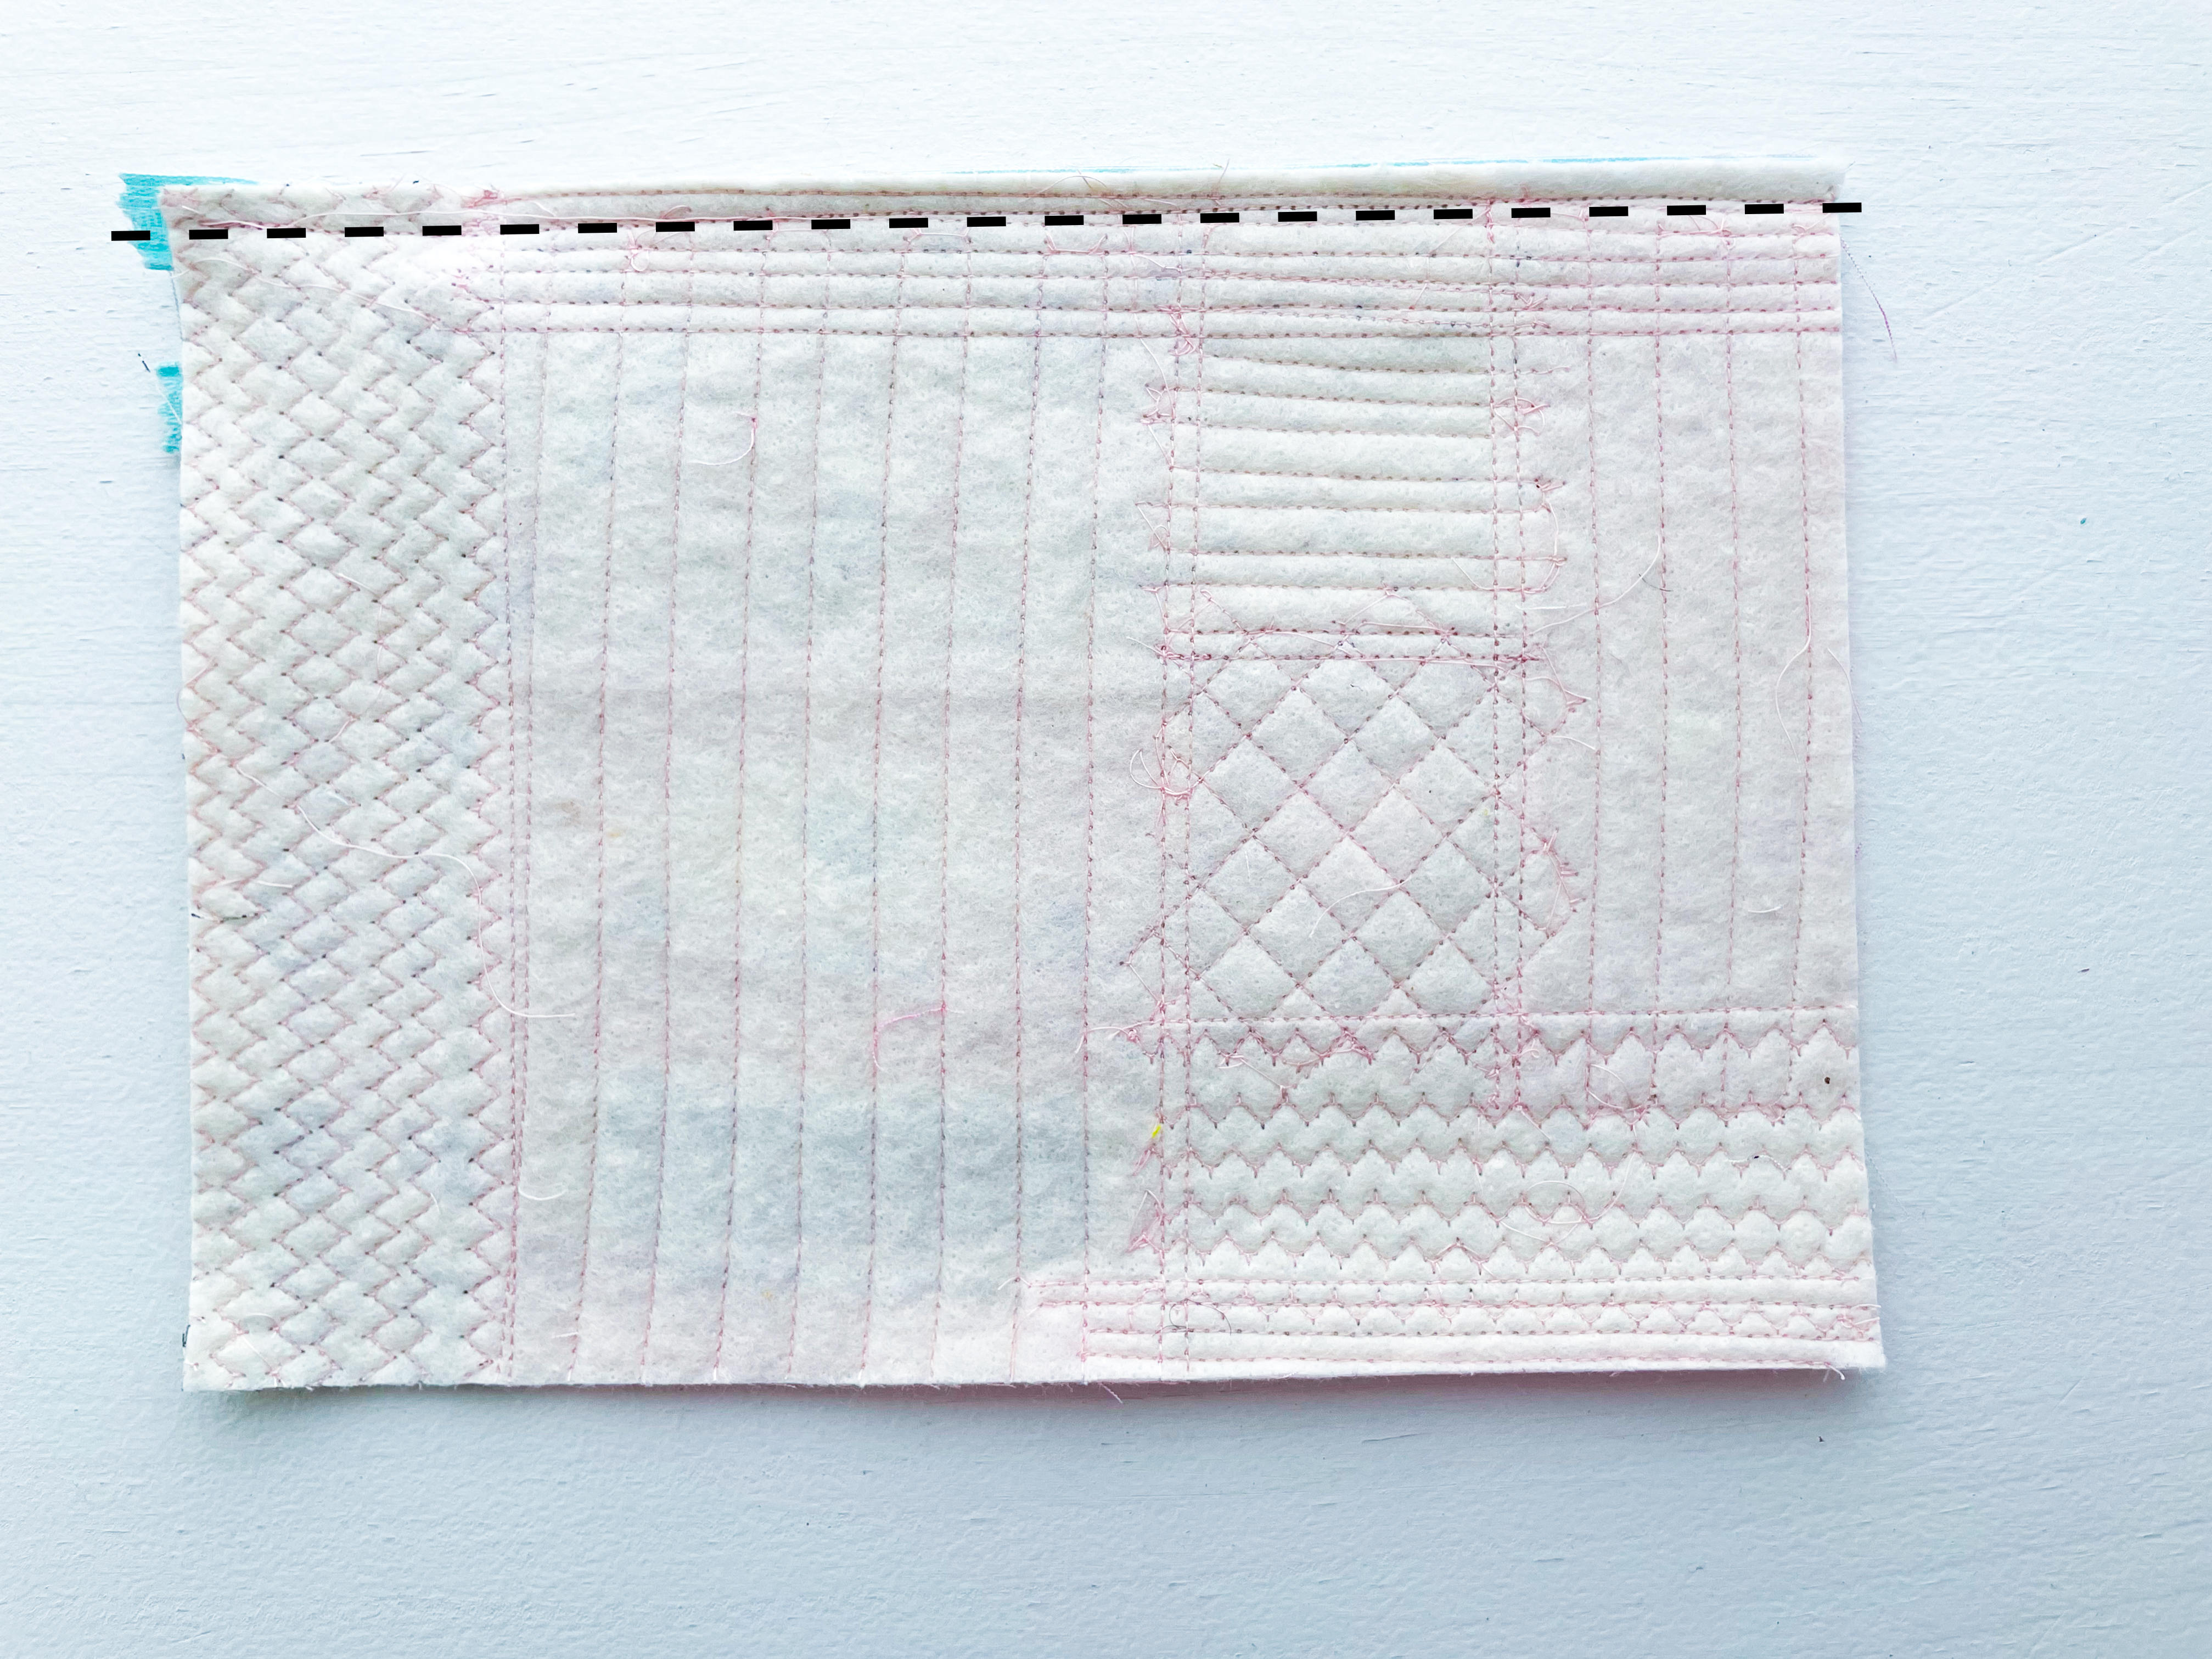
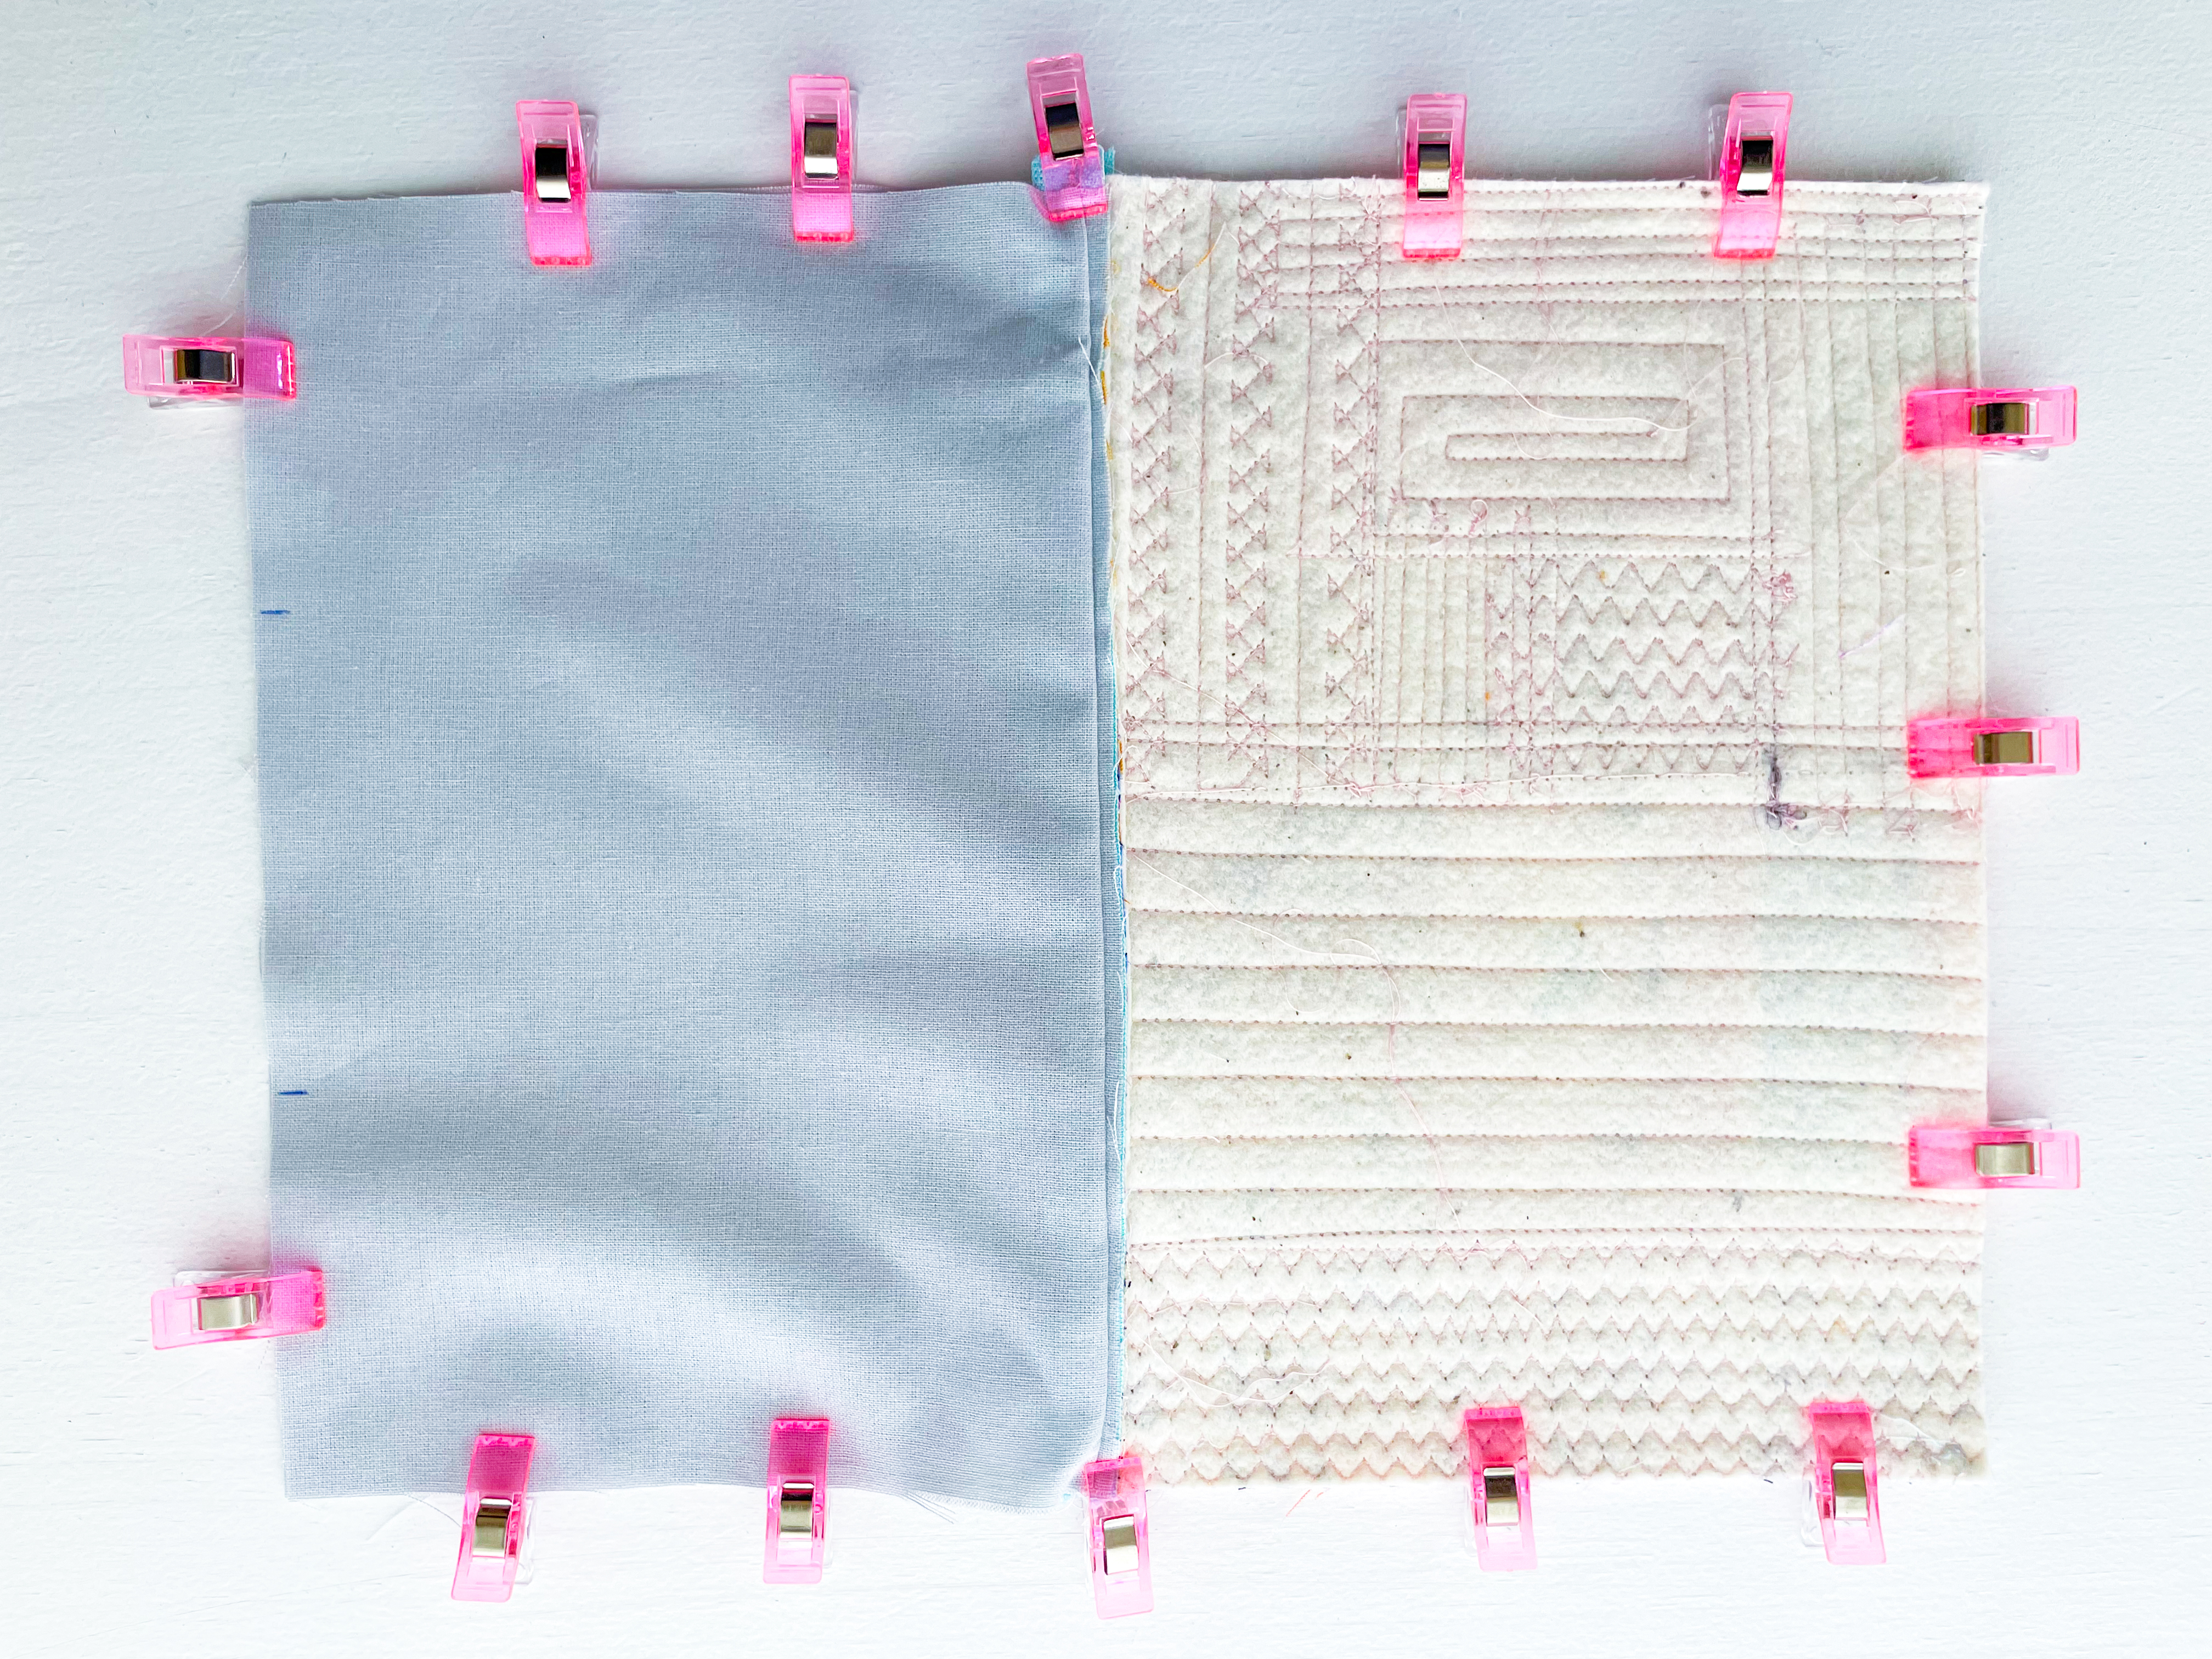
Step 8: Align the Pouch Panels
Fold the exterior panels right sides together and the lining panels right sides together.
The zipper teeth should be pointing toward the lining, and the zipper seams toward the exterior.
Clip all the way around.
Step 9: Sew Around the Pouch
Leaving a 3″ opening at the bottom of the lining, sew around the entire pouch using a ¼″ seam allowance.
Step 10: Trim the Corners
Trim excess fabric from the corners of both the lining and exterior, being careful not to cut through the stitches.
Step 11: Press the Lining Seams
Press the lining seams open — this helps the lining sit neatly inside the pouch.
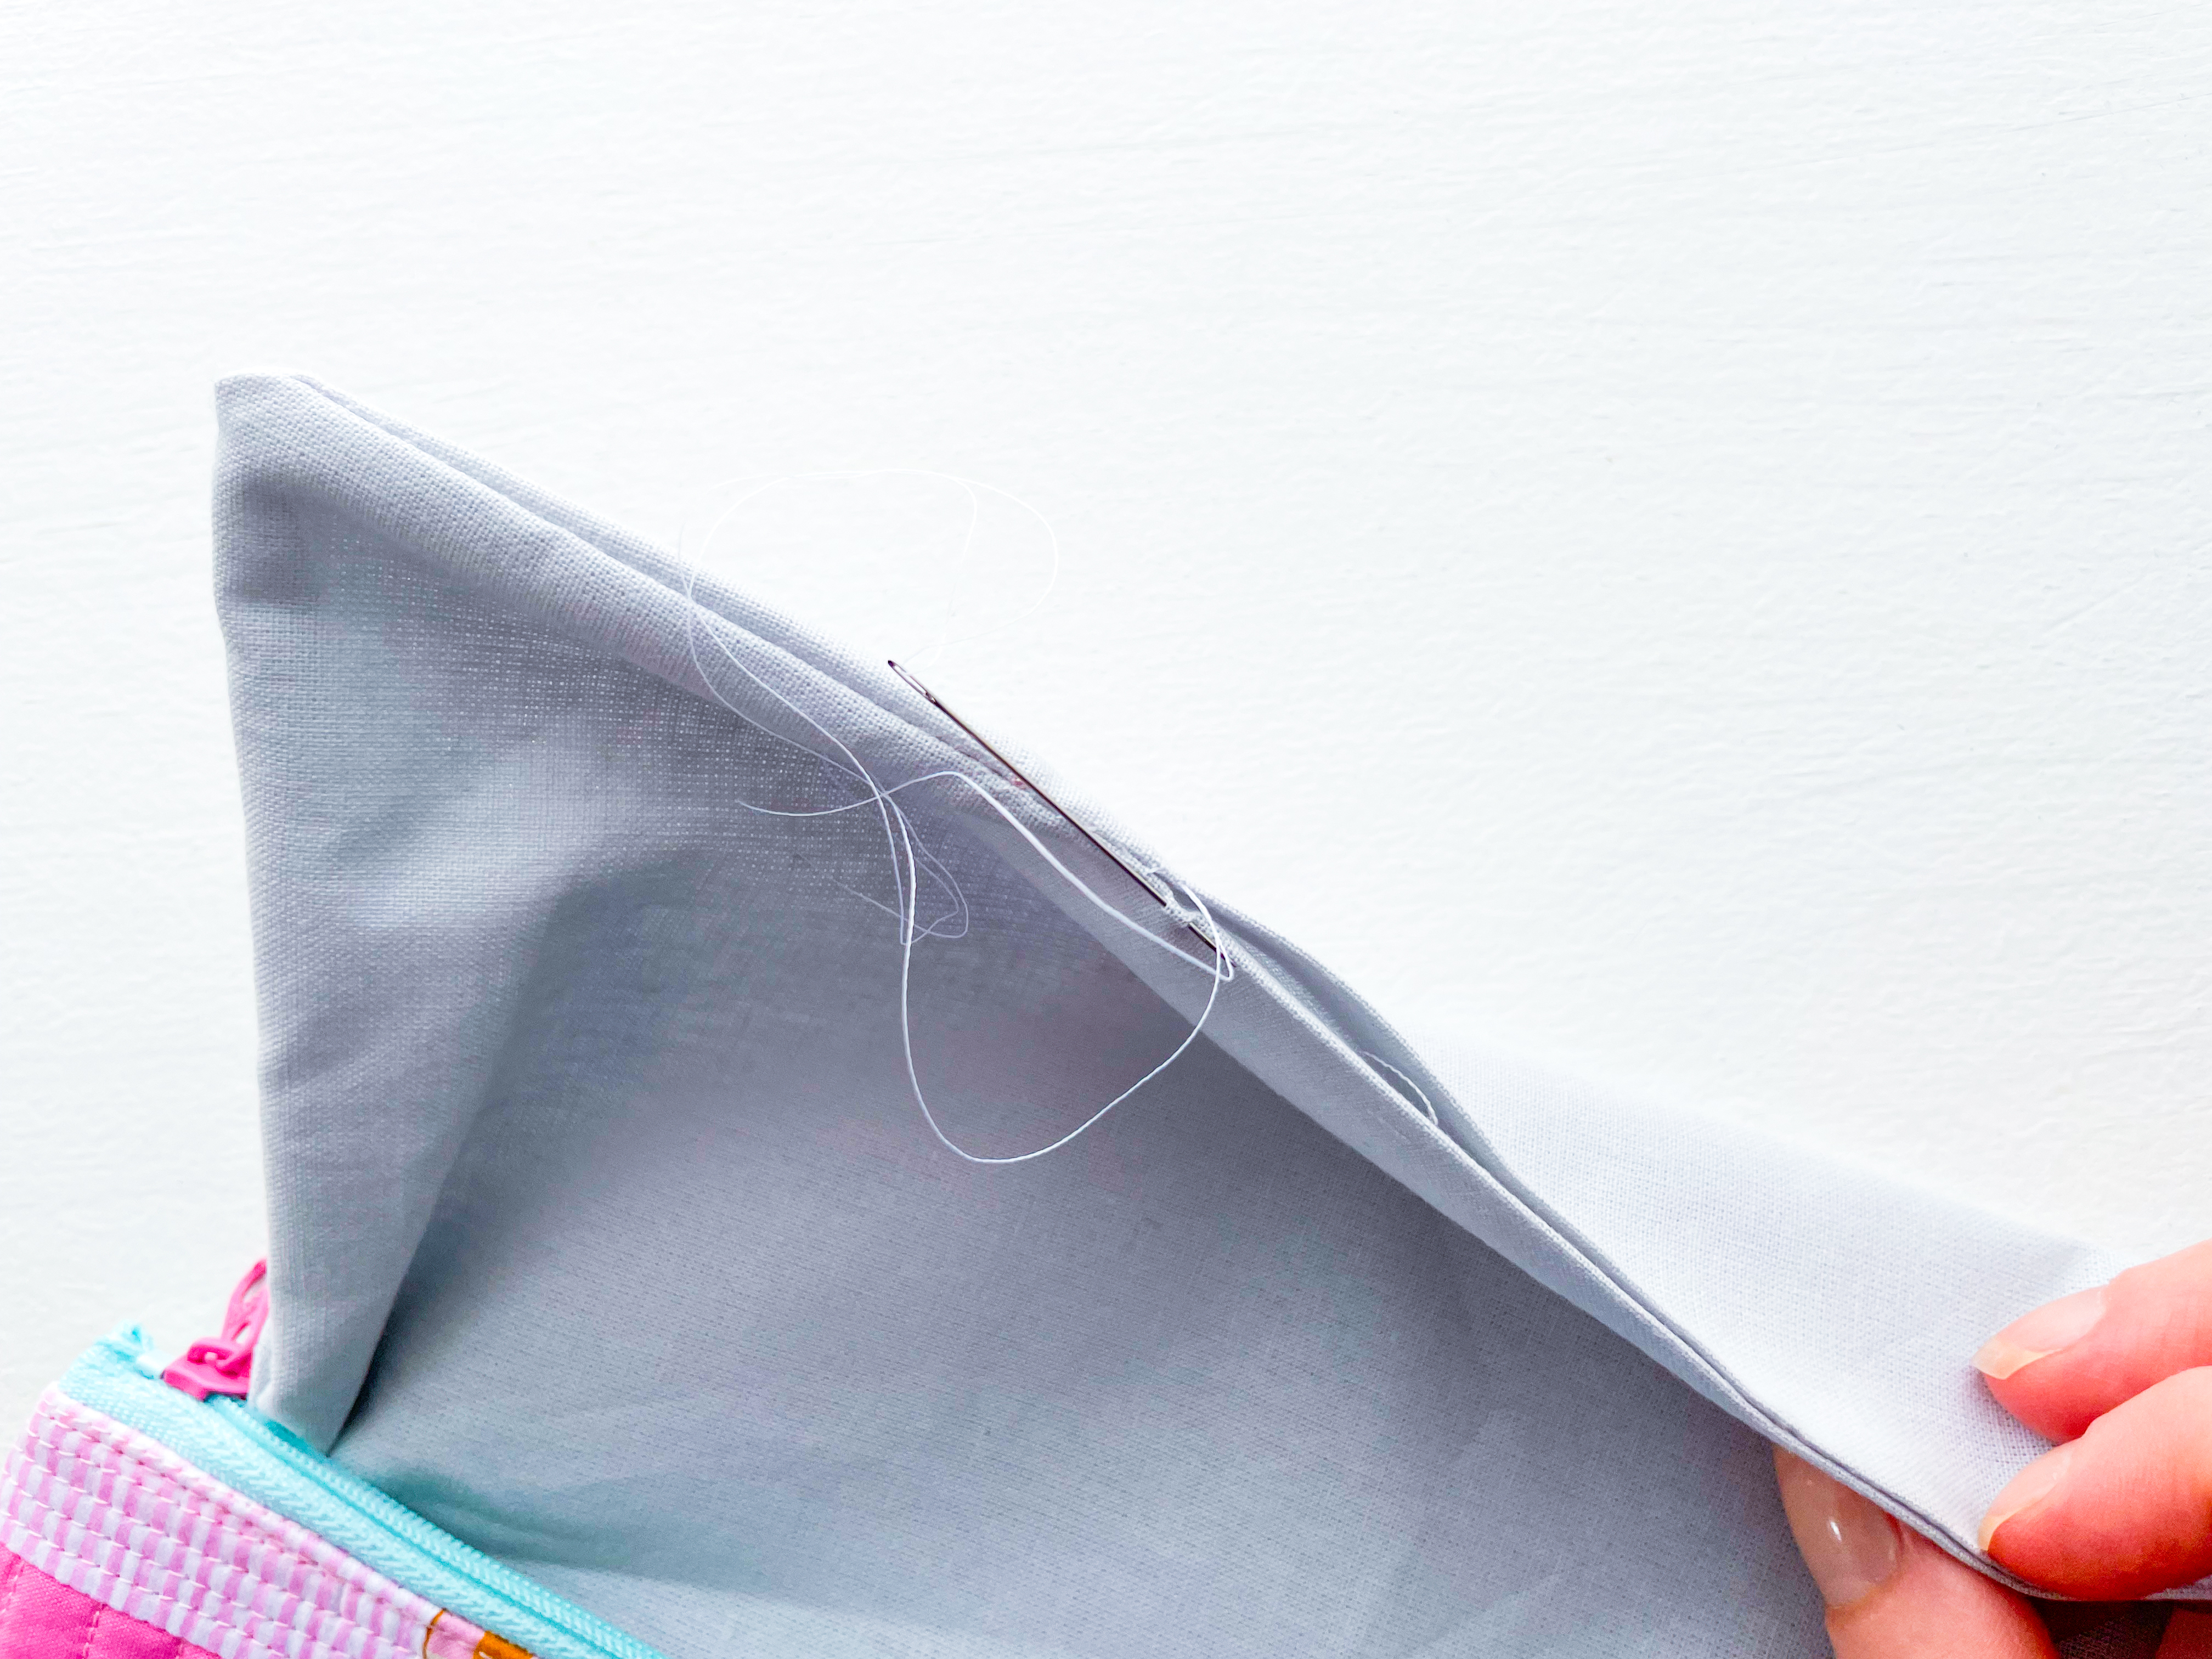
Step 12: Turn Right Side Out and Close the Lining
Turn the pouch right side out through the opening in the lining. Use a seam turner to gently push out the corners and seams. Sew the lining opening closed using a ladder (invisible) stitch.
Alternatively, stitch it closed by machine, sewing close to the edge.
Step 14: Final Press
Tuck the lining inside the pouch and give everything a good press with a hot iron.
Ta-da! You’ve made a sweet quilt-as-you-go zipper pouch — perfect for storing all your favourite things.

I hope this quilt-as-you-go zipper pouch showed you just how simple and satisfying this technique can be. Once you start building panels piece by piece, it’s hard to stop. There’s something so calming about the rhythm of stitching, pressing, and watching scraps turn into something beautifully textured and completely unique.
And the best part? Now that you understand the technique, you can use it in so many other bag projects — larger pouches, tote panels, pockets, even bag straps. This is just the beginning.
If you make one, I would absolutely love to see it. Tag me on Instagram @maandmedesigns so I can admire your scrappy quilting therapy in action 💛
Now… go check that scrap basket again. I know there’s another pouch in there waiting to happen.
Happy Sewing, Kellie x.
© Copyright 2021, Ma & Me Designs.

One thought on “Quilt-As-You-Go (QAYG) Piecing Technique + FREE Zipper Pouch Pattern”