

Clamshell EPP – A Tutorial
Who else loves the look of clamshells, but has no idea how to sew them or where to start? Maybe you’ve seen them done with needle turn appliqué, but that’s really not your thing. Well that’s ok because its not mine either. In this tutorial I’m going to show you how to sew perfect clamshells using my favourite EPP (English paper piecing) method and I’m hoping by the end you won’t be afraid to tackle clamshells either. They really are one of my favourite EPP shapes.
To sew my clamshells, I use a few EPP staples. These include pre-cut papers and a matching template, appliqué glue, and a glue pen.
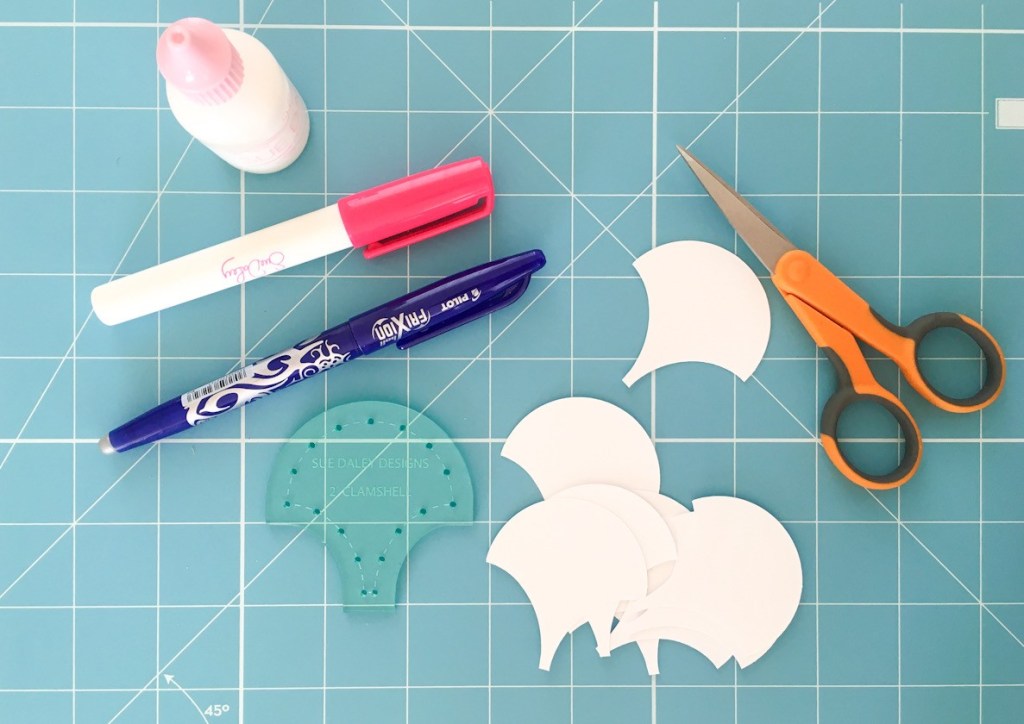
Other things you will need you should already have on hand: a small pair of sharp scissors, an iron and a pressing mat/ironing board, of course fabric and a needle and thread. I’m a huge fan of Sue Daley EPP products, I also use her size 11 milliners needles. They are very fine and make sewing EPP shapes so much easier. My thread of choice is bottom line thread. It’s very thin but very strong and disappears well into the fabric.
Before we get started, I will just note that the idea of EPPing clamshells can be a bit deceiving and maybe this is where a lot of confusion comes in. Although you are using EPP papers to get your fabric shapes, you are actually appliquéing them down to each other and not joining shapes together along a seam like you would with other EPP shapes. This will become clearer as we move on.
Let’s get started.
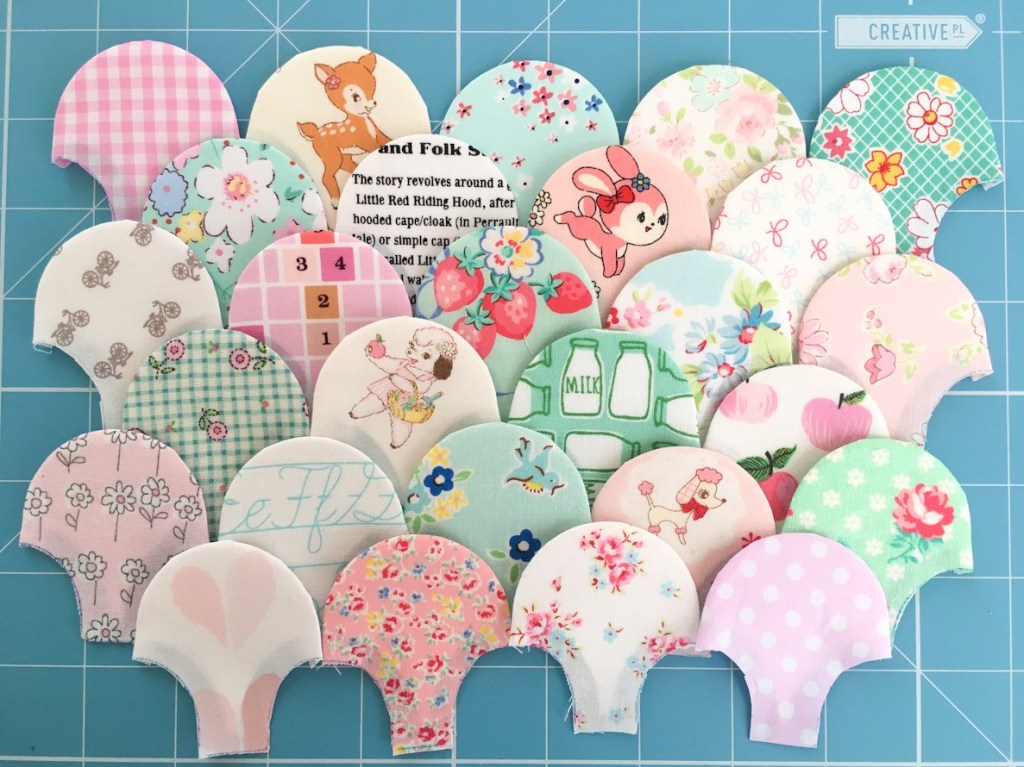
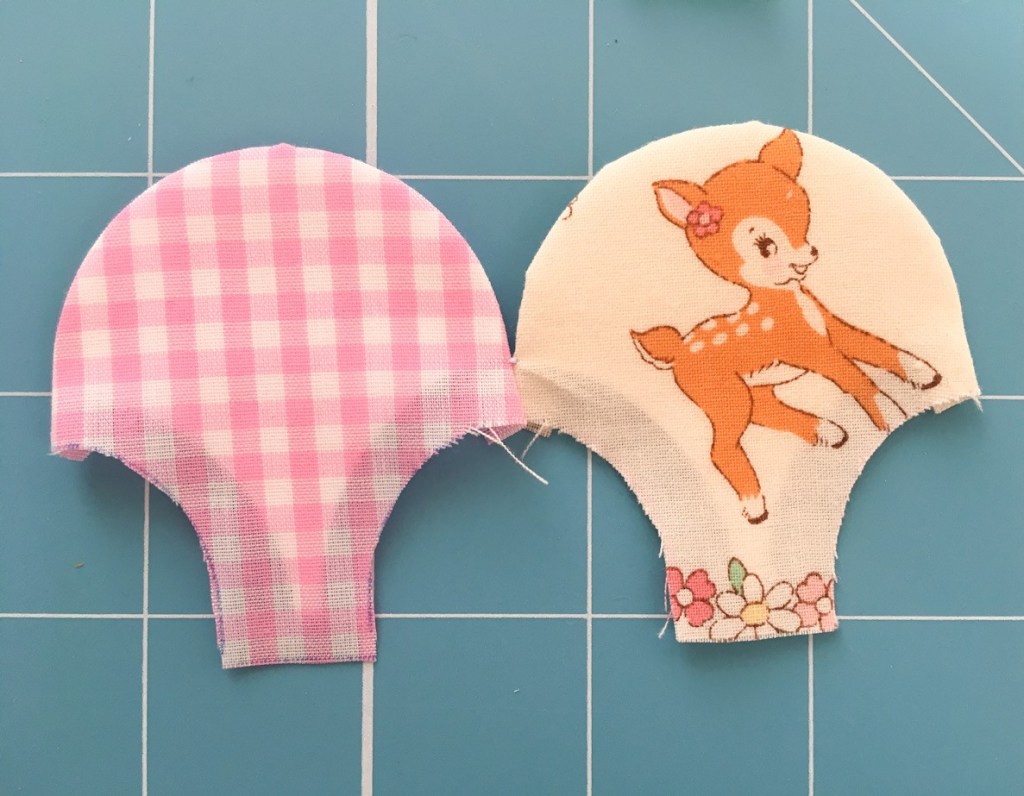
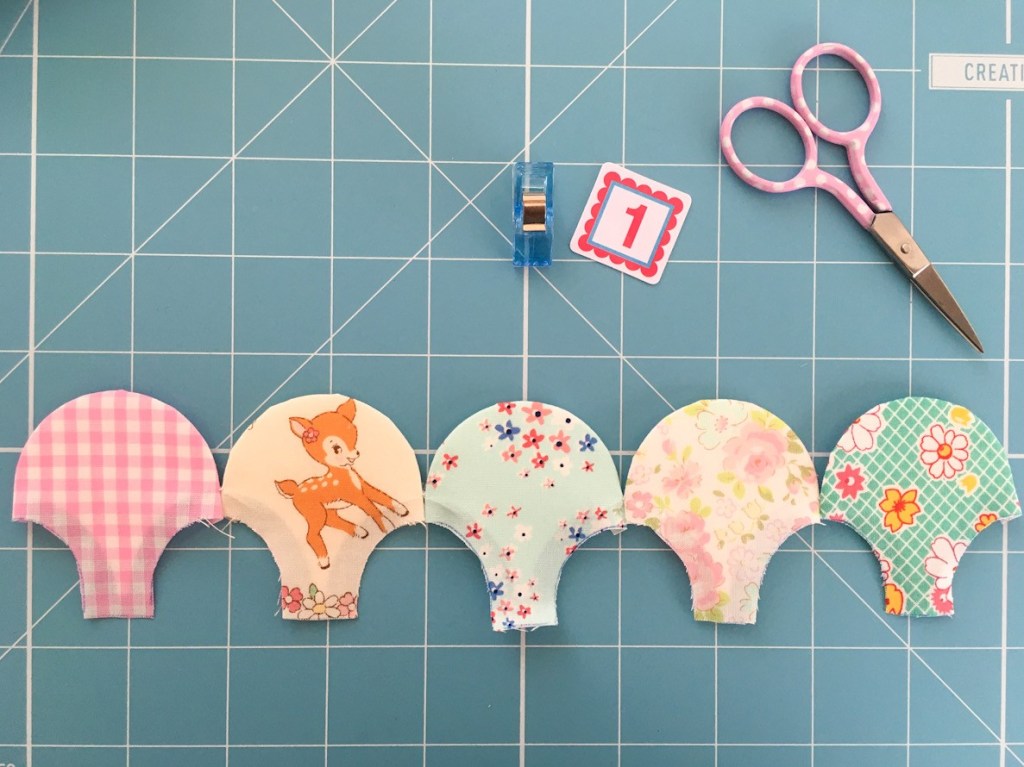
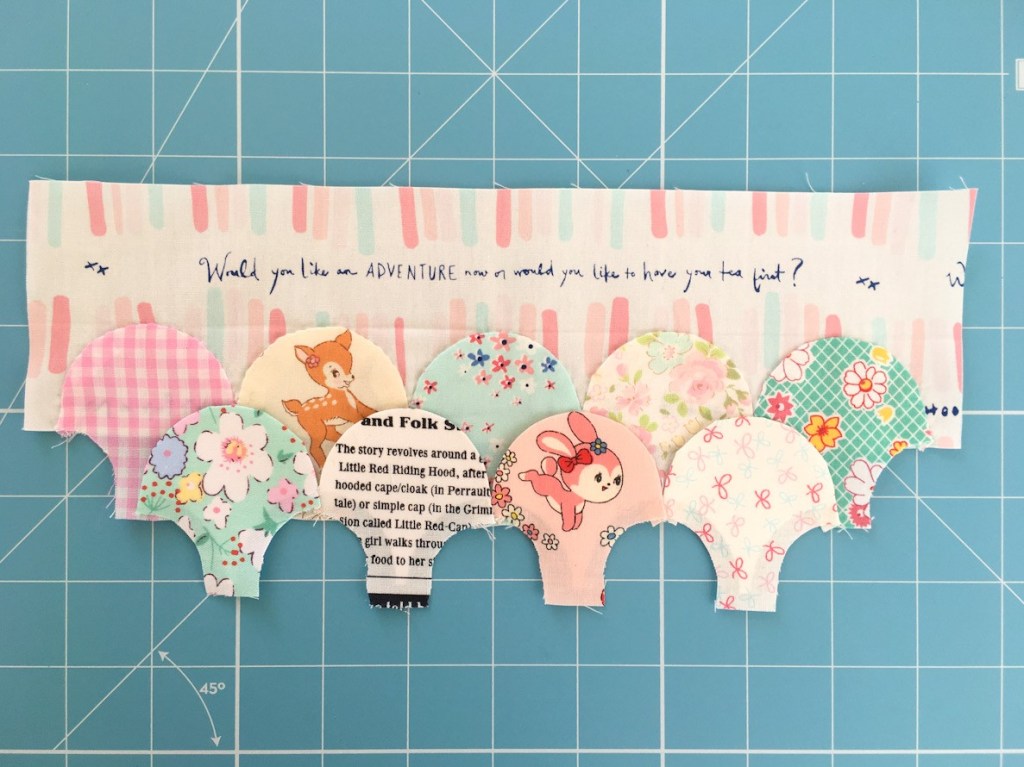
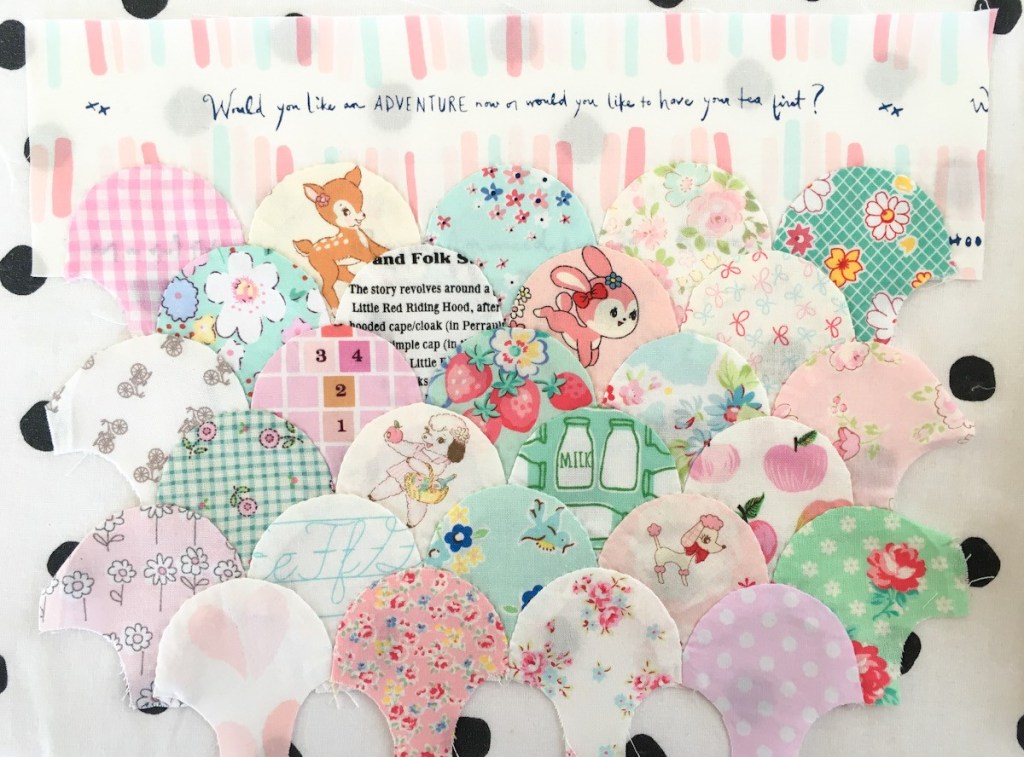
First up you need to cut out and baste all your clamshells for your project. How many you have and the layout of these will depend on what you are making. As a general rule, I lay mine over my template in rows and use that as a guide. Remembering to leave enough overhang for seam allowances.

The clamshells I’m going to make today are 2” clamshells that I’ll be using for a clamshell mug rug. You Can find the FREE tutorial Here.
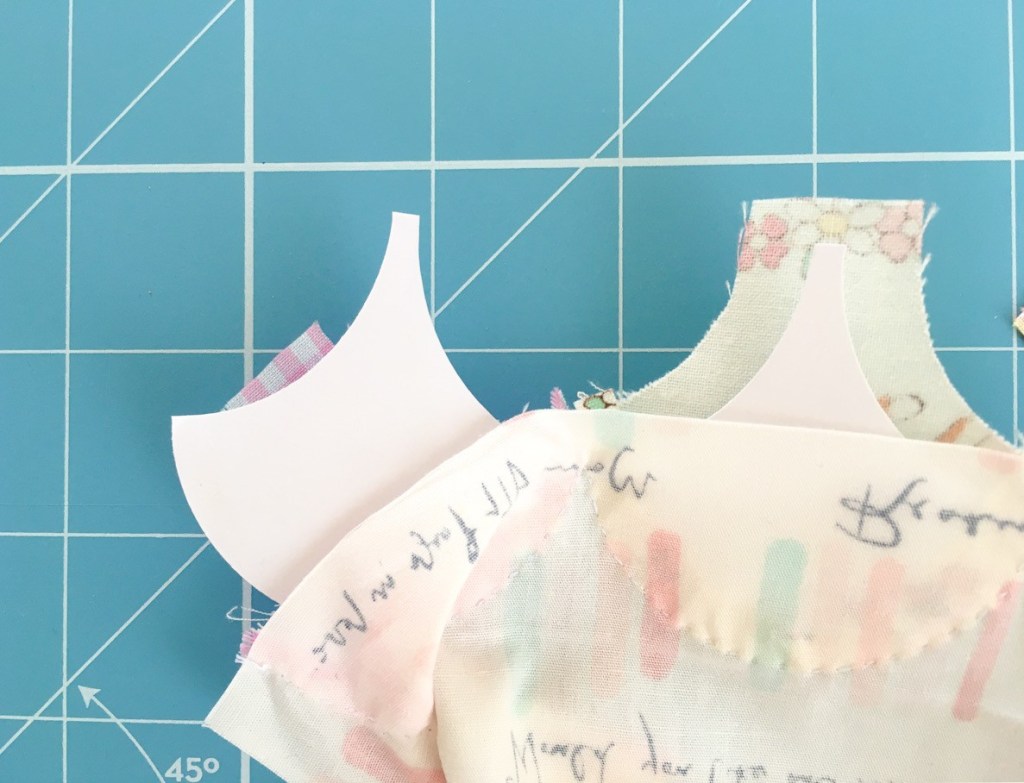
To cut your clamshells you need to take your template and place it down to your fabric and trace around the edge with an erasable marker or pencil. I like to use Frixon pens as they disappear with the iron. You then need to cut around them with a sharp pair of scissors, you won’t be able to use a rotary cutter, as you won’t be able to get into the tight curves.

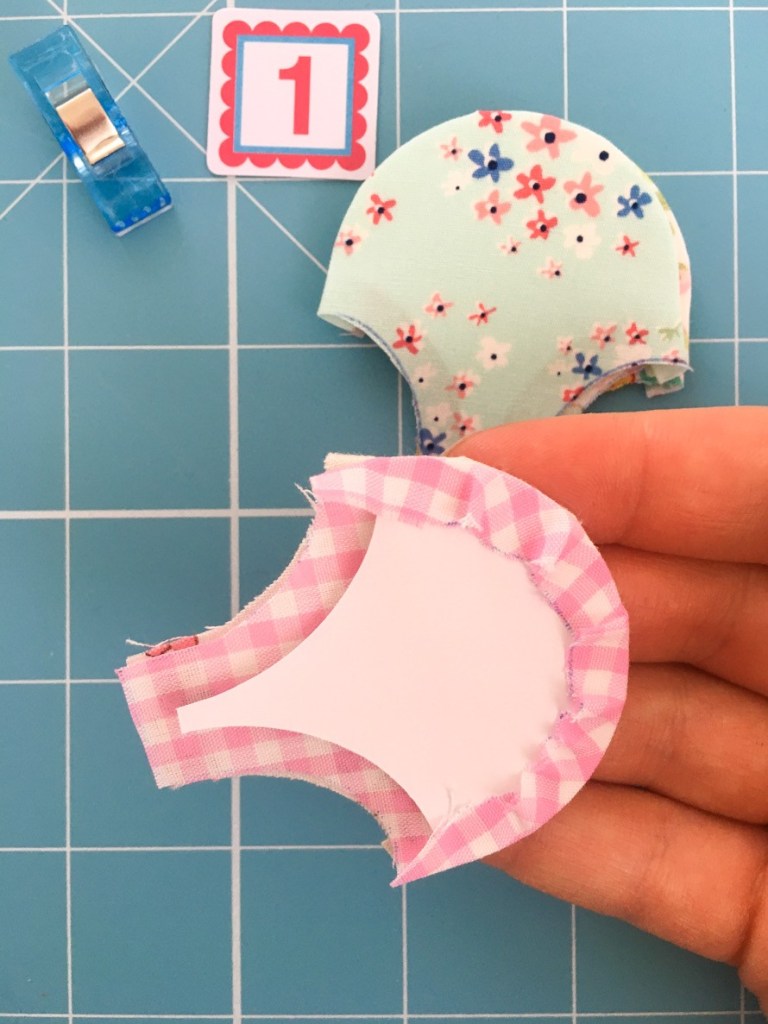
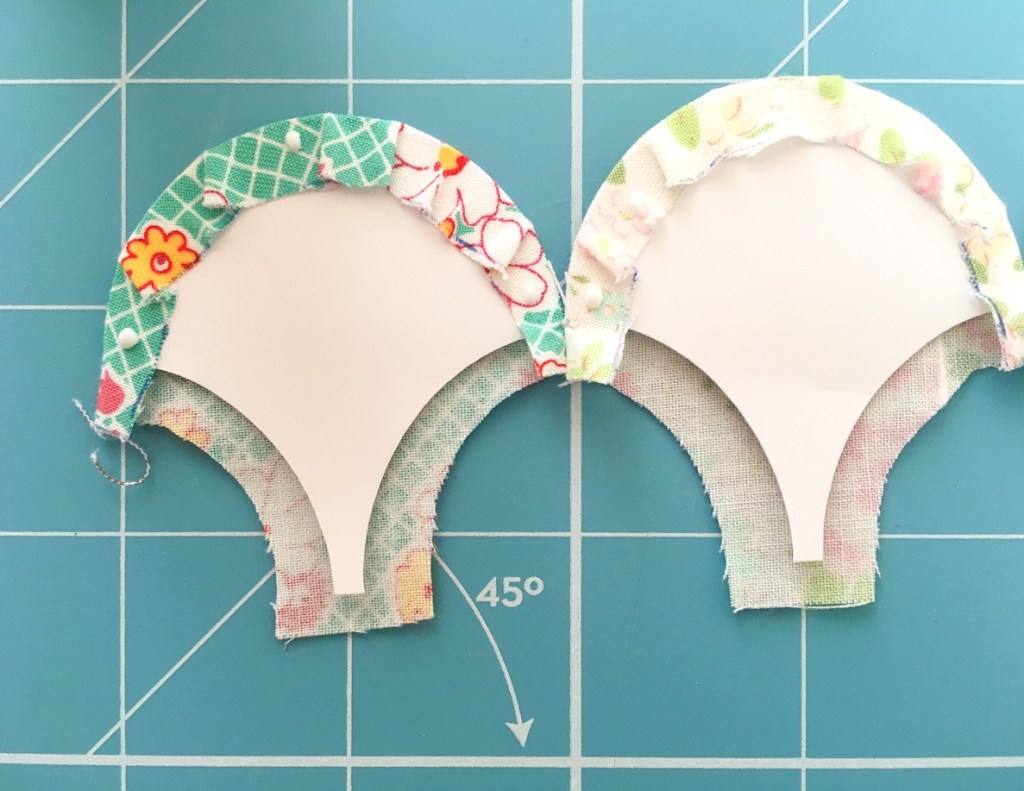
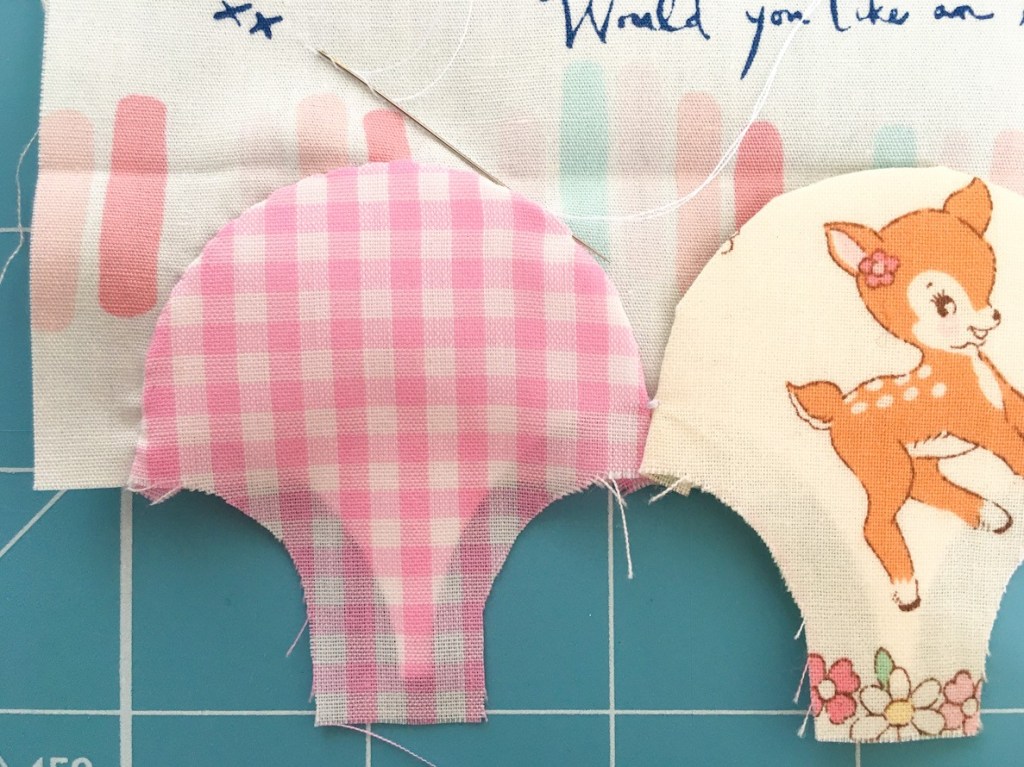
The next step is glue basting your fabric to your papers. To do this place your fabric right side down with your paper centred on top.

Put a line of glue around the top curved edge, right from one point to the next. Then press your fabric around the curve about a 1/3 of the way. Then I go to the other side and work my way back from there.

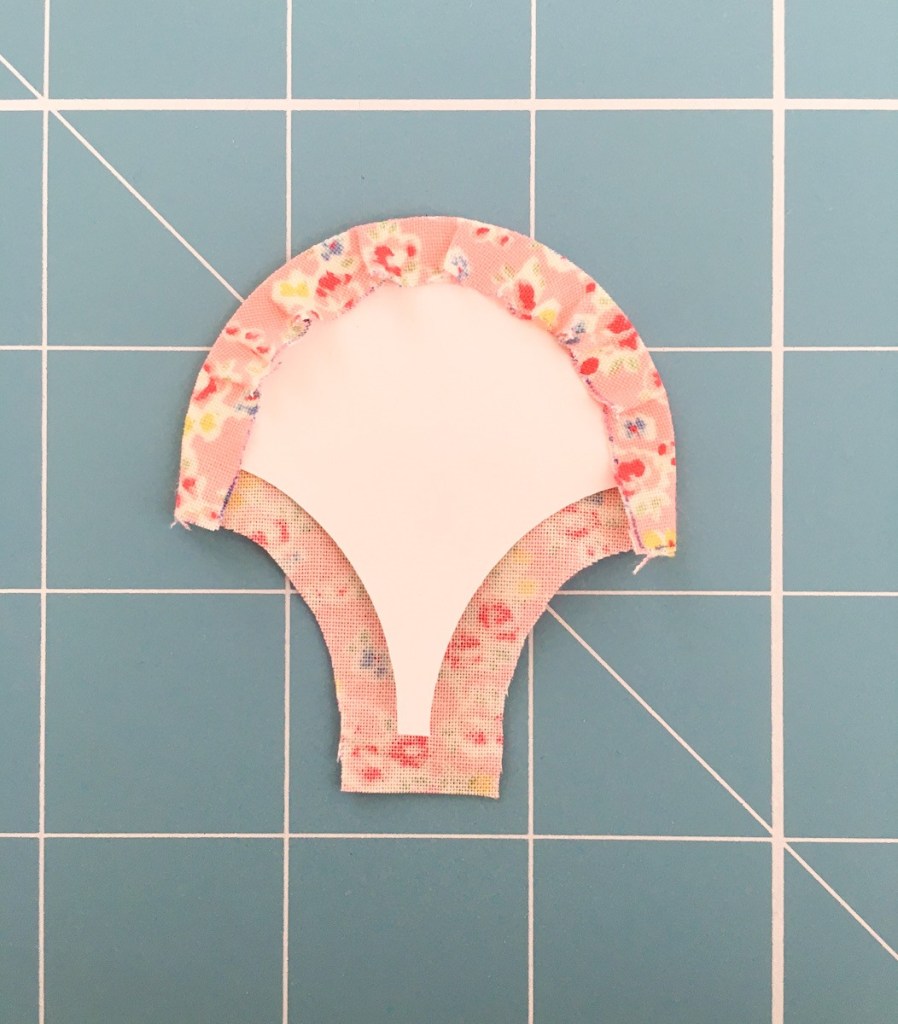
When you’re pressing your fabric down you must be quiet firm and drag your finger around the curve, so you get a nice smooth edge and avoid any puckers or folds. It’s especially important that you do it nice and tight all the way around the top curve of the clamshell, particularly at the points, as this will make sewing them together a lot easier and more accurate. With clamshells’ good preparation at the glue basting stage is the most important part. If you are finding that your first attempt isn’t that great simply practise a few times before you move on to the next stage. Please note that you also only baste the top convex curve of the clamshells, the bottom two concave curves are left as they are.

Once I have all my clamshells basted I like the arrange them over my template or to the size of the patchwork panel I am going to make.
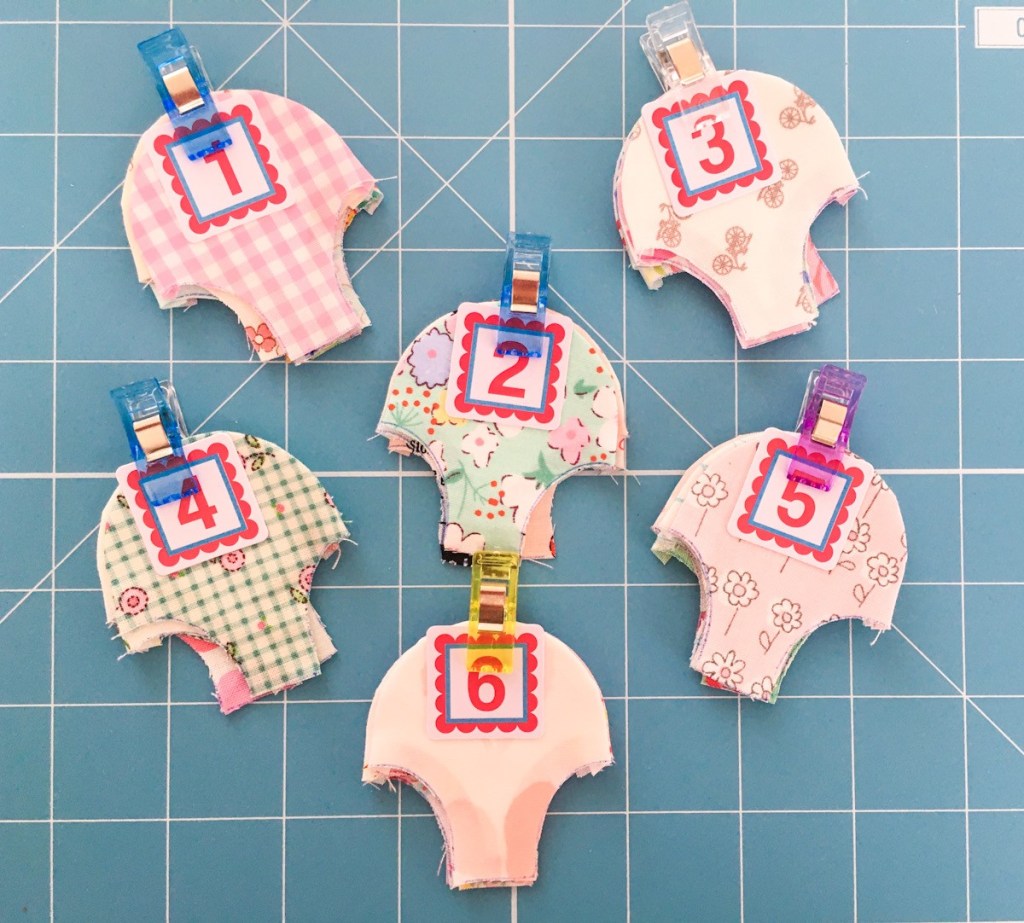
I then like to keep my rows organised together for easier sewing. This is so quick easy with the help of clover binding clips and alphabitties.
What you are going to do next is take your first row of clamshells and join them together like a chain at the points. You need to take your first two clamshells and place them right sides together and line them up at the points of the paper templates where the curve starts. Sometimes it helps if you fold the fabric a little at the points to emphasise exactly where they are.
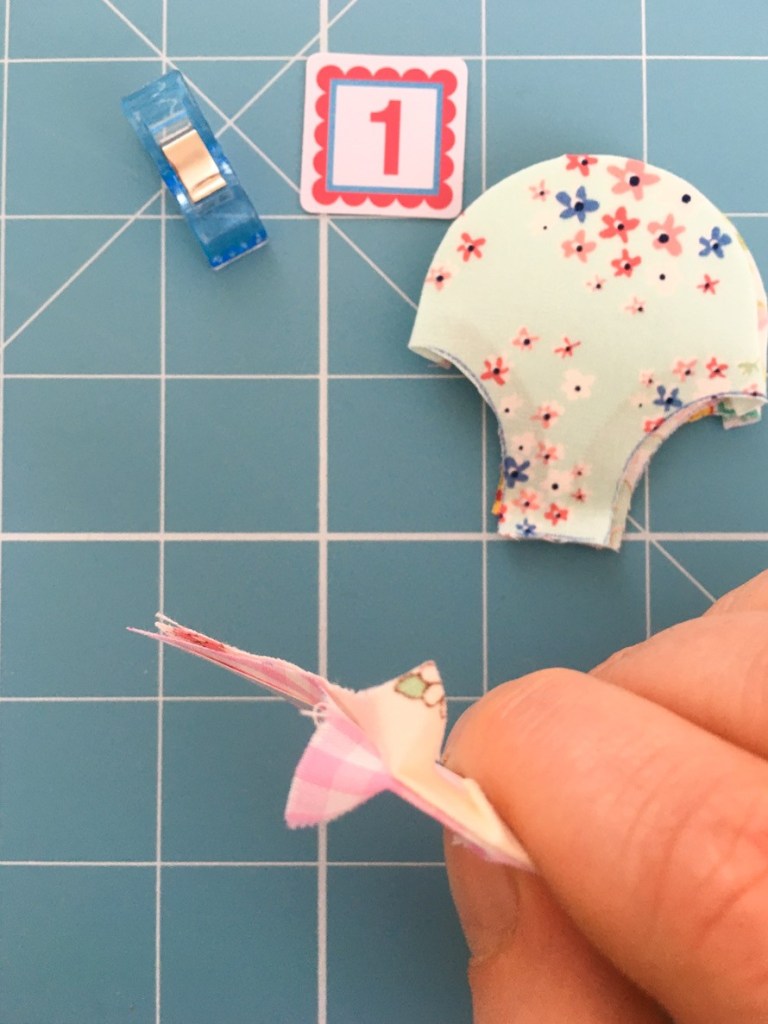
You are then going to join them at the points with a few stitches (about 3) over the top of each other, by put putting the needle into the fabric between the fabric and paper right at the very point of the curve. You don’t need to worry about tying a knot in your thread when you finish, as these are just stay stitches to hold your clamshells in place.
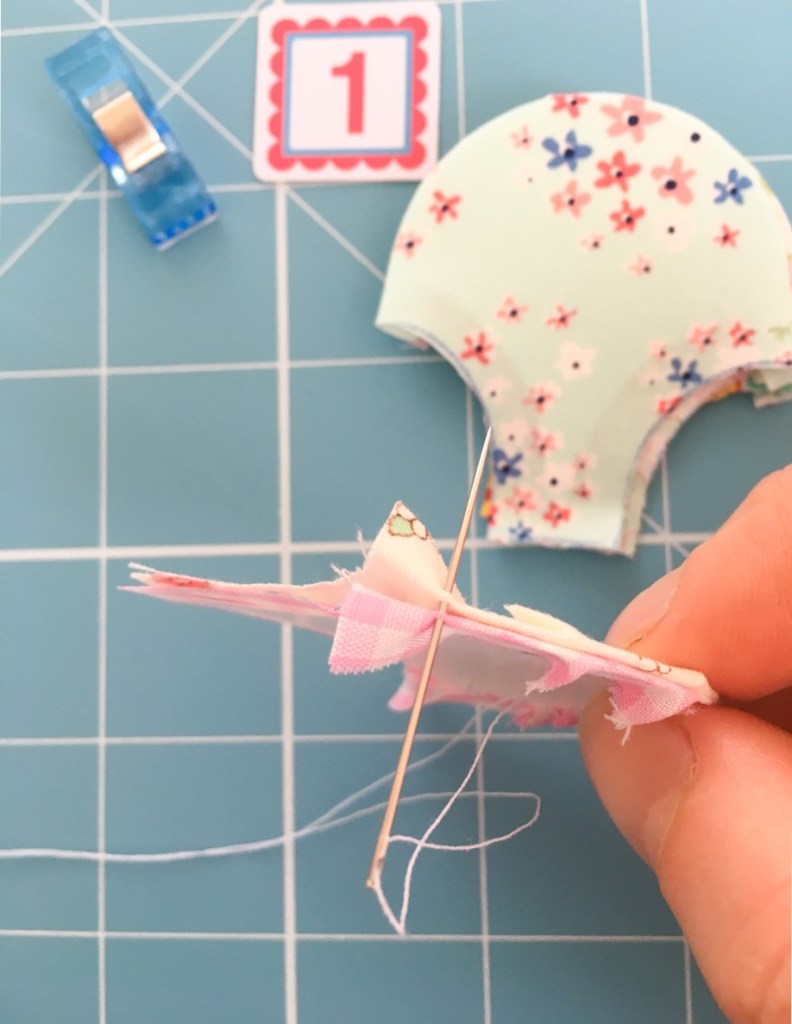
You then repeat this same process to join all your clamshells together that will be in the row. It is important that the stitches are right on the points as it will ensure that your clamshells stay nice and straight.
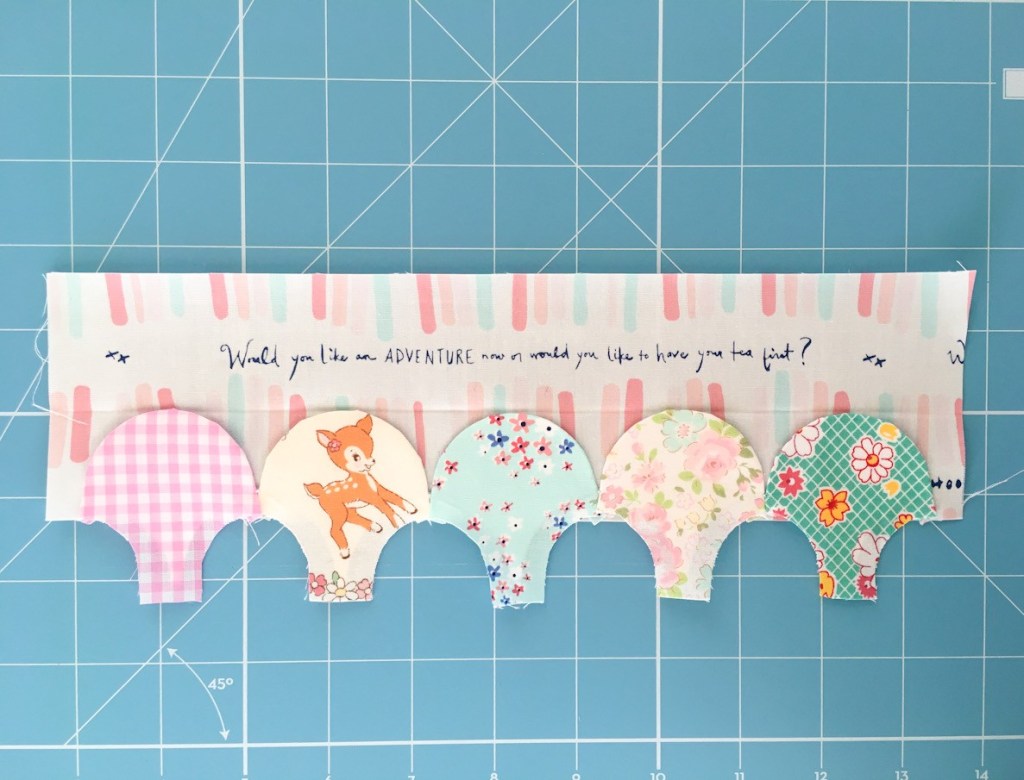
You are now ready to start sewing down your first row of clamshells by adding them to a background or foundation piece of fabric. For the piece of foundation fabric, I like to take a piece of fabric that is at least ½” longer on each side of the first row and at least ½” wider than the size of the clamshell I am using. So, for 2” clamshells it would be 2 ½” wide, for 3” clamshells it would be 3 ½” wide and so on.
From here on I do these steps on my pressing matt or ironing board. You need to make a crease or rule a line exactly in the middle of the piece of foundation fabric. I like to do this by folding it exactly in half along the length of the piece of fabric, pressing it with an iron and then opening it back up again. This line makes a guide of where your going to place the top edge of the clamshells.
You then take your applique glue and put a small dot on the sides and the top of each clamshell.
Then lay your clamshells down to line up along the fold line of your foundation fabric. I like to then press the clamshells with a hot iron to make the glue dry quicker.
Now your clamshells are ready to be sewn down to your foundation fabric. You do this by using an appliqué stitch and sew along the top of the curve of each of your clamshells.

Once you’ve done right along your first row, I like to give it a press again with the iron, then it is time to take out the papers from each clamshell.

You need to pull the papers out to the side, in the direction of the curve, you won’t be able to just pull them straight out. You then press your clamshells again and its time to add the second row of clamshells just like the first one.
Join them in a chain again at the points.
Add your applique glue.
Line up your chain so the top middle of each clamshell sits right where you joined the pervious row with stay stitches at the points. When your happy with it and it all looks straight. Press it again with the iron to hold the glue.
Then appliqué it down to the previous row of clamshells all the way along the top. Press it and remove the papers from the back.
Then you need to continue this same process of adding rows of clamshells until you have you desired patchwork panel.
See! Not so bad after all right!?
You can now sew perfect little clamshells too.
I hope this tutorial was helpful and took the fear out of clamshells for all of you out there wanting to give it a go.
If you have any questions, please feel free to send me a message or leave a comment.
Happy Sewing, Kellie X.
© Copyright 2020, Ma & Me Designs.

Thank you so much. Great Job. Dolores appreciates.
No worries Dolores, thanks so much.