
KAM Snap Tutorial
KAM snaps, also known as plastic snaps or plastic fasteners, are a brilliant alternative to traditional buttons and buttonholes. They’re bright, colourful, fun – and once you know how to install them properly, they’re also incredibly quick and easy to use. Best of all, KAM snaps require no sewing, no fiddly buttonholes, and can be installed in under one minute, making them a strong and reliable closure for all kinds of sewing projects.
I first started using KAM snaps a few years ago when I began sewing baby bibs. One of the biggest advantages is that babies can’t easily pull them off – something I always struggled with when using Velcro closures. Since then, my love for KAM snaps has only grown, and I now use them on everything from purses and bags to pillow covers and other handmade projects whenever I can. If it’s something you’d normally finish with a button, buttonhole, or Velcro, chances are you can swap it for a snap instead.
KAM snaps come in a variety of sizes, but the most commonly used size is Size 20 (also known as T5) — and it’s the size I use for almost all of my projects. It’s also the easiest size to find when shopping for snaps, though it’s always a good idea to double-check before purchasing.
You can find KAM snaps in many places, including Amazon, eBay, and independent fabric or patchwork shops. If you’re new to using plastic snaps, you’ll also need a pair of KAM snap pliers, which are a small and worthwhile investment. Some pliers come as part of a starter kit with a selection of snaps, or you can buy the pliers and snaps separately.
If you’re in Australia, you can purchase KAM snaps, pliers, and even a snap colour card from here or here – because who doesn’t love choosing the perfect snap colour? .
If this is your first time installing KAM snaps, I highly recommend practising on a scrap piece of fabric first. This will help you get a feel for the process and understand how the KAM snap pliers work before installing snaps on your actual sewing project. Once snaps are installed, they can be tricky to remove, and a mistake may damage your fabric – so a quick practice run is well worth it.
That said, if a snap doesn’t install quite right, it can be removed. To do this, gently squeeze the snap sideways with your pliers to break the seal between the cap and the stud or socket. Keep in mind that the fabric will still show the hole made by the awl, so removal isn’t completely invisible.
You may also want to test the thickness of the fabric layers you’re inserting your snaps into. I’ve found that KAM snaps work perfectly with two layers of fabric, plus a layer of cotton batting and thin interfacing such as SF101. If you’re working with thicker materials or heavier interfacings, it’s a good idea to test on scrap fabric first. This ensures the post on the snap cap can be compressed enough to secure the snap properly without it coming loose.
Let’s get started!
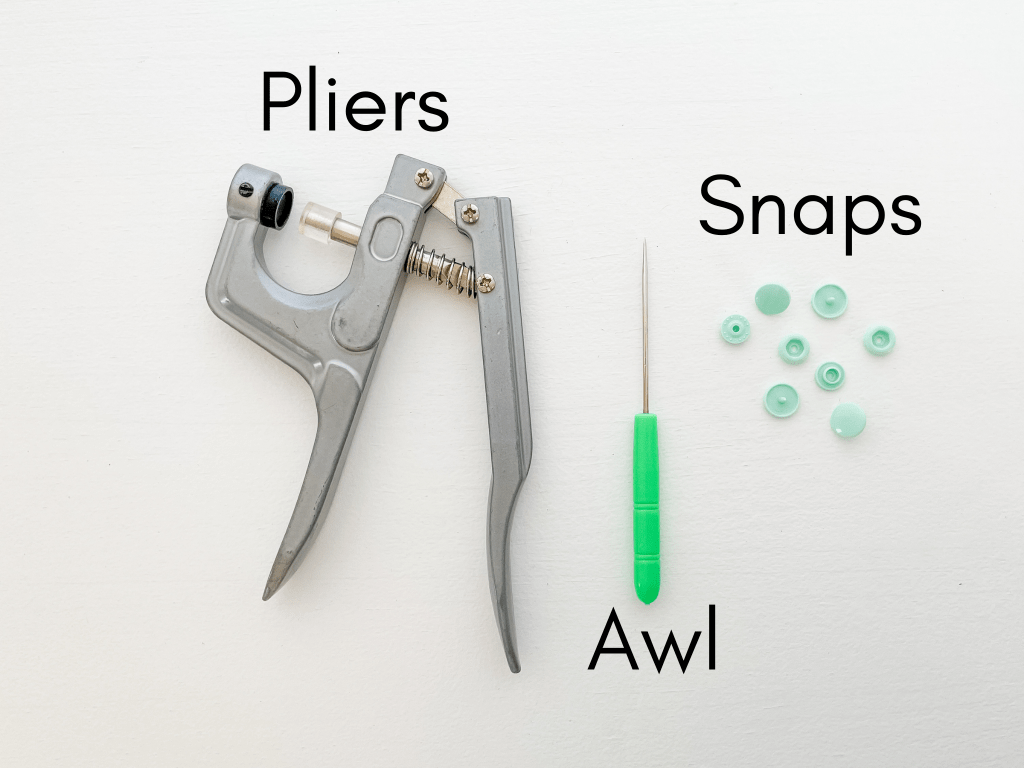
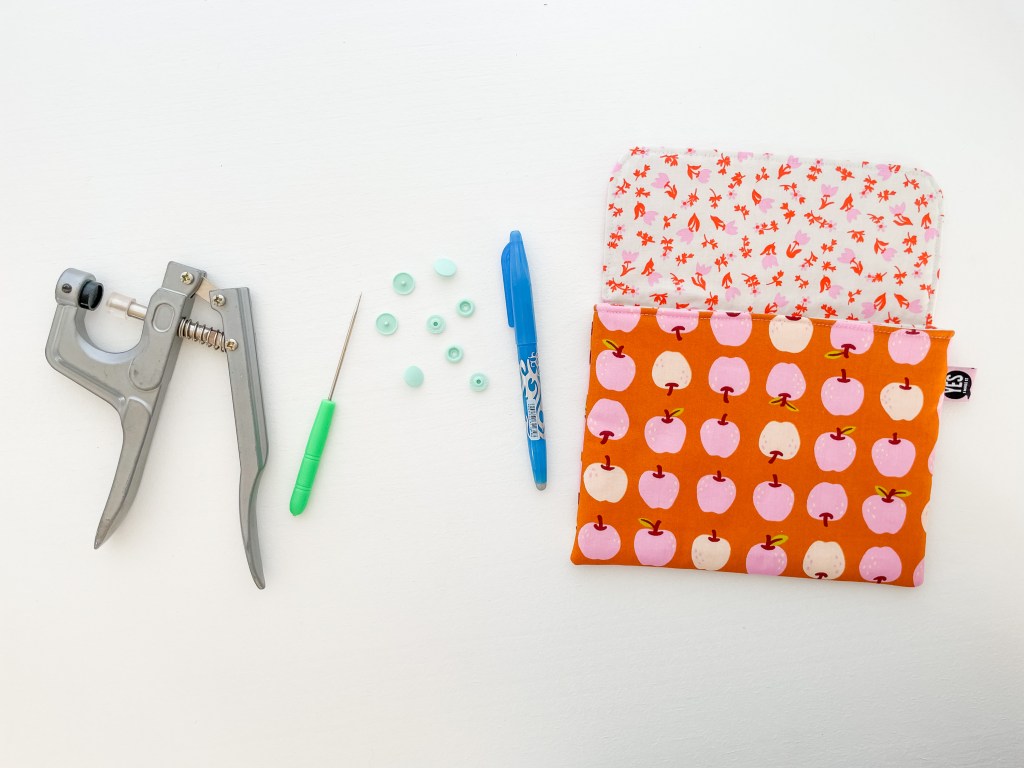
Supplies:
- KAM Snap Pliers
- An awl to push holes through the fabric/ fabric layers
- Plastic snaps
- Your sewing project
- Marking pen (I use Frixion)
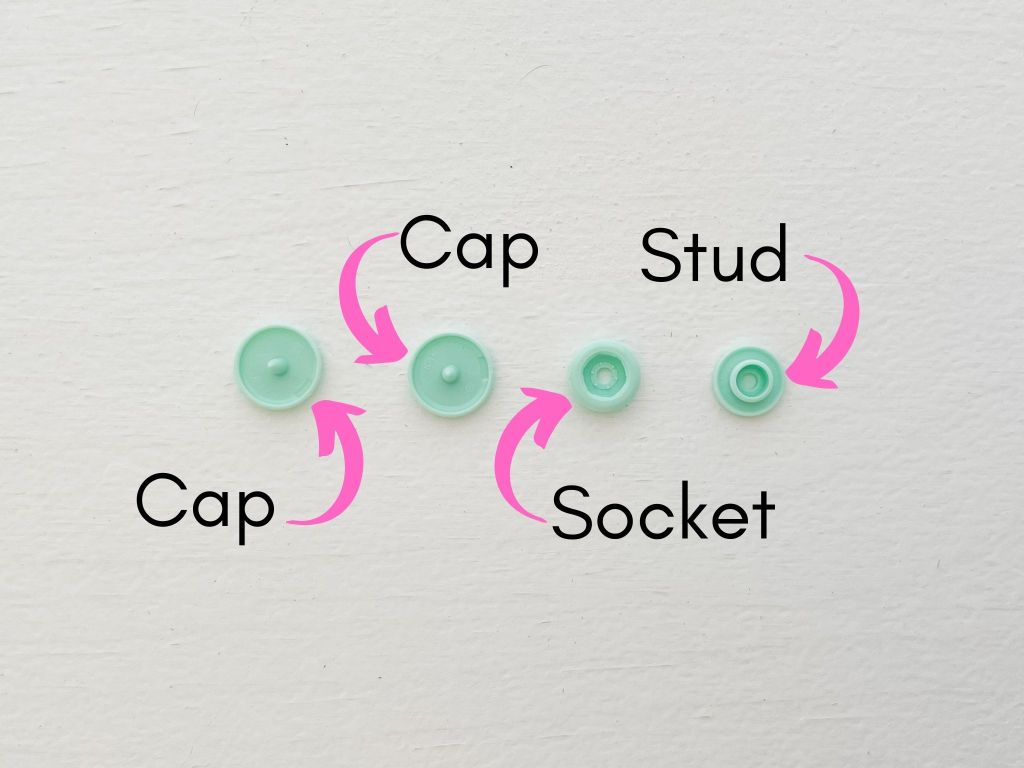
Select a set of snaps by choosing 2 caps, a stud and a socket in the colour you choose to use.
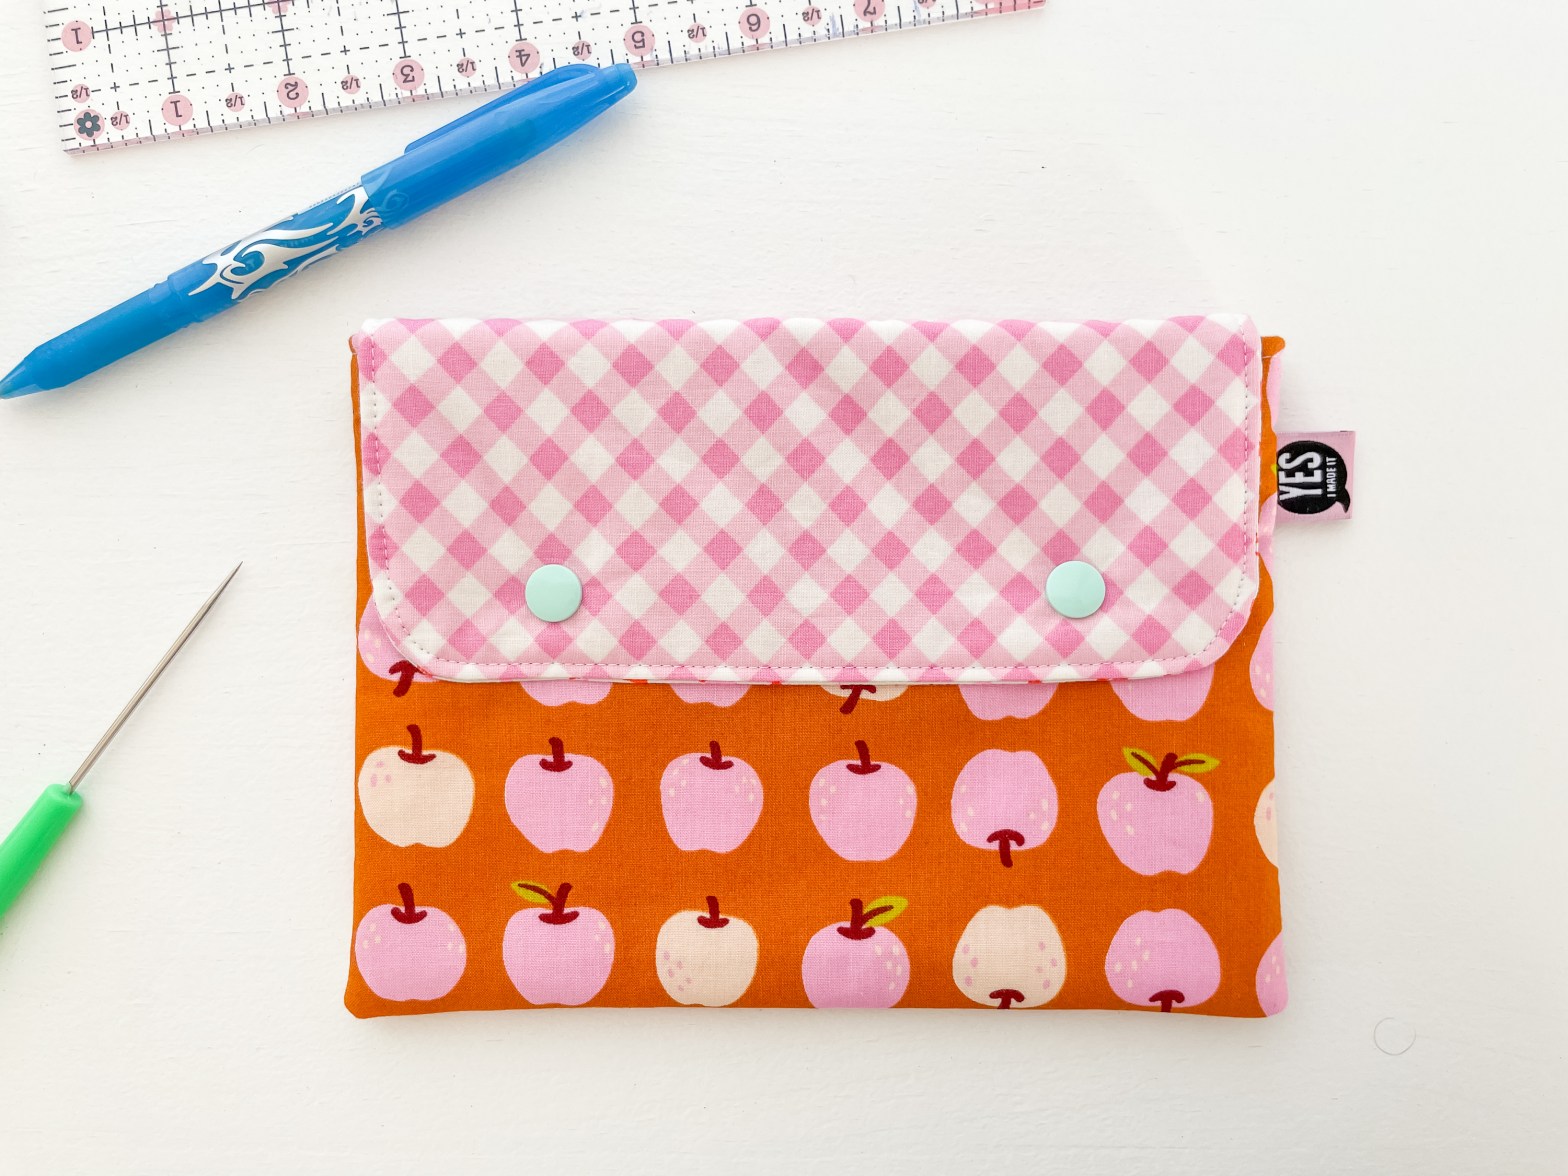
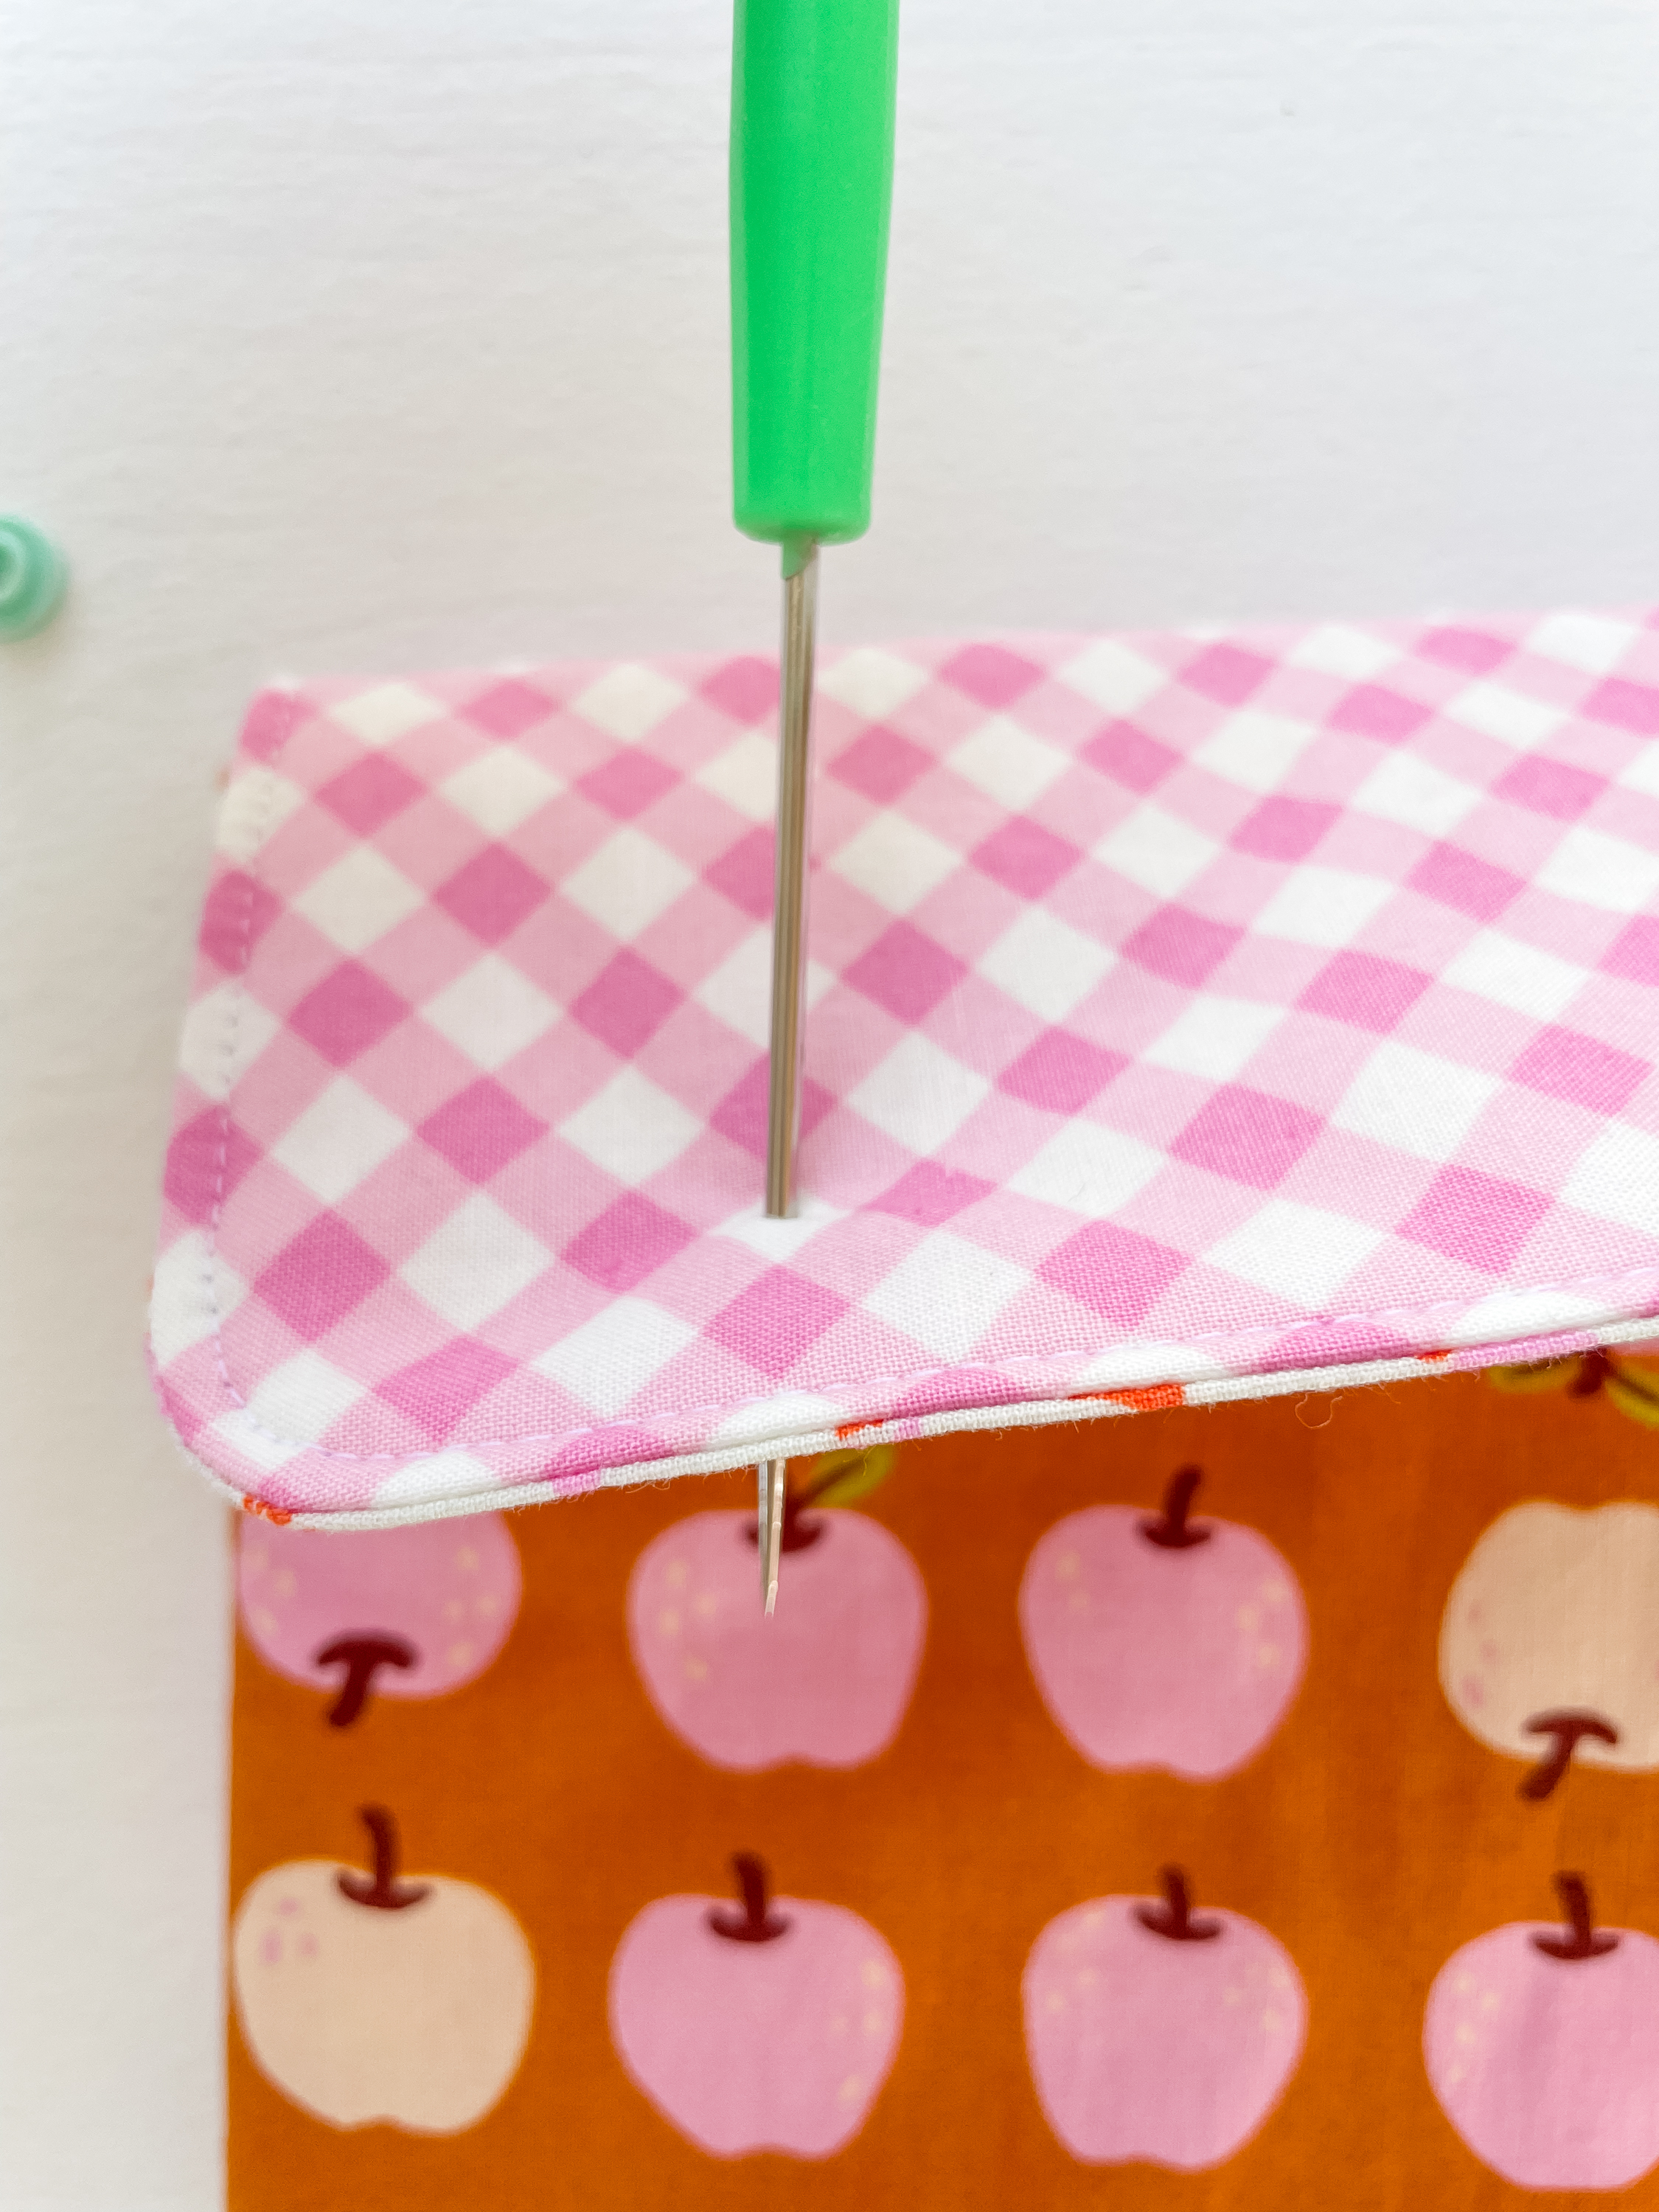
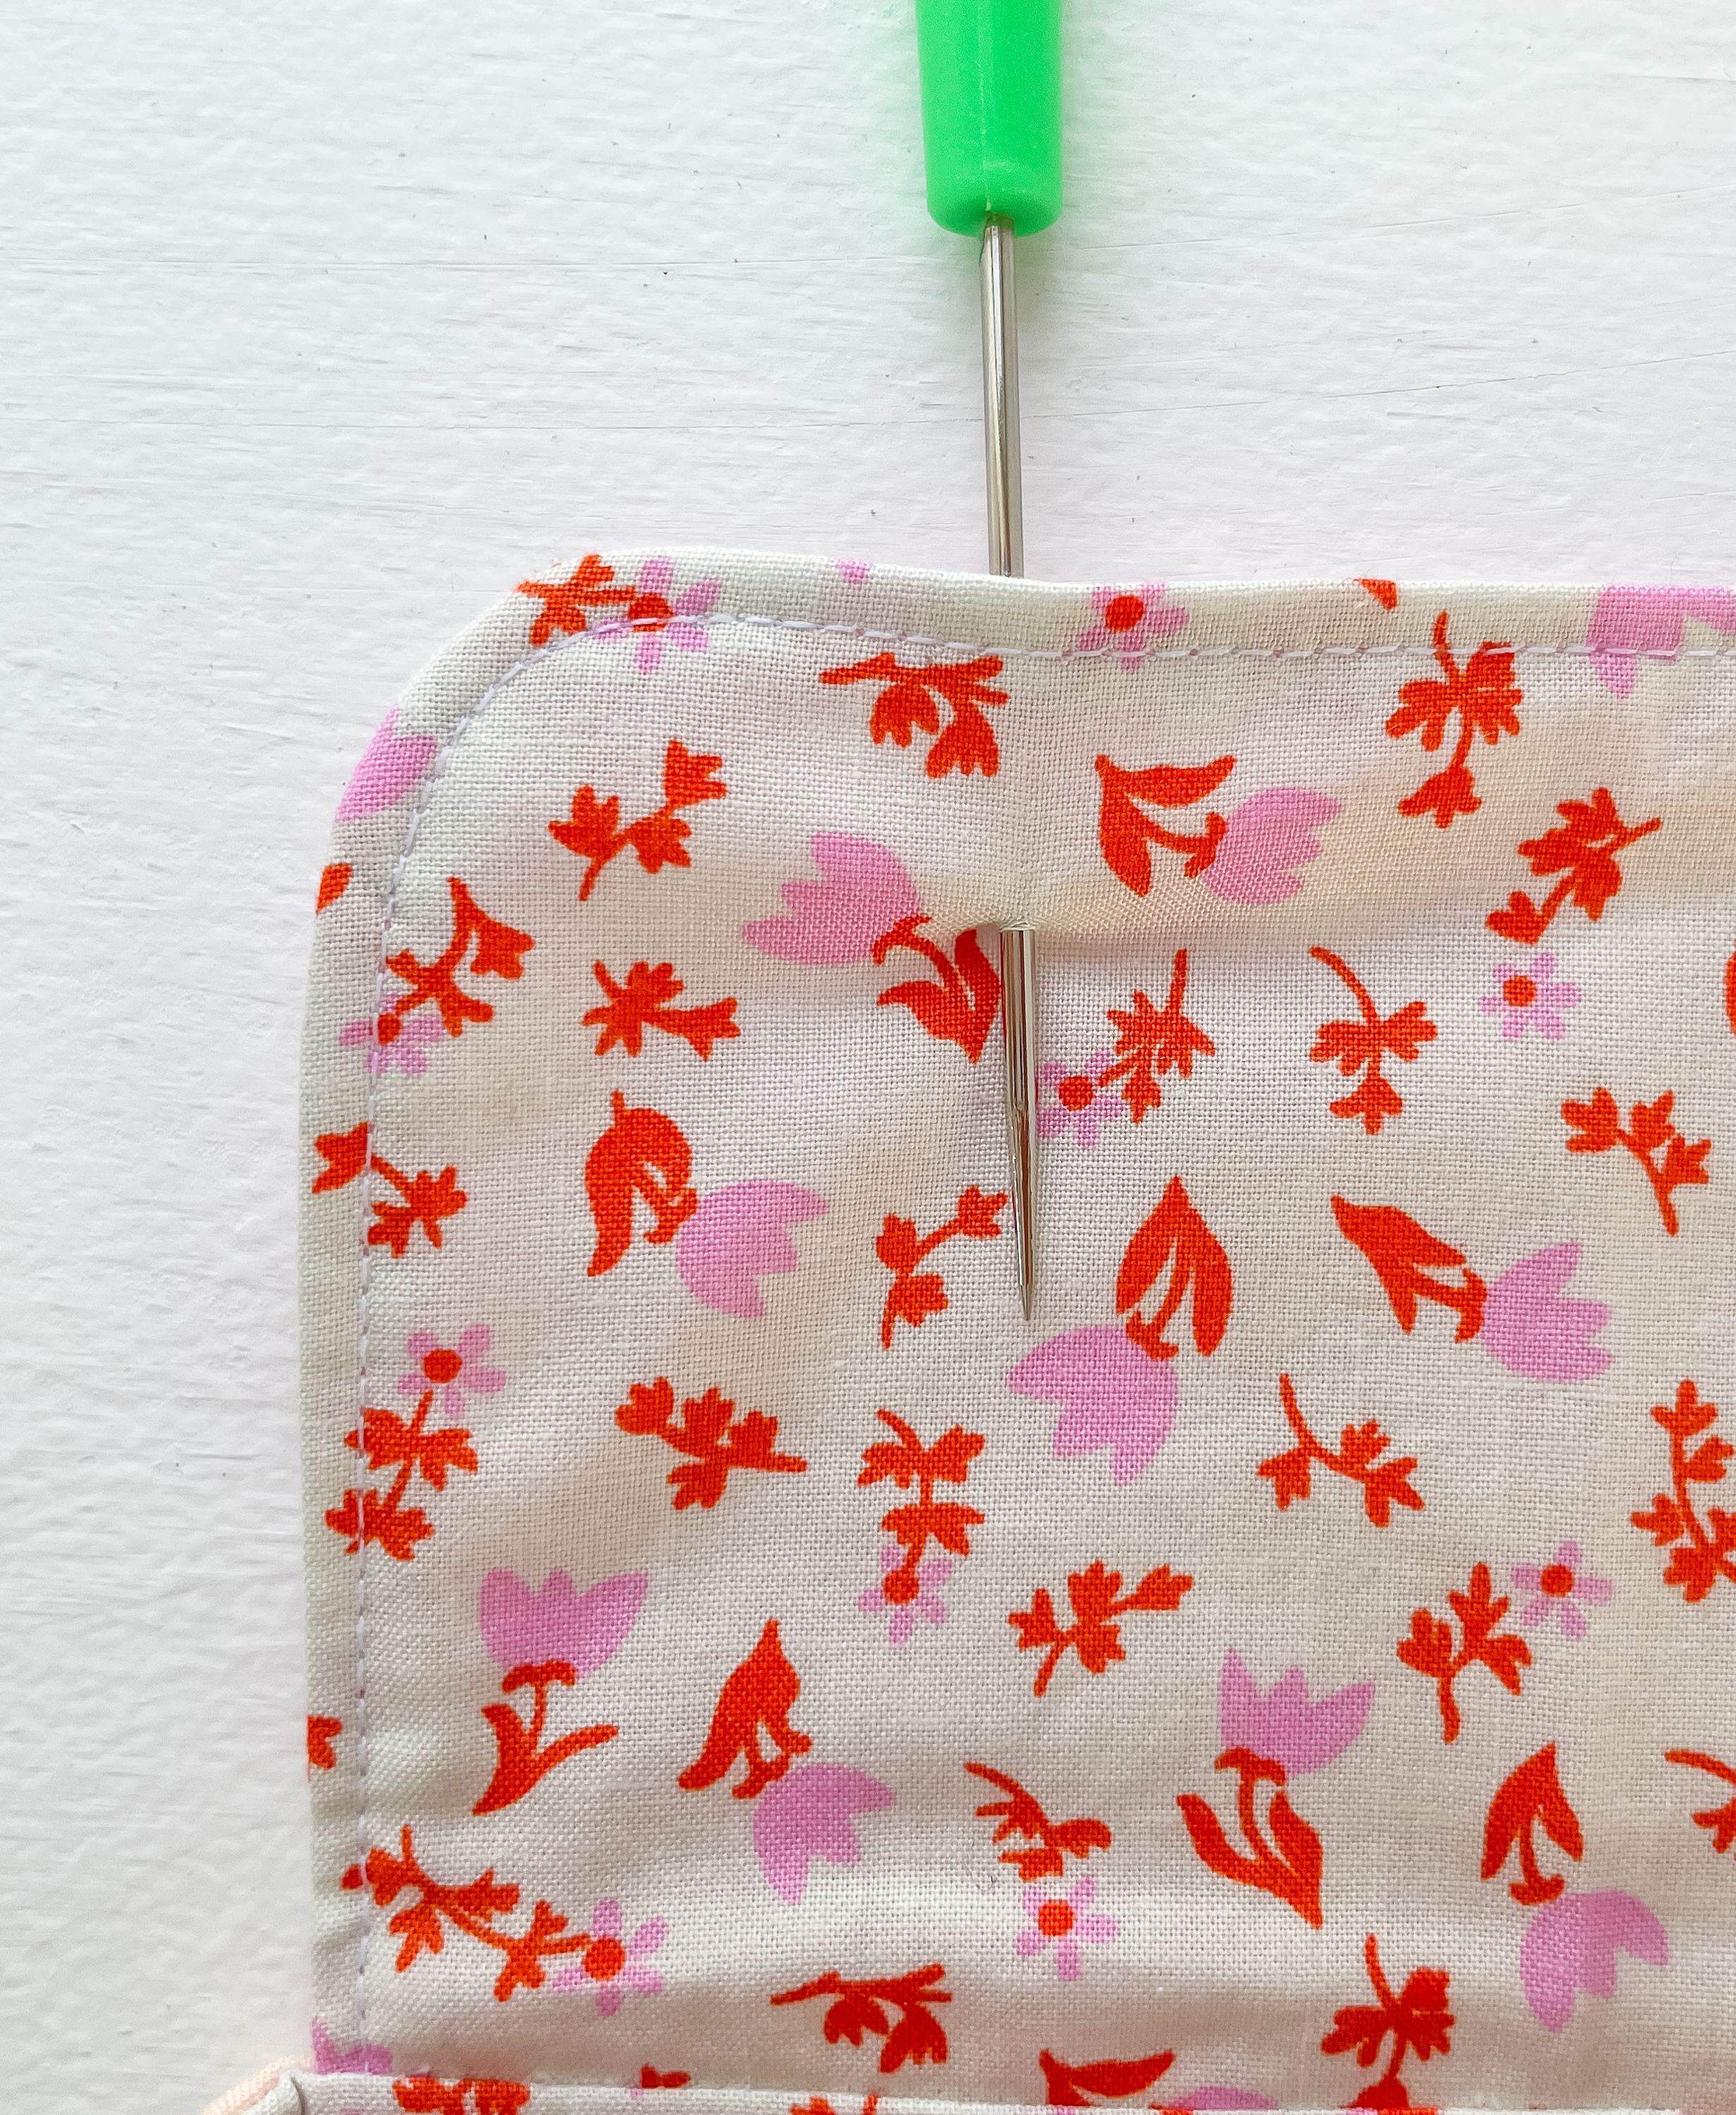
Mark on your fabric where you will insert your snap with a removable fabric marker. In my patchwork snap pouch pattern, I tell you exactly where to insert the snaps for each sized pouch.

Take your awl and push it through the fabric/fabric layers right where you put your mark. In this case we are putting a snap in the pouch flap so we push the awl all the way through the layers on the flap only.
Take one of the caps and push the prong through the hole you just made. The caps generally go on the outside of the project, but it depends on what you are sewing. Caps are on the outside; the stud and socket are on the inside of the snap pair. The stud and the socket are the bit that connect together to form the closure. The cap goes on the outside of the flap.
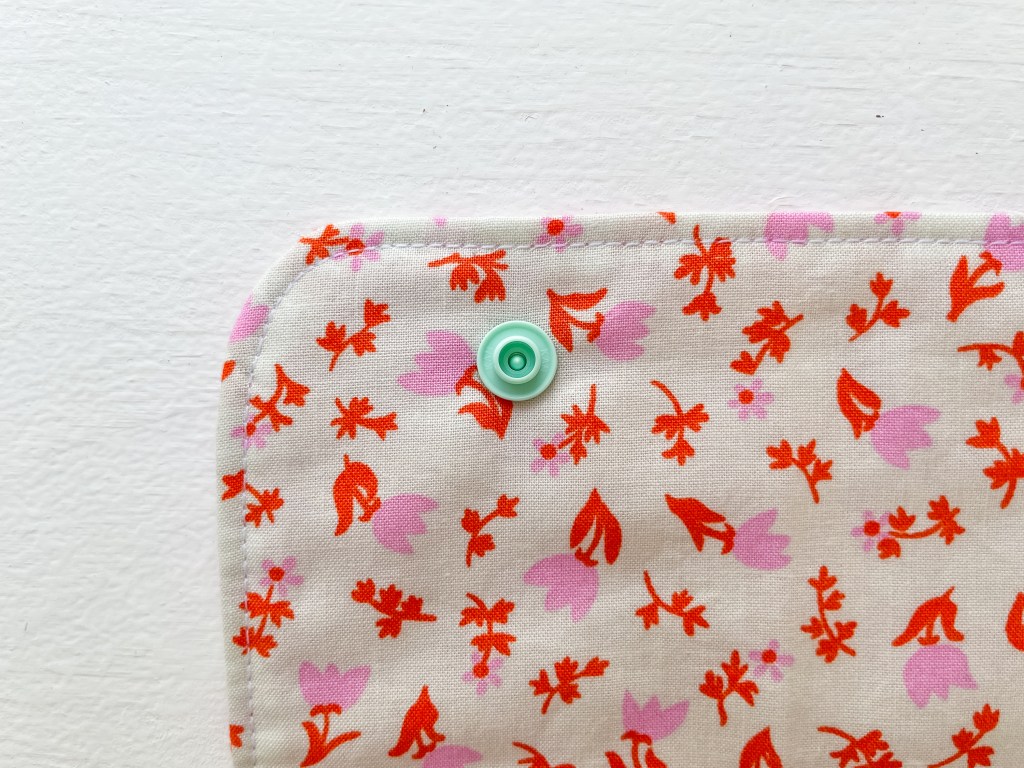
This is what it looks like on the inside of the flap. See that little post sticking through.
Place a STUD over the post of the cap on the other side of the fabric/other side of the flap.
NOTE: Whenever I am using a press stud I place the stud on top of the corresponding socket, not the other way around. When you are closing something, you want to push the stud into the socket, and when you are opening it you want to pull it out/off the socket. You might choose to do this differently and that’s fine. The best part about KAM snaps is they look exactly the same on the outside (due to that shiny, smooth cap), regardless of whether the stud or the socket is on top.
Now use the KAM snap pliers to secure the Snap in place. To do this you nest your snap into the pliers by making sure the cap at the bottom is sitting snug in the black disk at the bottom on the pliers.
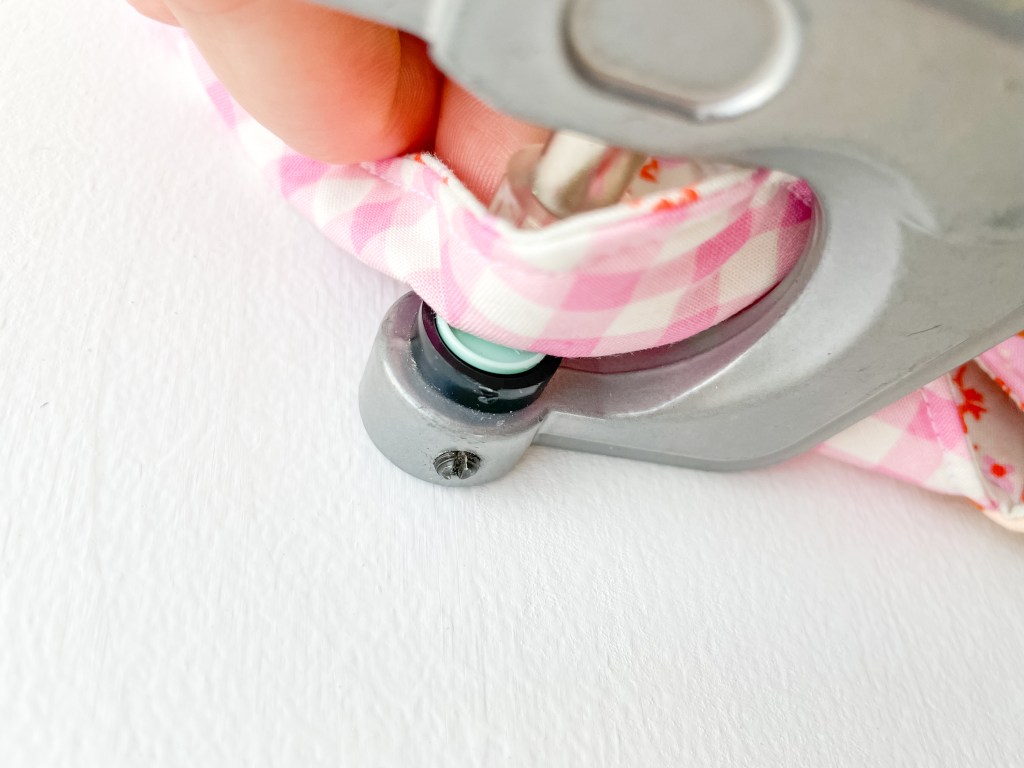
Your stud should then align with the pushing disk at the top of the pliers.
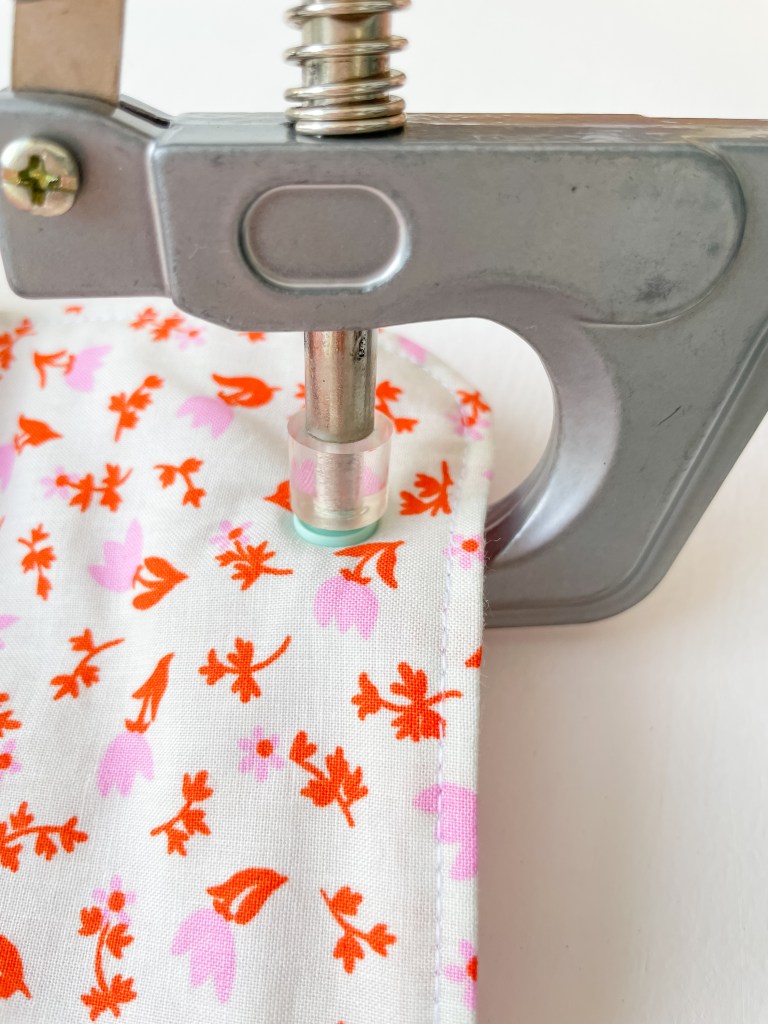
Once you’re happy with how everything is aligned, you then squeeze the handles of the pliers hard until the post in the cap is squashed down.

The post from your cap should now look like this. All squashed down and holding the stud in place.
Repeat the same process to attach the socket part of the snap pair to the other cap. In this case it goes in the front part of the pouch, or directly across from where you want it to snap to the corresponding stud. In my pattern, I tell you how to find where to put the corresponding socket.

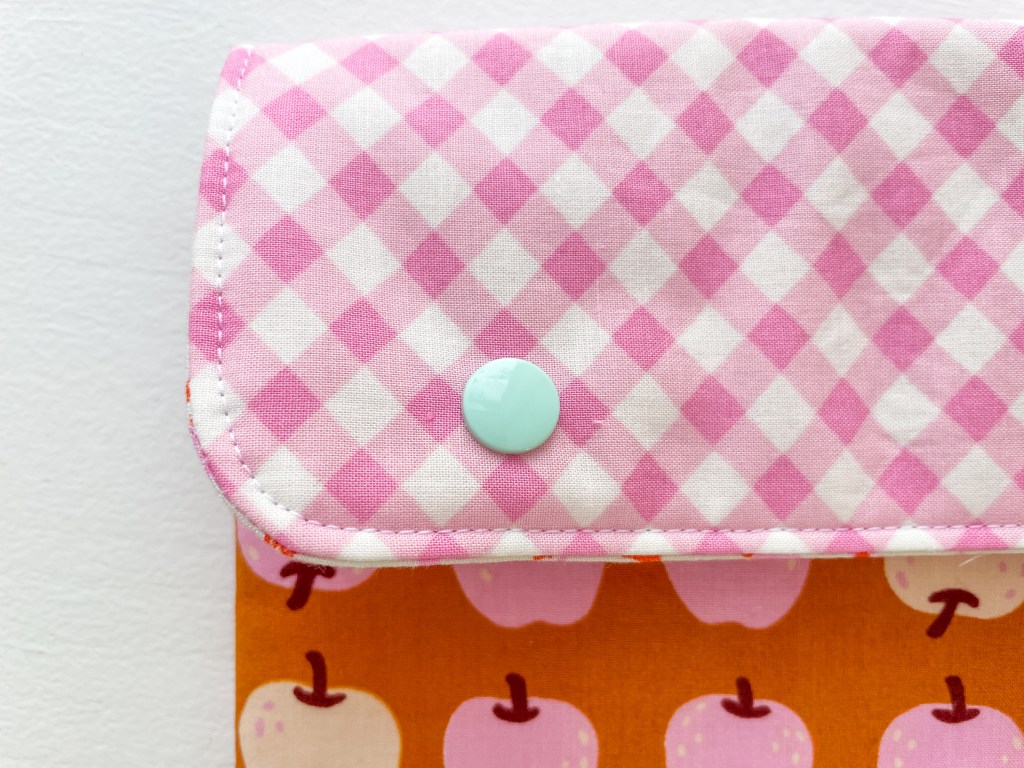
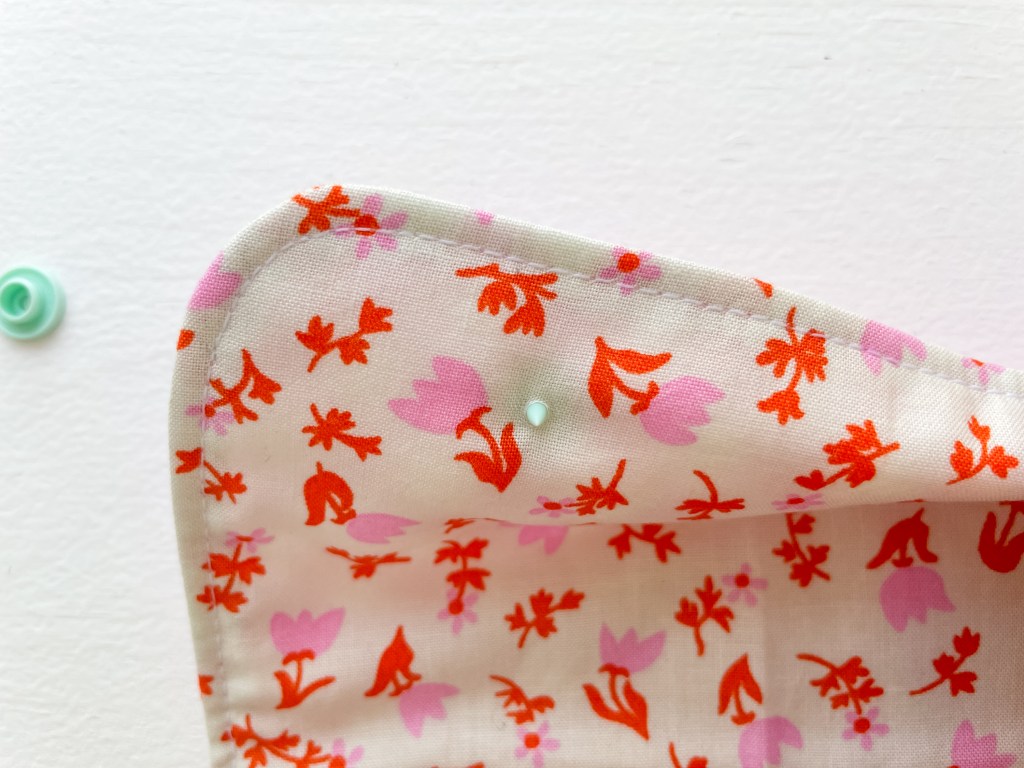
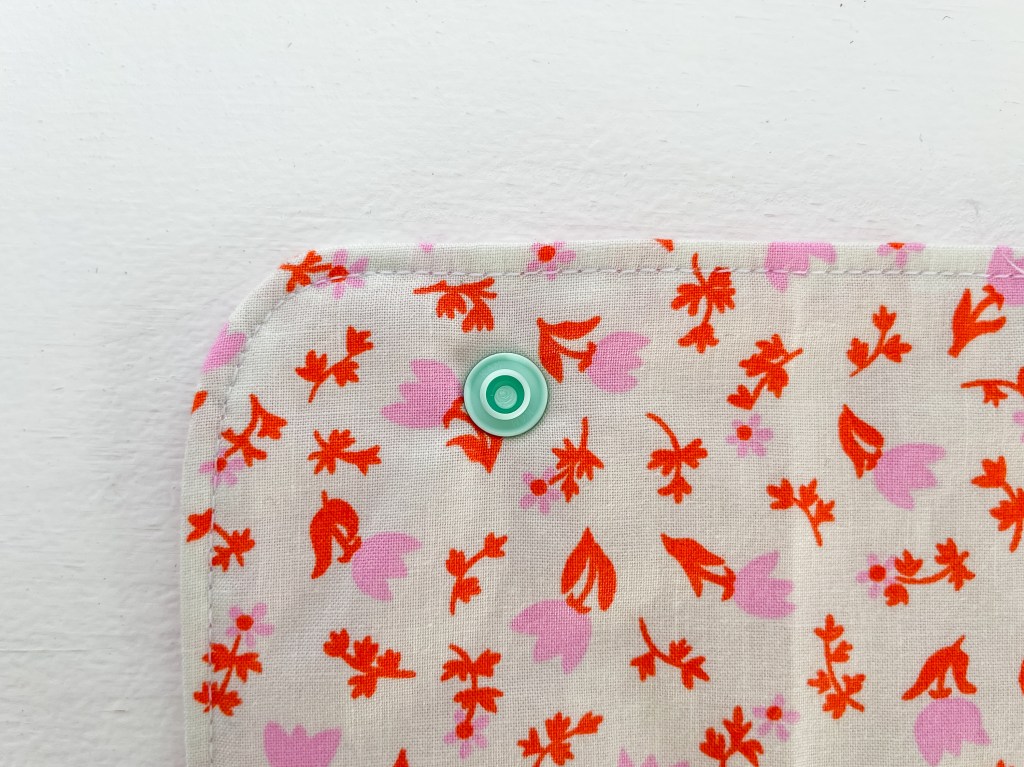
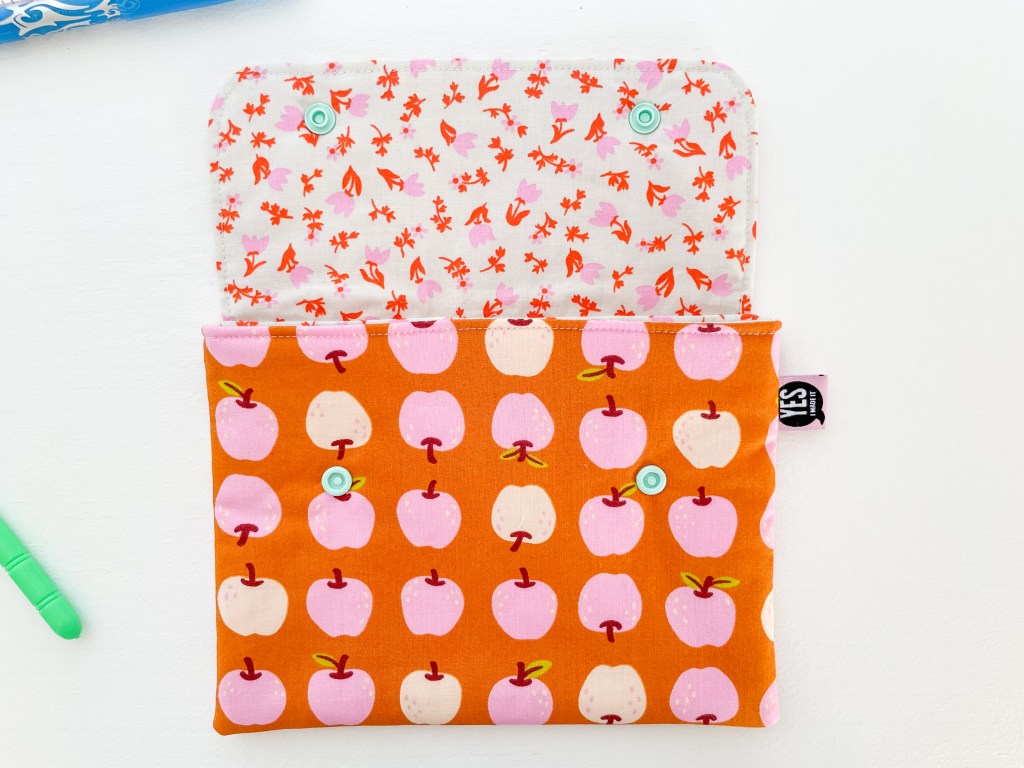
This is what your successfully inserted snaps should look like.
Now it’s time to grab some KAM snaps and pliers and get snapping! If this is your first time using them, remember to practise on some scrap fabric before adding snaps to your finished project. Once you get the hang of it, you’ll see just how quick, easy, and fun KAM snaps can be – and chances are, you’ll become as obsessed with them as I am!
Happy Kam Snapping! Kellie. X.

© Copyright 2022, Ma & Me Designs.

One thought on “How To Install Plastic Fasteners-KAM Snap Tutorial”